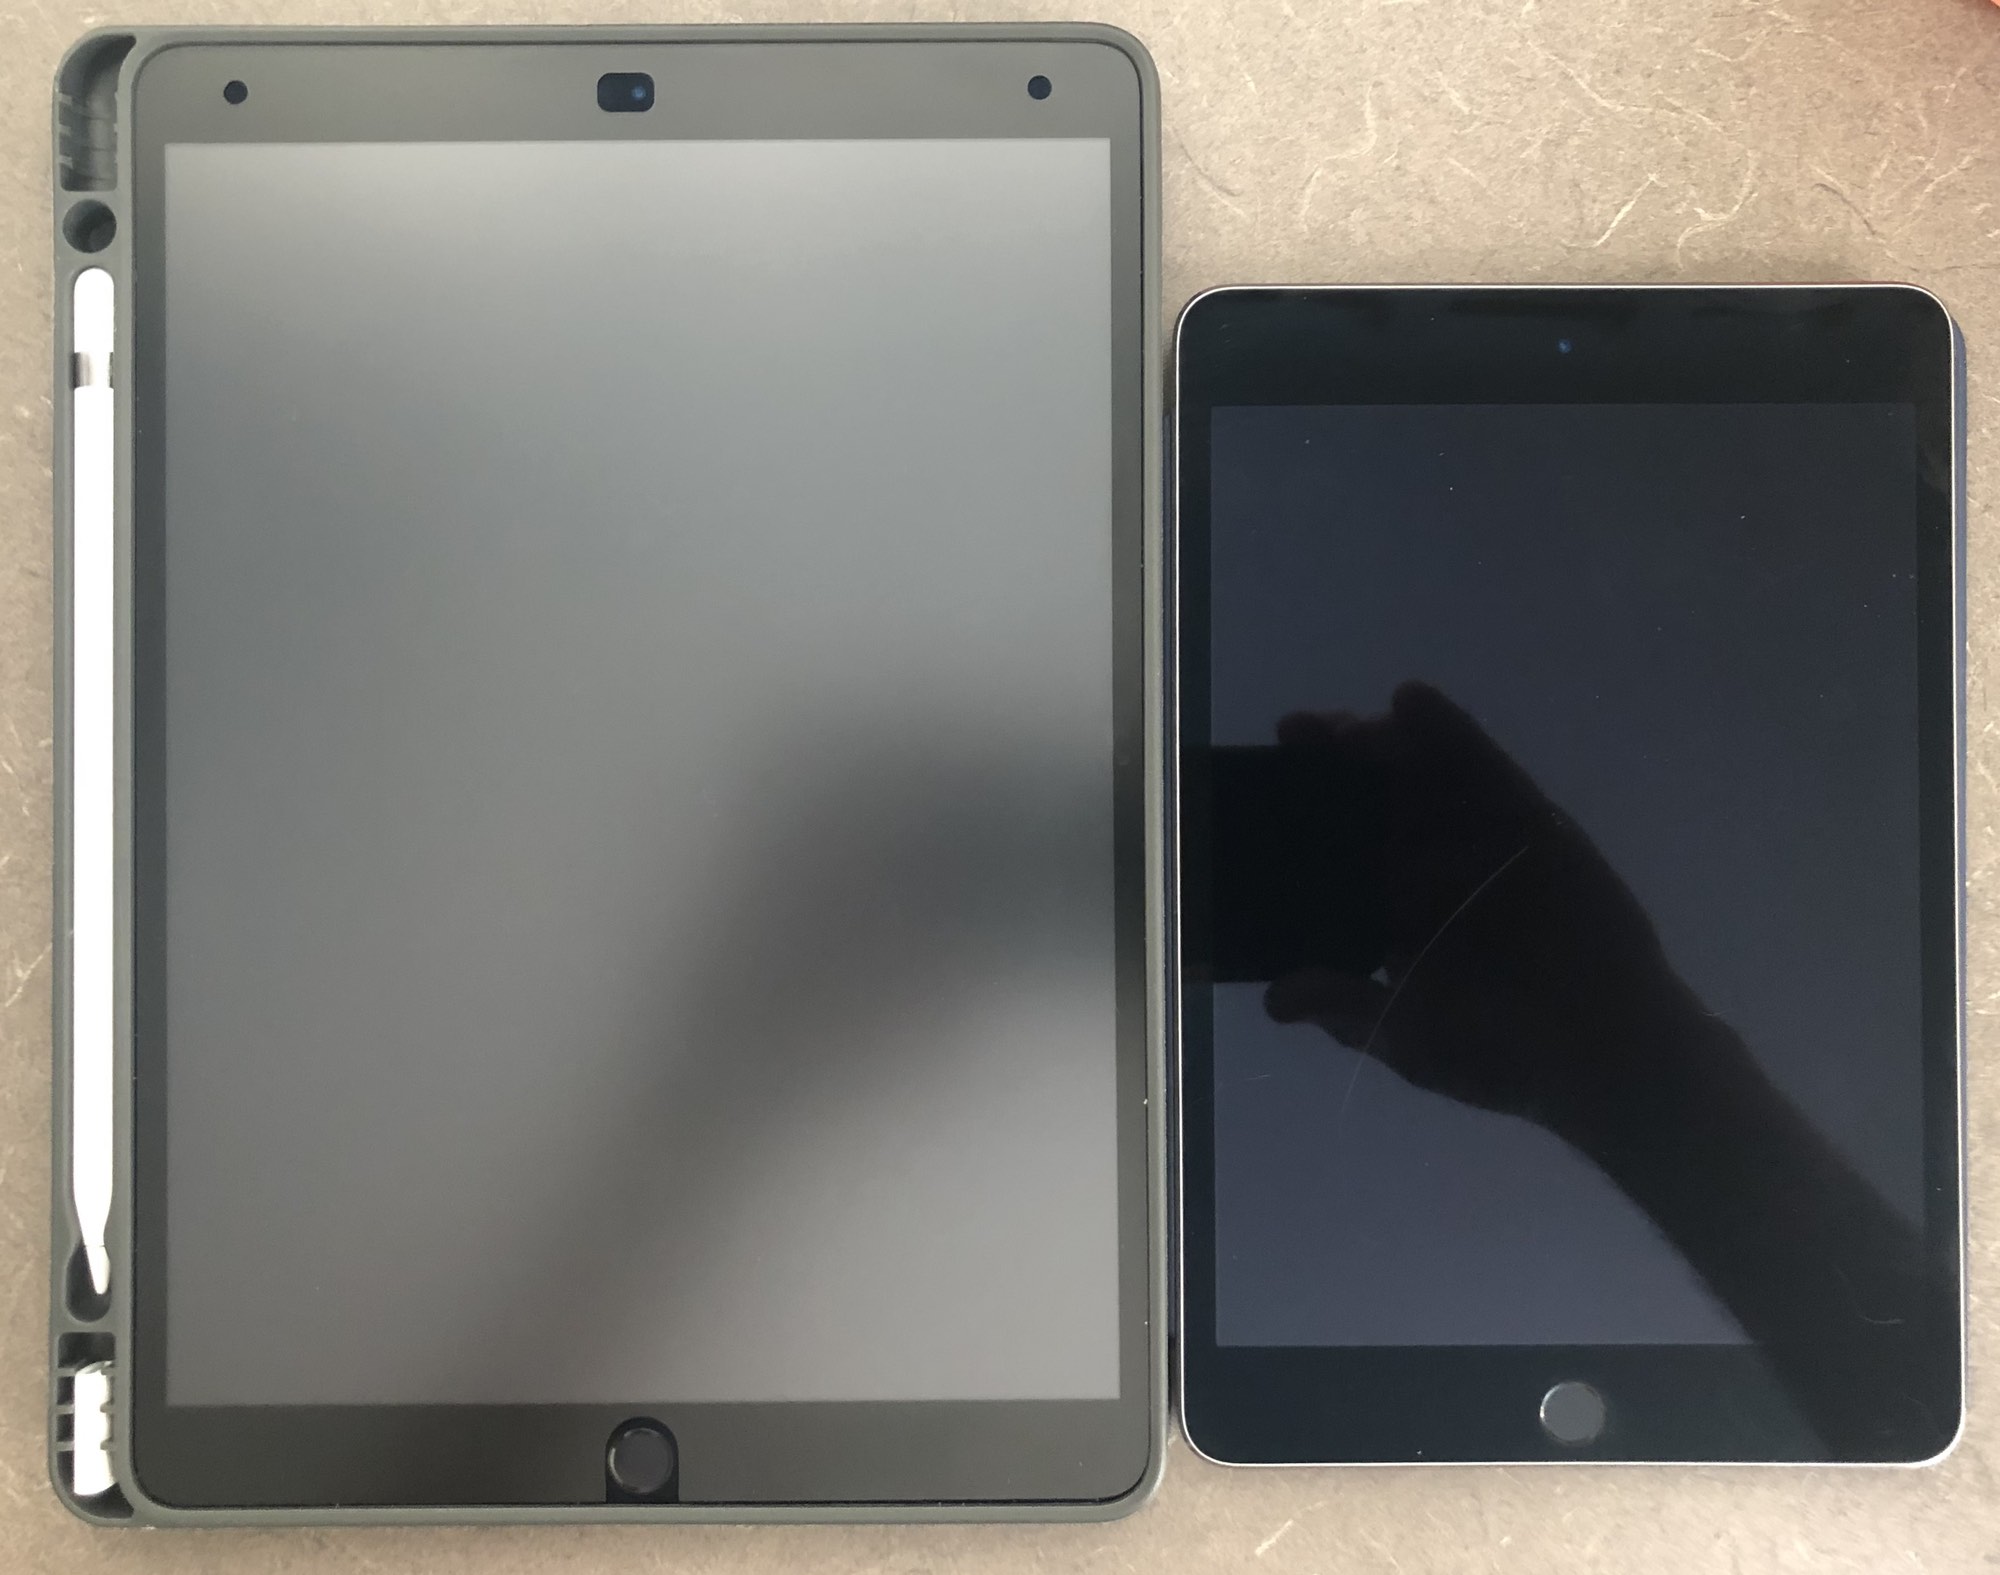
My iPad case of choice—twice over
When I bought my prior 9.7" iPad Pro back in 2018, I wanted to find a case that met my criteria:
- Full coverage - front, back, and sides
- Storage for Apple Pencil
- Auto-sleep on cover open/close
- Apple Keyboard support was not important to me
- Relatively inexpensive
I wound up ordering a few from Amazon, tested each of them, kept one, and sent the others back. The one I kept back then is the same general model as the one I've put on my new iPad Air: The JUQITECH iPad Case with Pencil Holder:
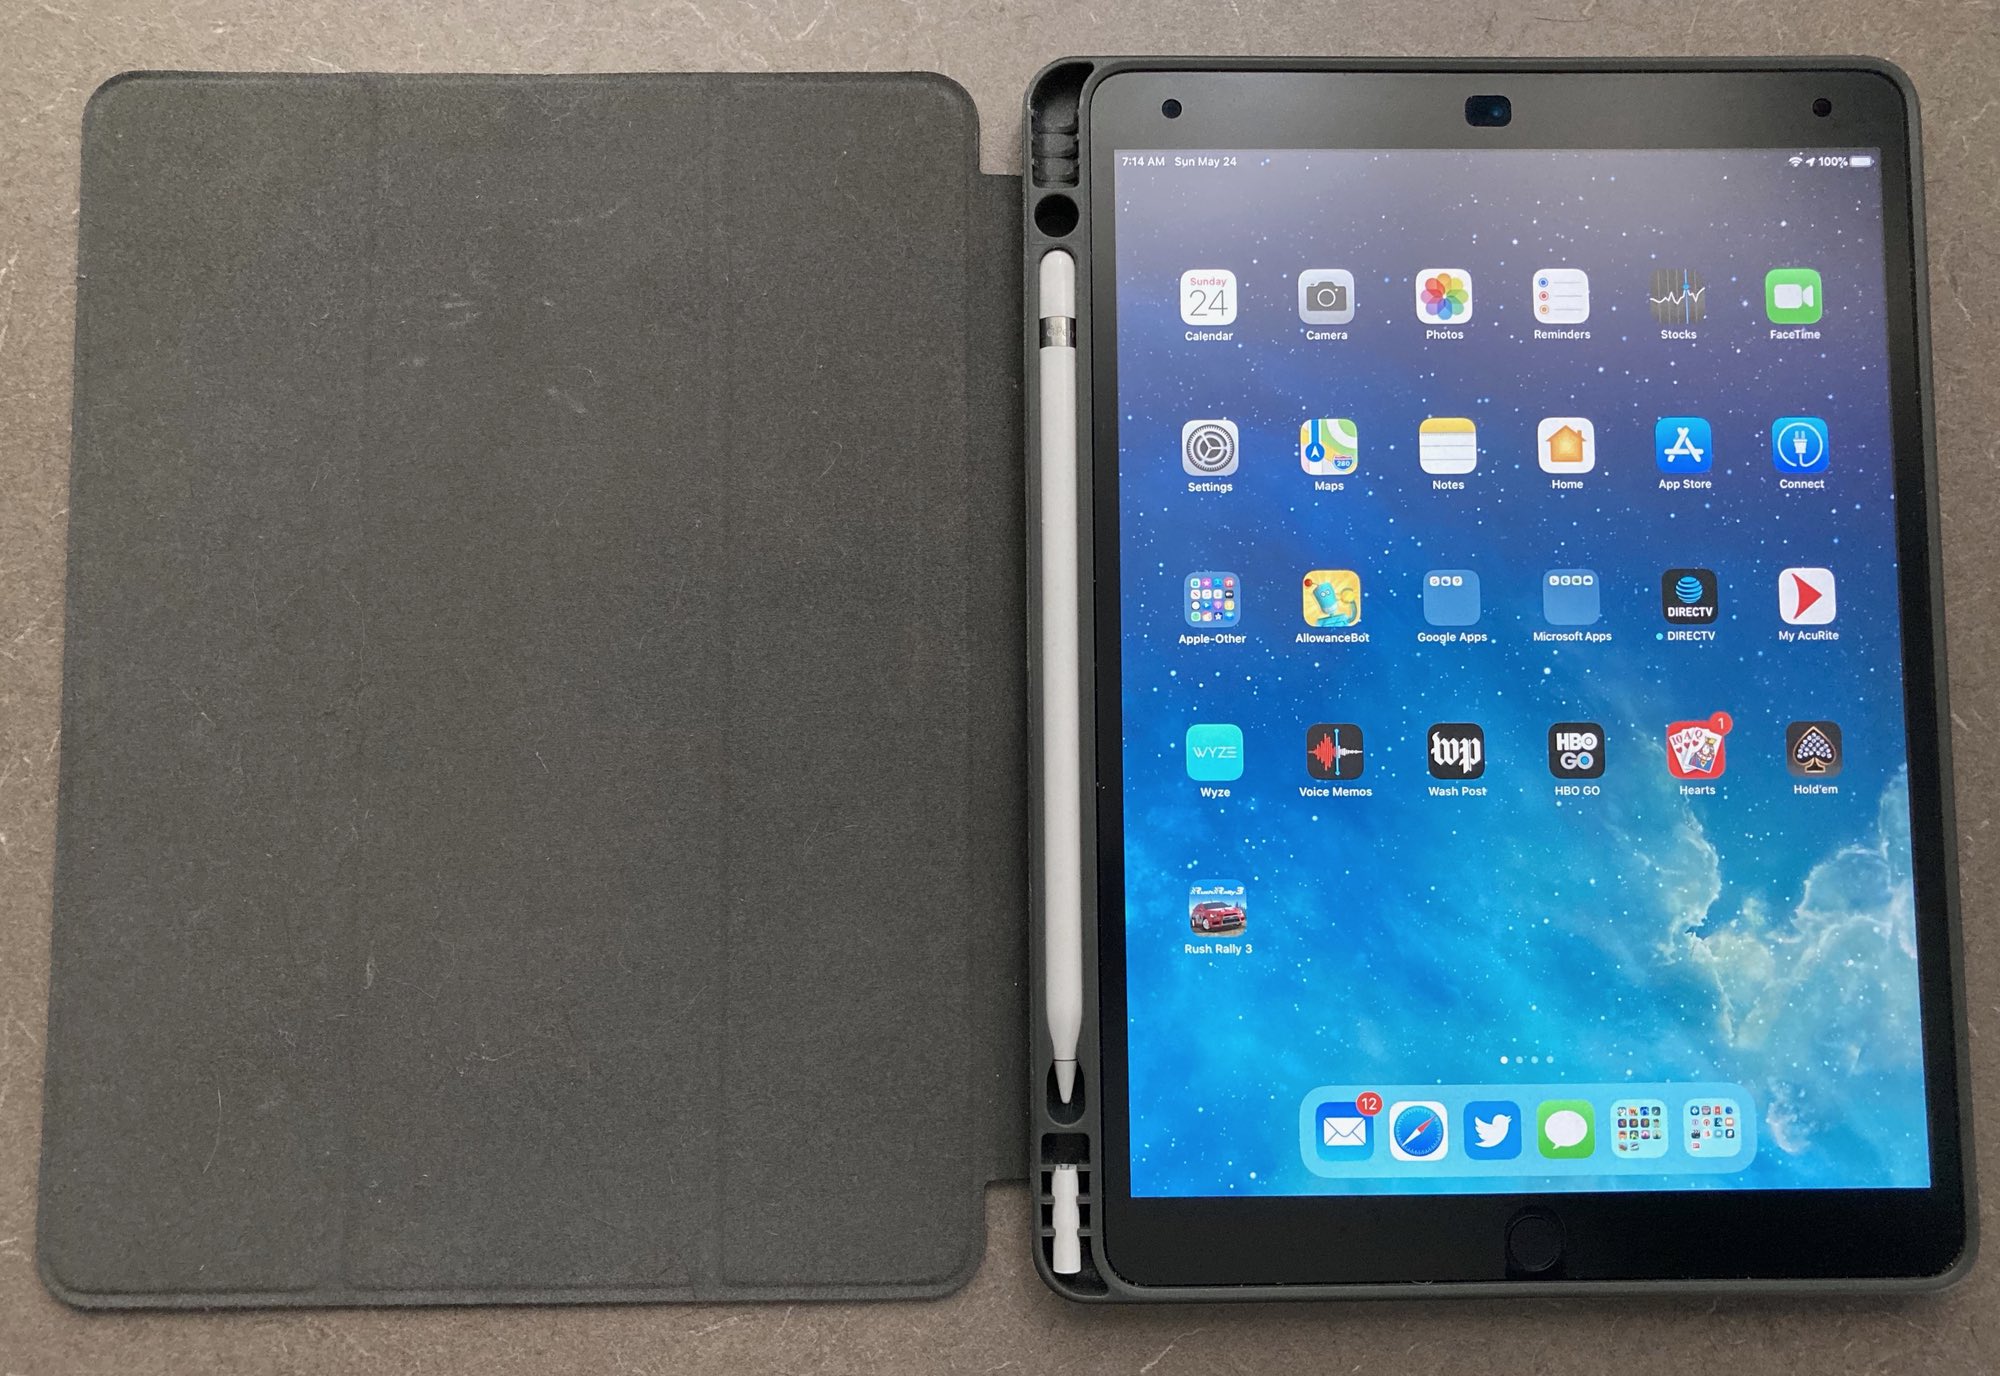
This case cost all of $11, and for that, you get a full-coverage case with room not only for the pencil, but the small USB adapter the pencil uses to connect to regular Lightning cables. And when the charging cap is off, it fits in the small hole above the pencil.

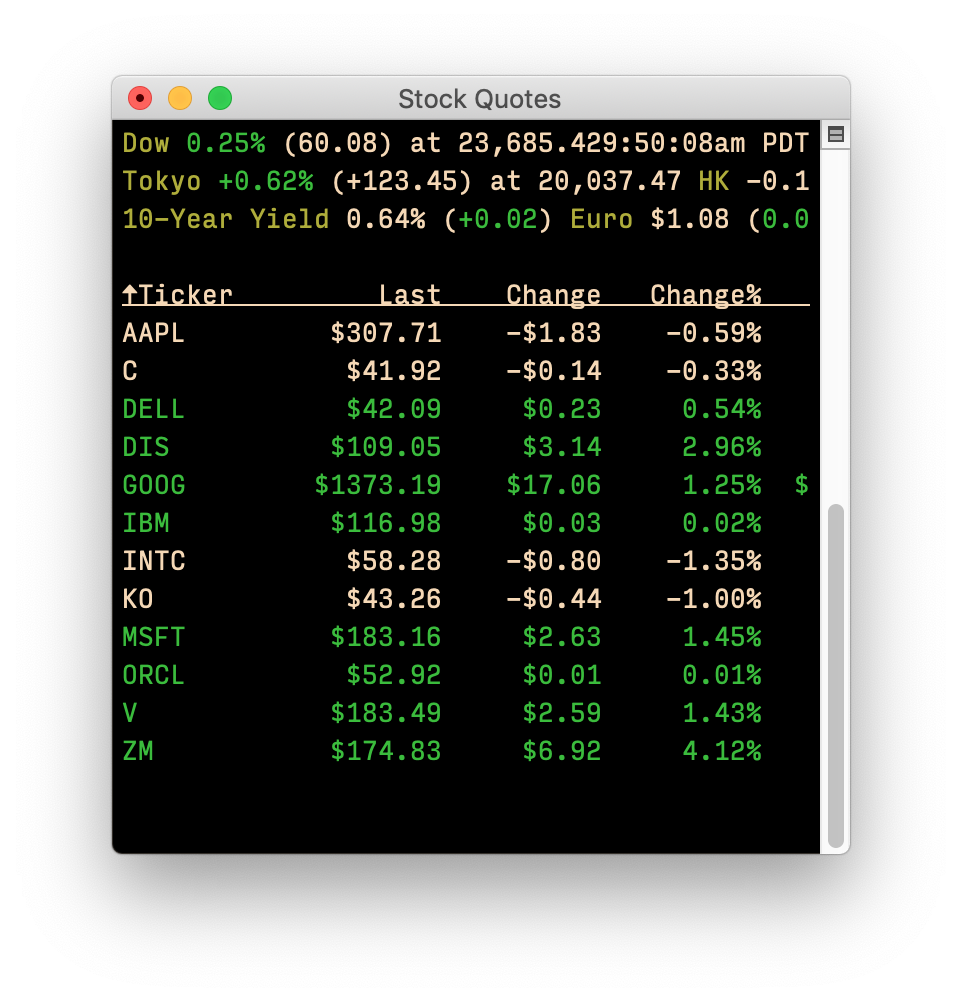
 I have two displays, so I just dedicate a small corner on one of them for the Dashboard widget, which I detach from the Dashboard using an old but still functional