![]() A couple years back, I explained how I rip Blu-ray discs. A lot of time has passed, and I now use a slightly different procedure that results in much faster rips—with the caveat that the resulting file will be larger than the "slow" method, and is technically of slightly lower quality, though I can't visually distinguish the two.
A couple years back, I explained how I rip Blu-ray discs. A lot of time has passed, and I now use a slightly different procedure that results in much faster rips—with the caveat that the resulting file will be larger than the "slow" method, and is technically of slightly lower quality, though I can't visually distinguish the two.
The new method uses Don Melton's amazing video transcoding tools, a set of Unix programs that optimize video conversion in ways you cannot do (or easily do) in the Handbrake GUI. If you're new to Unix, but would still like to try these tools, I wrote a detailed set of instructions that should help get you up and running.
Using these Unix programs, you can rip a disc with various parameters, including one to optimize for speed (with good image quality) and another that tries to minimize the file size.
Here's a quick comparison of all three methods, as tested with the three-hour Hamlet Blu-ray. The 'Handbrake GUI' rip was done using, well, the Handbrake GUI as described in my original article. The second and third rows use Don's tools set to quick and veryquick modes, and the final row uses Don's tools set to optimize the file size.
| Method | Data Copied | Convert (hrs:mins) | File Size |
|---|---|---|---|
| Handbrake GUI | 47.5GB | 3:52 | 6.8GB |
| transcode - quick | 40.1GB | 2:20 | 9.2GB |
| transcode - small | 40.1GB | 3:12 | 6.5GB |
Tested on a late 2014 27" iMac with a 4GHz Core i7 and 24GB of RAM.
Using Don's tools in "quick" mode, you save time two ways: 7GB (15%) less data is copied to the hard drive, and the conversion process is over 90 minutes (38%) faster. The downside is that the final file size is 2.4GB (35%) larger. And that's what they call a tradeoff.
Using the "small" mode in Don's tools, you still save the 7GB (15%) of data copy, and still save 40 minutes (17%) over the original method. In addition, the file size is smaller than the Handbrake GUI version.
To summarize, regardless of whether you care more about file size or ripping speed, Don's tools provide an advantage over the Handbrake GUI: Either method is notably faster, and the small option generates smaller (or probably at worst, very similar) file sizes. (There's also a "big" option, if you don't mind somewhat larger files at a higher quality level.)
Keep reading to see some examples of the image quality of each method, and information on how to install and use Don's video transcoding tools.
You may wonder about the quick option and how much quality you're giving up for the speed gain. The following two images are from the Hamlet Blu-ray; one was taken from a file created with Handbrake, and the other via Don's transcode video tools with the quick option. Drag the slider back and forth to spot any differences:


To my eyes, at this size, they're identical. Here's a comparison of a section of the paint on Hamlet's forehead at an 800x zoom level:


At this zoom level, you can finally see some degradation. Rip 1 (the left image) was done using Don's tools, while Rip 2 was done with Handbrake's high quality mode. But unless you're watching on a 40 foot screen, you're unlikely to notice these tiny differences.
And what about the small file option? I don't have a frame-to-frame swipe comparison, but here's roughly the same frame from the "small" rip:

Compare it to the above image, with the slider at either the left or the right side, and to my eye, the images are essentially identical.
Of course, the quality of the compression will vary with the quality of the source and the type of material—high-action films may suffer more by comparison, for instance. I've been using this method for about six months, though, and I've yet to find anything that was visibly bad in anything I've ripped.
As with my prior writeup, first the obligatory disclaimer:
Also from before, this same advice applies:
Ripping a Blu-ray disc to watch on a small-screen and/or limited-resolution device is somewhat senseless: The extra pixels in the Blu-ray will be lost due to the limited resolution, or you won't see the benefit of them due to the small screen size. You'll get very good results—and get done much faster—by using the DVD version of the movie.
With all of that out of the way, here's what you'll need to save time and waste drive space.
 The Pioneer drive I referenced in the original article is no longer available. However, the Pioneer BDR-XD05S appears to be its direct successor, and it's $10 cheaper than the previous model. (Other companies make Mac-compatible Blu-ray drives; this is just one that I have personal experience with.)
Once you have the hardware, you still can't directly watch a Blu-ray disc on your Mac…at least not without adding some software, in the form of the MacGo Blu-ray Player. The software isn't cheap, listed at $60 but usually on sale for $40 or so. I think I got my copy from a bundle at some point in time. Note that it may not play all discs, but if you want to try to watch the original discs on your Mac without ripping, this is your only real option.
To use this new method of ripping Blu-ray discs, you'll need some additional software. As before, you'll still need MakeMKV, a $50 program that can be used to decrypt Blu-ray discs.
MakeMKV is in beta, and has been for years. The current beta key is always posted in the MakeMKV forums, and the software is free to use while it's in beta. However, if you find it works well for you, you should purchase a license.
In addition to MakeMKV, you'll need the previously-mentioned video transcoding tools. This is a set of Unix apps that handles the video conversion process. Installing the tools themselves is quite easy, as they're packaged as a Ruby gem. Ruby is bundled with macOS, so installing Don's tools is as easy as opening Terminal and typing sudo gem install video_transcoding.
However, in order to make Don's tools actually work, you'll need a number of other Unix apps—things like ffmpeg, mkvmerge, mkvpropedit, mp4track, mplayer, and the command line version of Handbrake. Thankfully, Don put together a thorough how-to for installing these tools, so I won't repeat his efforts. (Here's the tl;dr version: Use Homebrew.)
Update: I've written an even more detailed version, hopefully written so that even those new to Terminal/Unix can understand the process.
Once you have everything installed, you can then decrypt and convert the video.
Insert the Blu-ray in your burner, then launch MakeMKV. When it opens, you'll see a typical not-so-lovely Java app interface:

It may not be obvious, but that picture of the Blu-ray disc in the drive is a clickable button—go ahead and click it. When you do, MakeMKV will spend some time reading the disc, then open to a window like this:
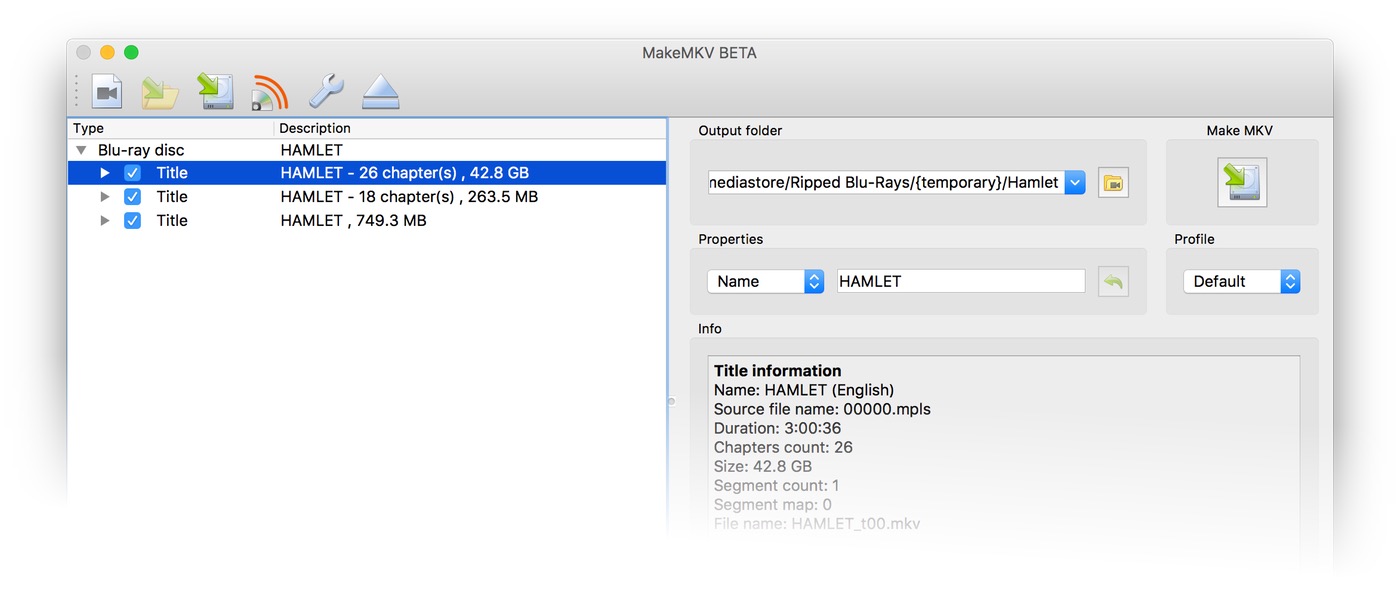
Next, you need to find the video track, which will typically be in the largest listed element in the left-hand pane. Expand that section, and you'll see the details of the audio and/or video tracks it contains:
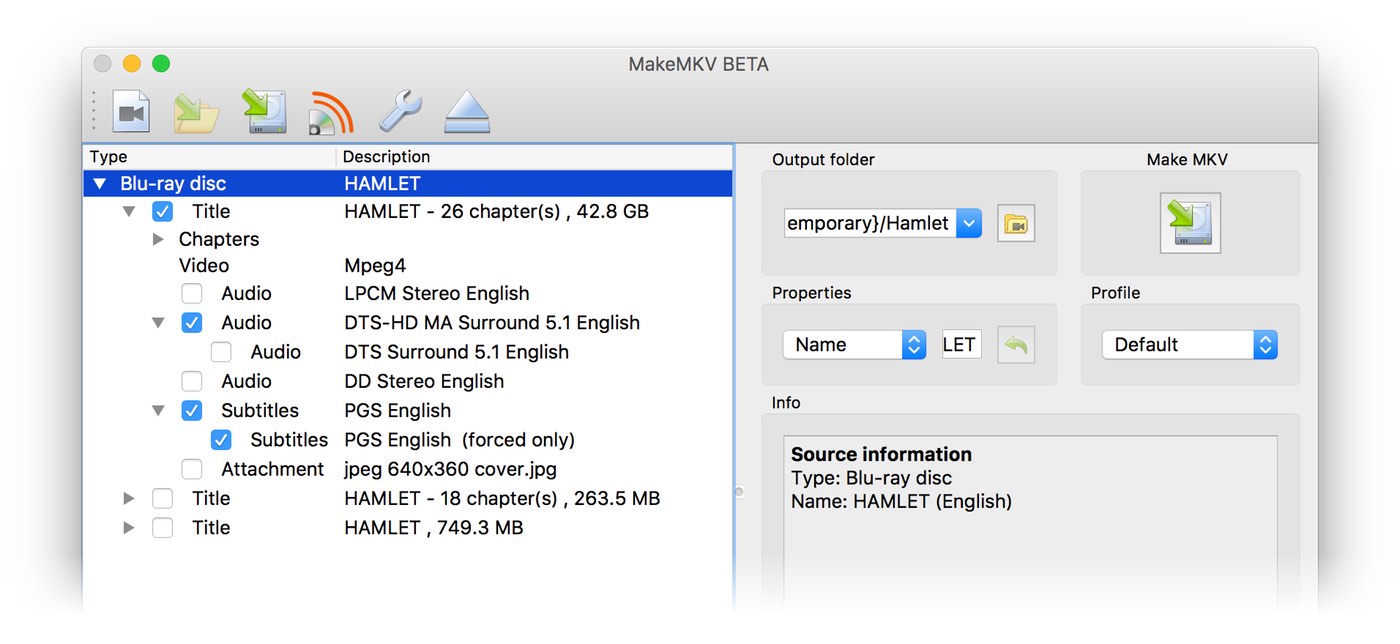
There are many things to choose from there, but for this technique, you want to select at least one video track and one audio track. Once again, Don's written a great guide that explains what to pick (and why to pick it). Basically, you want the video track, the HD-MA audio track, and possibly the forced subtitles track.
With my prior method, I'd just click the Backup button, which would copy the entire disc. By selecting only the relevant items, much less data is copied. As Don explains in his guide, you want to copy these files into a single MKV file, as there are things his tools can do to a single file that they cannot do to multiple files.
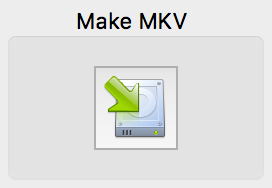 To create a single file after selecting the files to rip, click the "Make MKV" button at the top right of the MakeMKV window. This will take a while, as it's copying a lot of data from the disc to your hard drive.
Once it's done, all that's left is a Terminal command…and a bunch of time.
Time to get geeky and fire up Terminal. There are a number of tools in Don's transcoding video package, but the one that does video transcoding is trickily named transcode-video. By default, the transcode-video tool outputs to the directory it was run from, so start with this:
cd /path/to/the/file.mkv
(Alternatively, you can specify an output directory with the transcode-video command with the --output /path/to/save/location option.)
The command itself can take a number of arguments, but here's the version I use:
transcode-video --quick --mp4 /path/to/the/file.mkv
The --quick option is the one that gains speed at the cost of drive space, and --mp4 specifies mp4 as the output format.
If you've gotten this far, you hopefully don't need help with the /path/to/the/file.mkv bits, but just in case: This needs to be replaced with the full path to the file you just created in the previous step. One easy way to do this is to enter the command (including a trailing space) up to the path section, then drag the file from Finder into the Terminal window and drop—this will auto-fill the path to the dropped file.
Press Return at the end, and then wait anywhere from one to three hours, depending on the length and complexity of your source file…and the speed of your Mac, of course.
You could leave off the --quick, which would get you a similar final file size, but with higher quality. Or you could use the smaller option I discussed earlier:
transcode-video --target small --mp4 /path/to/the/file.mkv
Or the version that creates larger file sizes with better quality:
transcode-video --target big --mp4 /path/to/the/file.mkv
Which you use is up to you—quick will save lots of time but use more drive space and some minor image quality losses; small will save drive space; and big will use more drive space while improving image quality.
When the conversion is done, you can add your movie to iTunes, stream it to an AppleTV, etc. Just remember to delete the MKV file you created, as you don't need it any more—you'll only forget a few times before you wonder where all your hard drive space is going.
Is this method more work than using the Handbrake GUI? There's definitely more work done one time to install all the tools. Once that's done, you'll spend a bit more time up front with MakeMKV, as you need to mark audio and video tracks for ripping. But that extra minute or two will be easily made up for between copying gigabytes less data and the faster ripping speed of Don's tools…all with no easily-discernible quality differences.
Did I miss out on the specification of the final screen resolution you are transcoding to for those file sizes listed at the top?
I didn't set a screen resolution, I just let it transcode at the native size. In the case of Hamlet, that appears to be 1920x1080.
-rob.
Thanks, I got confused when your caveat mentioned “limited resolution device”.
I just meant that if you're ripping a Blu-ray to watch on your 5th gen iPod, you're probably wasting a bunch of time :).
Any chance you can provide the current beta key? Their website is over their limit, probably your fault haha.
"Resource Limit Is Reached, The website is temporarily unable to service your request as it exceeded resource limit. Please try again later."
I have no idea if this is right, but what shows in the app for me is T-lAx41P60qUCpItEaWeTy4lU1PzJ7F3qIvKQxircspYn1lT9f9ubuvvghA6DJAnkAsj ... I'll take this down once they're back up. (I don't think their issues are from my traffic, which hasn't been all that high today.)
-rob.
That worked. Thanks.
I've tried all the Cache sites I know, but none work. http://cachedview.com
Thanks, Rob. I'm hoping you will update your excellent article with a sentence or two, explaining what users should do, if they want to save 35% in file space, rather than the 38% in time of transcoding. Could it be as simple as dropping the word "--quick" from one of the Terminal commands?
Yep, it's that simple - leave out --quick and you'll basically get the Handbrake version of the process. I'll try to do this on my Hamlet rip and add its results to the table.
-rob.
I've updated the article with some data on using the "--target small" option, and how well that worked. The table at the front has a third row now, and there's a new image showing a frame of the small output's quality.
-rob.
I am a massive newb when it comes to anything to do with Github or terminal. Before doing anything in Step 2 (Get Some Software) do I first need to download all or some of Ruby, Homebrew and/or Don's scripts from Github (or somewhere else)?
I want to give it a try, but have never done anything like this.
I have successfully ripped my BluRay discs using MakeMKV, so at least I got that far!
I am using the newest model iMac on the most recent version of macOS.
I wrote a detailed set of instructions that walks you through that process - hopefully usable by beginners. Let me know if you have any questions.
-rob.
Thank you so much for this! I will definitely follow your instructions and let you know how it goes.
After completing your directions, I hit the Makemkv button, and it runs about an hour and comes back with the message:
0 Files saved : 1 failed
I've never seen anything like that here, and without seeing all the settings and what you selected, I have no way of even guessing as to what might have happened. You might try enabling MakeMKV's logging feature, and seeing what it has to say:
http://www.makemkv.com/faq/item/8/catid/6
-rob.
Hi Rob! How can I go about setting up a queue of mkvs to convert? I'd like to do multiple movies without having to manually trigger each movie. I've got quite a backlog. Thanks!
I've never tried it, but Don has a how-to for batch conversion: Batch control for transcode-video
-rob.
Question: when ripping a BluRay with a bunch of tracks, like a TV series with 12 episodes, do you know of a way to select on the English language for each track "globally"? The only thing I've found is to individually check the language option for each track...somewhat tedious. Maybe it doesn't matter since when converting the mkv files with HandBrake etc., the extra language tracks would be stripped out... Thoughts?
Try https://cachearchive.com for google cache and archive org cache checking. Hope this helped.
Comments are closed.