Skip to content

video

A possible simple fix for flickering slow-motion video

With the transition to LED lighting, I was hopeful it meant the end of flicker in slow-motion videos, because LEDs don't heat-and-cool the way an incandescent bulb does when running on AC power. Alas, after installing some EcoSmart 100W LEDs over our pool table, I was still getting horrendously bad flicker in my iPhone slow motion videos.

I did a bunch of web searching, and most of what I read said that I'd need to find a way to run the lights on DC, or change my frame rate, in order to avoid the flicker effect. Neither was really a viable solution.

Then, on a lark, I searched Amazon for 100w no flicker LED bulbs, which returned a ton of matches—most of which weren't applicable (I didn't need a 16-pack, and they had to be normal-style bulbs). But I did eventually find the LOHAS 100W Equivalent LED A19 Light Bulbs, which promised "Non-flickering light and zero harsh glares."

I ordered a box (four lights), replaced my existing lights…and surprisingly to me, the new bulbs eliminated the flicker—based on what I'd read, I didn't think there was much of a chance that a simple bulb change would work. But it did.
[continue reading…]


Easily create animated GIFs from video via ffmpeg

I recently explained how I captured a series of screenshots and turned them into a movie. While I was working on my tweet about the write-up, I thought an animated GIF of the final movie would be a nice way to show what it was I was trying to do. So that's what I wound up doing:

So how did I create the animated GIF from the movie file? I know there are any number of great apps that will do this (ScreenFlow, for one), but I had another thought: While working on the animated screenshot movie (which I created using ffmpeg), I had happened to read about ffmpeg's ability to create high quality animated GIFs, so I thought I'd give that a try.

[continue reading…]


Get more details from transcode-video

While working on my massive Blu-ray ripping comparison, I wanted more information about what some of the transcode-video presets were doing. That is, if you pick --target big, exactly what settings are being used to rip the video?

It turns out there's --dry-run option for transcode-video that will tell you exactly that. (I've added some line breaks for readability here.)

What's neat is that you can also use this to see what the default options are for transcode-video when you don't supply it with any options. Just use the --dry-run parameter option but leave off any of the presets (i.e. --target big), and the output will show you the defaults.

In addition, you can use it on already-ripped media to get their details as well, regardless as to how you ripped the movie.

In a related vein, I was having issues with the above rip, because I thought that the surround sound track wasn't being ripped. Again, thanks to Don, I learned about a second command line option for transcode-video that reveals exactly what's in a ripped video.

[continue reading…]


A deep dive into HandBrake and Video Transcoding

An obvious interest area of mine is in ripping (and watching) movies using my Mac. I've talked about everything from installing the tools I use to how I rip to how to make sure I update the ripping tools. And though I've included some comparison pictures in the how-I-rip article, I've never done a deep dive into the various ripping options and how they compare on three key fronts:

  • Speed: Faster is better; measured in minutes required to rip.
  • Size: Smaller is better; measured in MB of drive space used.
  • Quality: Higher is better; the closer the image quality is to the original, the better.

An ideal rip would be one that happens in seconds, saves into a 10KB file, and has quality matching the original. The reality, though, is far from the ideal. Ripping a movie involves making trade-offs between those three competing measures: Maximizing any one measure requires some sort of tradeoff with one or both of the other measures.

After ripping so many DVDs and Blu-rays over the years, I was curious about how HandBrake and Don Melton's Video Transcoding tools handle those tradeoffs, so I decided to do some testing.

If you'd like to see what I discovered about ripping time, file sizes, and—with lots and lots of frame grabs—image quality, keep reading…

[continue reading…]


Detailed instructions for installing the transcode-video tools

My method of ripping Blu-ray discs relies on Don Melton's video_transcoding tools. While these tools work great, they are command-line only (i.e. Terminal required). In my guide, I glossed over the installation bit, referring back to Don's basic guide. But for those new to Terminal, even Don's instructions may be too light on the details.

Hence this detailed installation guide for Don's video_transcoding tools. This guide walks a new user through every step of the process, hopefully getting even someone brand new to Terminal up and running with Don's tools. This will only be of interest if you're having trouble getting the video_transcoding tools installed. If that's you, though, hopefully this will be helpful.

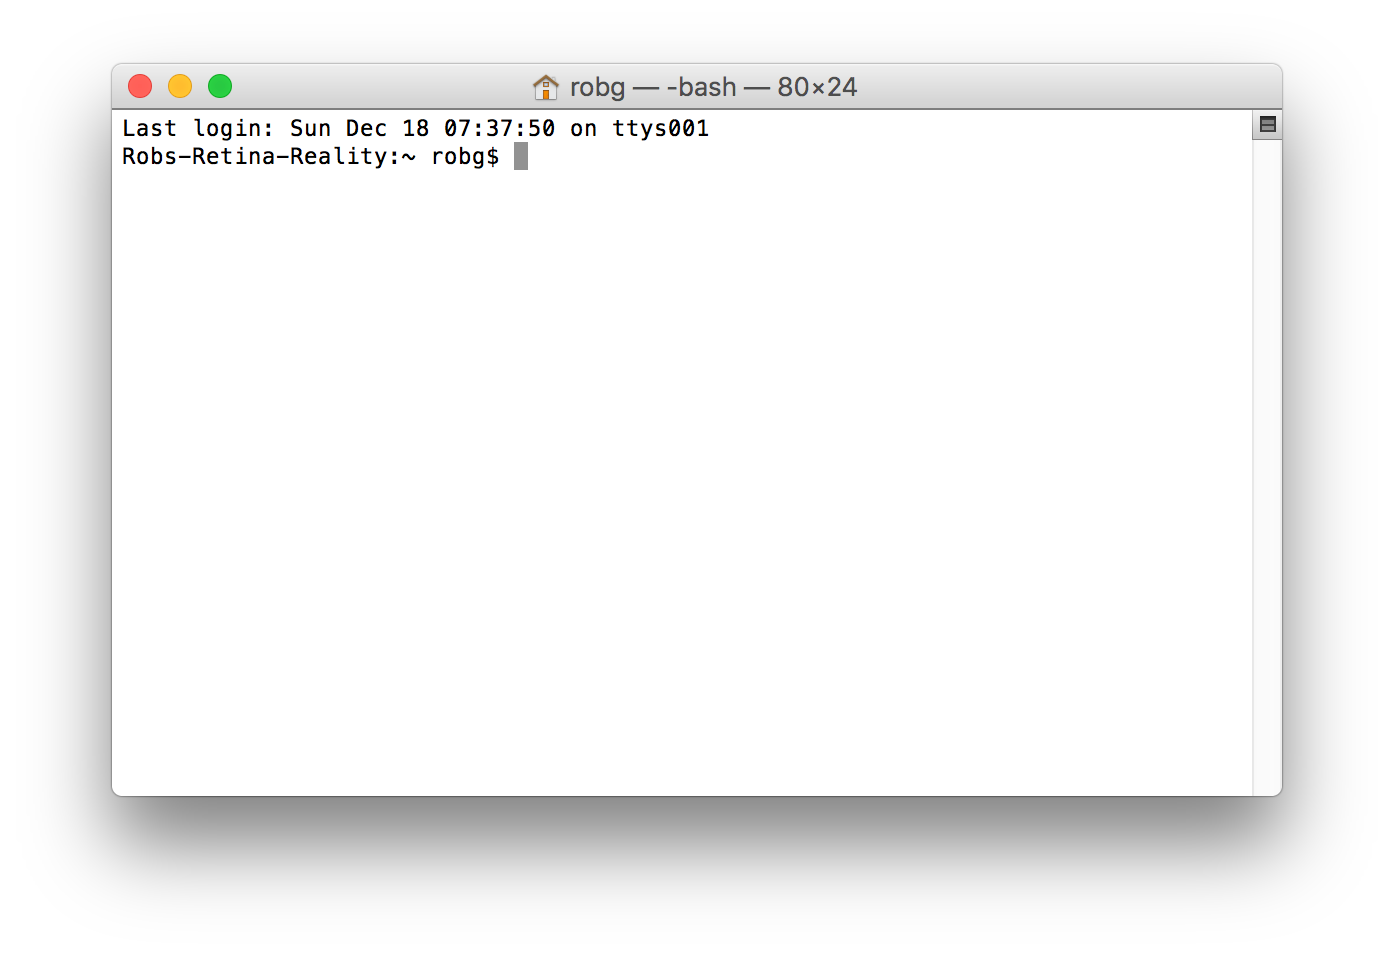
The entire installation of the video_transcoding tool set and all its dependencies will take place in Terminal, which is the direct line to the Unix core of macOS. Open Terminal, which you'll find in /Applications > Utilities, and you'll be greeted by a window with some text; something like this:

This lovely interface is where you'll spend the next chunk of time, installing the video_transcoding tools, and all the programs it uses to get its work done.

Note that this guide is not a detailed introduction to Terminal or Unix. (There are many such guides on the net, and if you're interested, they're well worth reading.) This guide is focused solely on how to use Terminal to install the video_transcoding tools, not how to use Terminal on its own. So let's get started…

[continue reading…]


A unique lava lamp time-lapse

We occasionally take our kids to a local place, Big Al's, which is one of those bowling/arcade places that give out tickets as rewards from the arcade games. Being good parents, we too sometimes play the games (you know, to spend time with the kids…yea, that's it). Over the years, we amassed quite a bunch of tickets, but weren't quite sure what to spend them on.

The last time we were there, I was smitten by a lava lamp, similar to this one, but ours has a black base and blue "lava." I don't know why (childhood flashback?), but I decided some of our points cache would go to this mesmerizing but otherwise useless device.

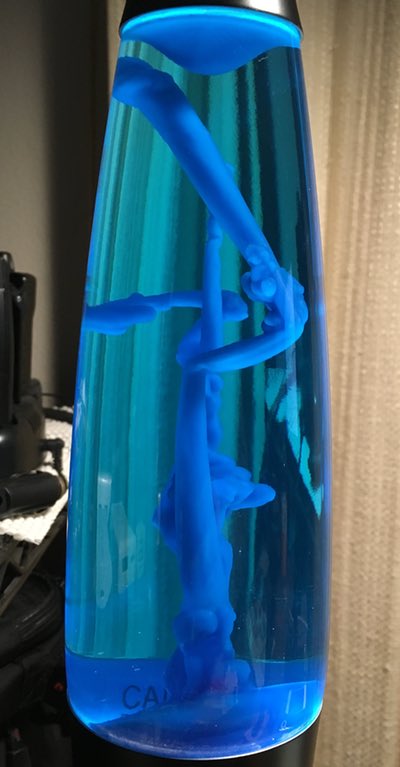
When I got it home, I was surprised at just how long it takes to warm up: It can take nearly an hour before any "lava" starts flowing, and about two hours before it really looks like a traditional lava lamp. During the first hour, though, the melting wax in the lamp makes some really cool abstract bits of art, as seen in the photo at right.

I thought this might make a neat time lapse, so I set out to record it with the iPhone. My first attempt failed, due to the iPhone's auto-adjusting time-lapse feature. Because the lamp takes so long to get going, the gap between frames winds up being quite long. Long enough that when stuff does start happening, the iPhone's time-lapse gaps are too wide to make for an interesting video.

I needed another solution, so I headed to the iOS App Store to see what was available…

[continue reading…]