Skip to content

Find and fix non-searchable PDFs

I use a ScanSnap ix500 scanner to scan a lot of paper into PDFs on my iMac. And thanks to the ScanSnap's bundled optical character recognition (OCR), all of those scans are searchable via Spotlight. While the OCR may not be perfect, it's generally more than good enough to find what I'm looking for.

However, I noticed that I had a number of PDFs that weren't searchable—some electronic statements from credit cards and utility companies, and some older documents that predated my purchase of the ScanSnap, at least based on some tests with Spotlight.

But I wanted to know how many such PDFs I had, so I could run OCR on all of them, via the excellent PDFPen Pro app. (The Fujitsu's software will only perform OCR on documents it scanned.) The question was how to find all such files, and then once found, how to most easily run them through PDFPen Pro's OCR process.

In the end, I needed to install one set of Unix tools, and then write two small scripts—one shell script and one AppleScript. Of course, you'll also need PDFPen (I don't think Pro is required), or some other app that can perform OCR on PDF files.
[continue reading…]


View app-specific log messages in Terminal

March 29 2018 Update:

When this tip was first posted, it didn't work right: The log command ignored the --start, --end, and --last parameters. Regardless of what you listed for parameters, you'd always get the entire contents of the log file. I'm happy to note that this has been resolved in macOS 10.13.4, as log now functions as expected:

$ log show --last 20s --predicate 'processImagePath CONTAINS[c] "Twitter"'
Filtering the log data using "processImagePath CONTAINS[c] "Twitter""
Skipping info and debug messages, pass --info and/or --debug to include.
Timestamp                       Thread     Type        Activity             PID    TTL  
2018-03-30 09:26:15.357714-0700 0xc88a8    Default     0x0                  5075   0    Twitterrific: (CFNetwork) Task <9AD0920A-7AE7-4313-A727-6D34F4BBE38F>.<250> now using Connection 142
2018-03-30 09:26:15.357742-0700 0xc8d7a    Default     0x0                  5075   0    Twitterrific: (CFNetwork) Task <9AD0920A-7AE7-4313-A727-6D34F4BBE38F>.<250> sent request, body N
2018-03-30 09:26:15.420242-0700 0xc88a8    Default     0x0                  5075   0    Twitterrific: (CFNetwork) Task <9AD0920A-7AE7-4313-A727-6D34F4BBE38F>.<250> received response, status 200 content K
2018-03-30 09:26:15.420406-0700 0xc8d7a    Default     0x0                  5075   0    Twitterrific: (CFNetwork) Task <9AD0920A-7AE7-4313-A727-6D34F4BBE38F>.<250> response ended
 --------------------------------------------------------------------------------------------------------------------
Log      - Default:          4, Info:                0, Debug:             0, Error:          0, Fault:          0
Activity - Create:           0, Transition:          0, Actions:           0
$

This makes it really easy to get just the time slice you need from the overly-long log files. You can use s for seconds, m for minutes, h for hours, and d for days as arguments to these parameters.

This article provides a nice overview on interacting with log and predicates to filter the output—there's a lot you can do to help figure out what might be causing a problem.

And now, here's the rest of the original post…

[continue reading…]


Sorting—or not—bookmarks in Safari in macOS 10.13.4

One of the unpublicized nuggets in macOS 10.13.4 is this little doozy in the release notes:

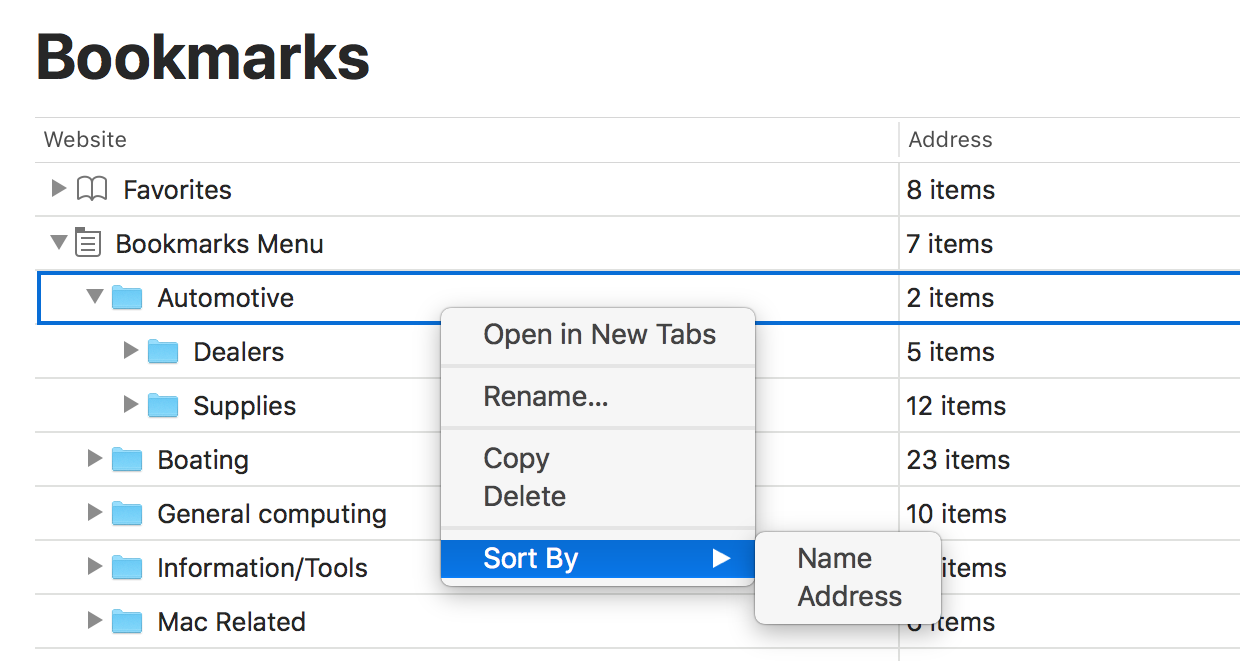
Enables sorting Safari bookmarks by name or URL by right-clicking and choosing 'Sort By…'

This has been a feature request for nearly as long as Safari has existed—Safari was released in January 2003, and I found this MacRumors forum thread from April 2003 asking how to sort bookmarks. So this feature was nearly 15 years in the making!

Sure enough, right click on an entry in your Bookmarks list, and you can sort by name or URL:

I have a junk drawer in Safari where I bookmark stuff that I might someday want. Like a real junk drawer, it gets filled pretty quickly, and sorting the entries is a great way to trim the out of date entries. But when I tried to sort my junk drawer…

…there was no such option available. Stumped for a moment, it struck me that there may be a limit on the number of entries, as that was the only difference between this folder and others. I removed half the entries, leaving 546, but still, no Sort entry in the contextual menu.

After a bunch of back-and-forth moving (which takes some time, when you move hundreds of bookmarks around), I found the limit: 450 entries.


So if you have a large folder of bookmarks in Safari that you need to sort, you'll have to split it into multiple folders, none of which can have more than 450 entries. Weird but true.


How to rename dropped pins in macOS Maps

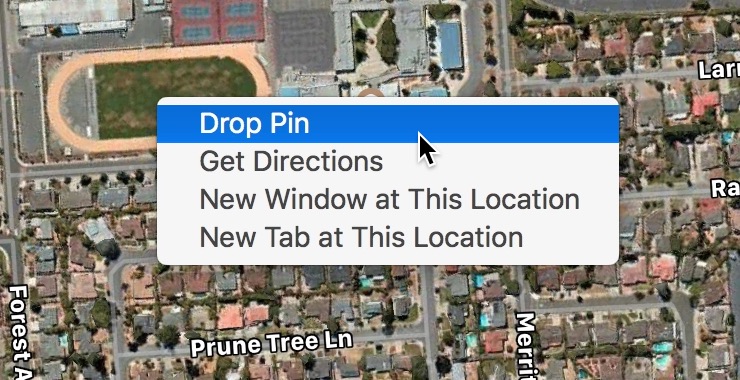
Today I wanted to do something that seemed simple: Add a pin to Apple's Maps app on macOS High Sierra, then rename the pin.

But after trying everything obvious, I was stumped, and took to both Twitter and web searching. About the same time I found the answer on the web, I also received a tweet from @tmneff with the same answer.

This seems absolutely crazy, but here's how you name a dropped pin in Maps on macOS—these are just the instructions from the linked web page, with a few added screenshots:

  1. Drop the pin.

  2. When the info box appears, click the small circled 'i' at the right.

  3. In the new window that appears, click the heart (Favorite) icon, to make your new pin a favorite.

  4. Click in the search bar, then highlight the Favorites entry and click it.

  5. When the list of favorites appears, you'll see an Edit box at the lower right corner; click that, and you can then click-and-edit any of the pin names as you would a filename in Finder.

    You can also delete favorites here by clicking the 'x' icon.

  6. Click Done, and your custom name should be saved with the dropped pin.

Apparently in iOS, you're prompted for a name when you tap the Favorite icon—that makes a lot sense, and macOS should follow the same convention. But it doesn't, sigh.


An easy and effective way to repair small chips in auto paint

I try to keep our vehicles looking as good as possible for as long as possible. My kids know that this means long walks from the out-there-no-way-to-get-dinged parking spot to our destination. It means I spend a lot of my free time hand washing our cars, because I don't trust the automated variety. It means lots of vacuuming and leather cleaning and Windexing and who knows what else.

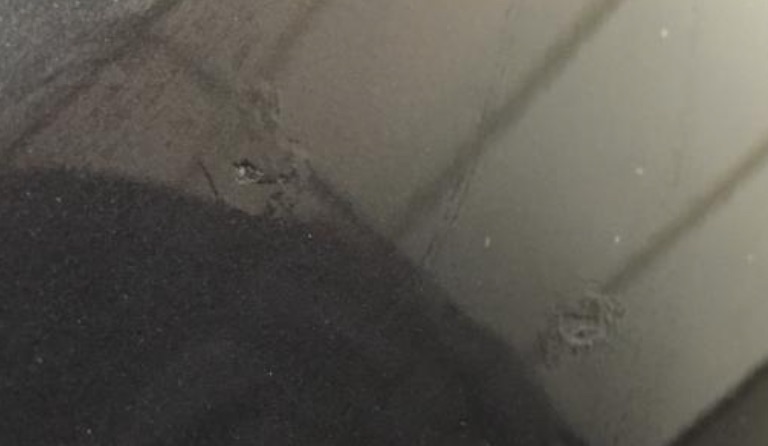
But the one thing that has—until recently—stumped me is repairing small chips in the paint. For years, I'd buy a bottle of the factory paint and a bottle of clear sealant, and do my best to dab, smooth, and seal. But the results were never very good—sure, the chip was covered, but you could still see exactly where it was—many of my cars have had repaired areas that looked something like this (though not quite this bad)…

While effective at preventing any further expansion of the chipped area, the results were far from pretty.

Then I read about Dr. ColorChip, and thought I'd give it a try. You can also buy their kits on Amazon, but I recommend using their web site, so you can make sure you get an exact color match. There are many similar systems out there, but this is the only one I've used1I didn't receive anything from them for writing this; I'm just a happy customer..)

Using their kit, here's a set of before-during-after pictures of a small chip repair on my car:

Left: The rock chip • Middle: Paint dabbed and spread • Right: The finished repair • Zoom to see closeups

Compared to my prior method, the difference is astonishing. The fixed area is basically invisible from any distance, and there's no excess paint surrounding the fixed area.

[continue reading…]


Show albums a given Photos’ photo has been added to

A friend asked if there was a way in Photos to see which albums a selected photo had been added to. This is one of those things that would be incredibly easy for Apple to provide: Select a photo, press Command-I, and in the info window, you could see a list of all albums containing the selected photo.

Unfortunately, Apple doesn't seem to think people might care about what albums a photo is in, so this feature exists only in my mind. Thankfully, Mac users Jacques Rious and léonie wrote an AppleScript to solve the problem. I used the first instance (version 4) of the script in that post and it worked fine in High Sierra. (In case Apple ever decides to remove its forums, I've recreated the script below.)

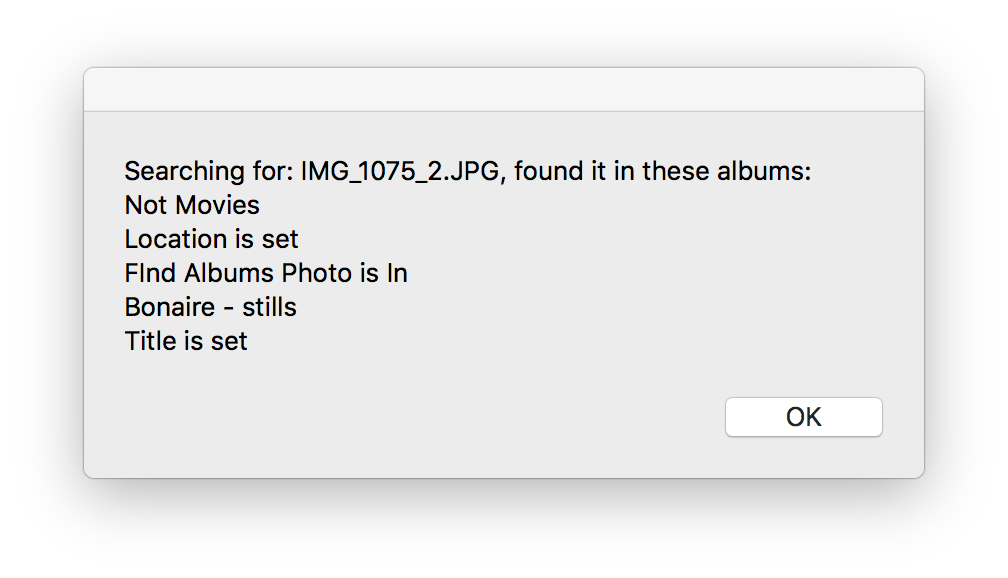
To use the script, paste it all into AppleScript Editor and save it as an application (or you can just run it in AppleScript Editor). In Photos, create a top-level album (I named mine Find Albums Photo Is In), and place the photo you want to know about into that album. Leave it selected, then run the AppleScript. You'll see one dialog stating what photo is being used, then after a bit, you should see a results dialog, like this:

As you can see, the album used for the search is included in the results; someone with better AppleScript skills than I could probably modify the script to exclude that album (any takers?). While I'd much prefer Apple include this feature directly in Photos, at least there's an alternative when you need this information.

[continue reading…]


Review: Olala SG1 Bluetooth earbuds

Recently, Olala sent me a set of their SG1 Bluetooth wireless earbuds to review.1I received the SG1s for free, but my review is based solely on their performance and my impressions of their build quality. While I listen to music in a number of ways, none of them currently include wireless earbuds, so I was interested in seeing how the SG1s performed. These earbuds are also very reasonably priced—only $32 at Amazon as I write this today.

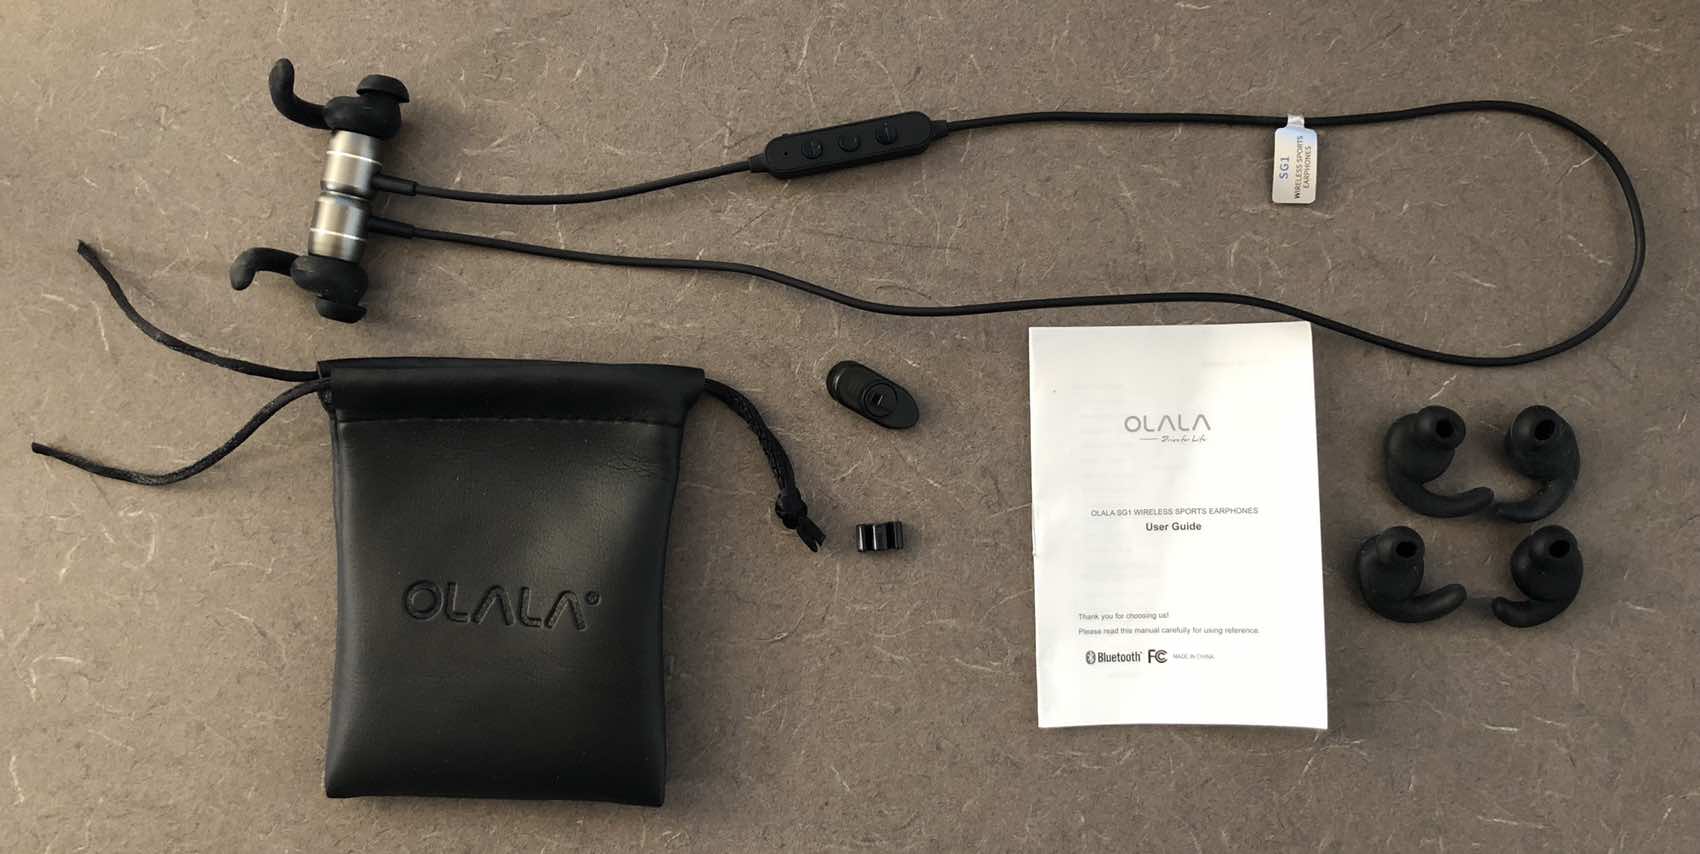
And for that $32, you get a very complete setup: The earbuds on about a two-foot cable, three sizes of ear cushions, a complete (though tiny) instruction manual, a shirt clip, a cable separator, and a leather-look carrying case.

(Also included, but not shown in the photo, is a USB charging cable.)

[continue reading…]


How to download macOS Sierra

This morning on Twitter, Antonio asked…

I thought "Well, that's an easy question to answer—via the Mac App Store, of course." As it turns out, that's the right answer, but it was much harder to find than I expected it to be. I started on the Purchased tab in the Mac App Store app, where you can (theoretically) see all past purchases, including prior Mac OS X versions. However, those old releases stop with Mac OS X El Capitan from 2015; neither Sierra nor High Sierra are listed.

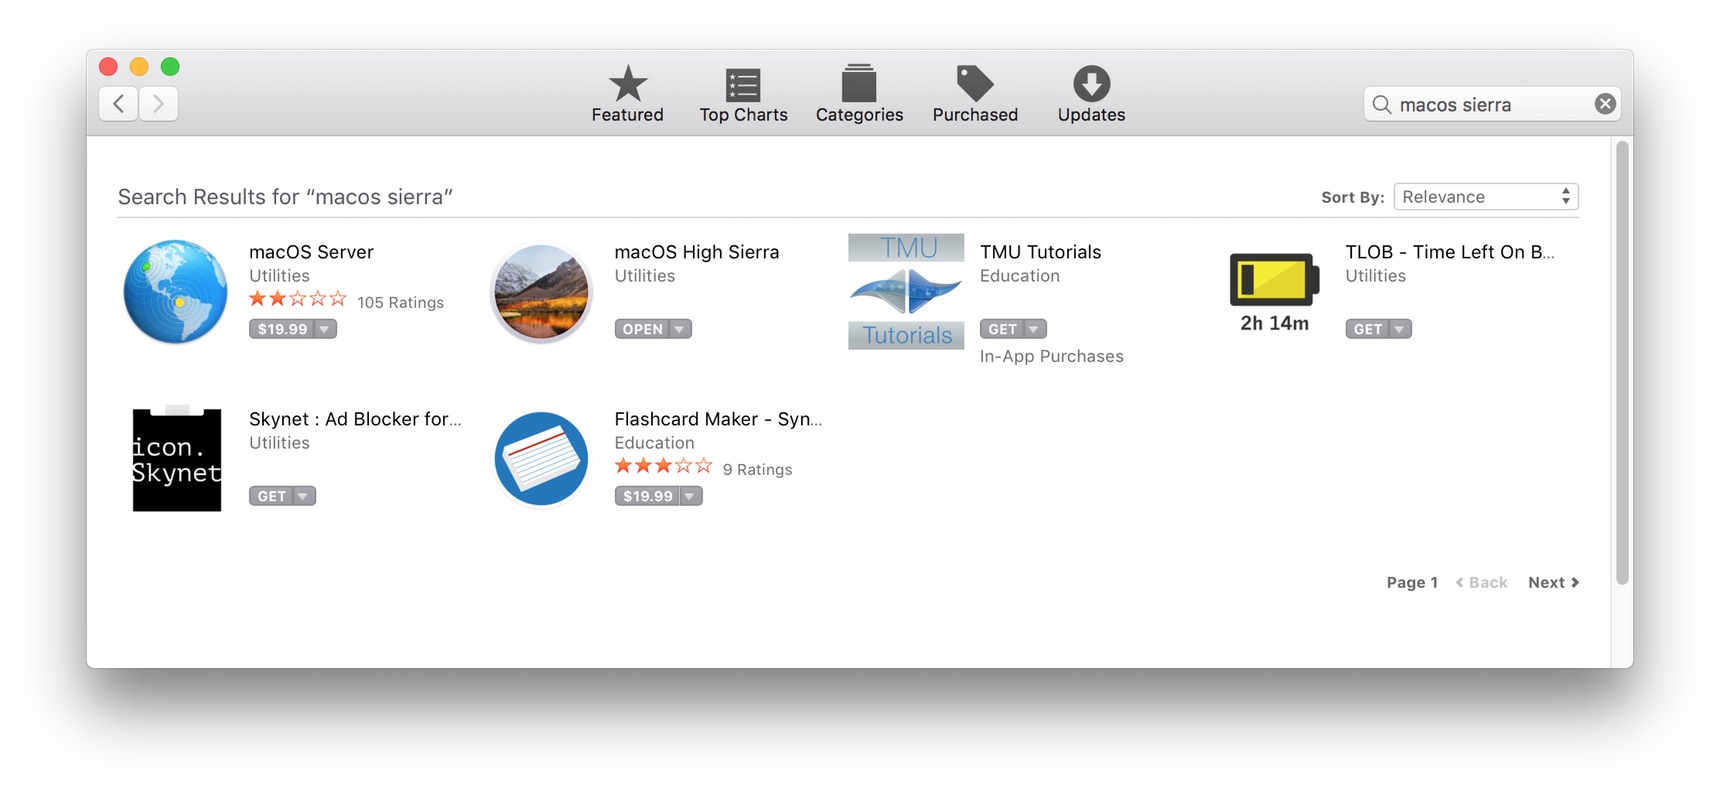
Next I tried searching the Mac App Store for Sierra, but that nets only Server and High Sierra, and a few apps that appear to have gotten away with using "Sierra" in their descriptions:

I then tried the Apple Developer site, but they don't offer Sierra for download either.

Somewhat stumped, I then started searching, and after way too many attempts, I finally landed on this useful page at Stack Exchange, which attempts to explain how to download all older versions of Mac OS X/macOS. Here's the relevant bit for Sierra:

For OS versions since Sierra.

Sierra itself has now vanished from everybody's Purchase History. However, Apple are keeping Sierra fully available, even though High Sierra is out. No Apple ID is required.

Apple KB - How to download macOS Sierra
Sierra - Direct download link from the App Store

Given how much trouble I had finding this page, I thought I'd post it here for anyone looking for Sierra. Going forward, keep that Stack Exchange link handy, as it should be updated in the future as new releases come out.


A neat detail in Star Wars: The Last Jedi [Coded Spoiler]

We saw Star Wars: The Last Jedi for a second time a while back, mainly because a large group of friends was going and we had most of the theater to ourselves, so it was sort of like a private screening. During my re-watching, I spotted a number of things that I'd missed the first time, but one in particular stood out…

Note: The remainder of this post is hidden behind a spoiler-hiding plug-in, as the subject being discussed is a major—really major—plot spoiler. This should keep it disguised both here on the site, and in the RSS feed. However, commenters may not disguise their comments, which means you may not want to scroll down at all if you haven't seen the movie yet.

If you don't want a major plot element revealed, don't expand the hidden spoiler!

[continue reading…]


Easily delete albums in Photos

Last fall, I finally made the move from iPhoto to Photos…months later, I still find myself frustrated by many things in the Photos' user interface.

Today's aggravation dealt with cleaning up a bunch of older photo albums—some I just wanted to delete, others I wanted to convert from Smart Albums into normal albums (because I wouldn't be adding any more photos that used the keywords in the Smart Album). That meant I wanted to delete a bunch of albums—well over 100.

Deleting an album in Photos can only be done from either the My Albums overview, where you can select more than one (though not across folders), or via the contextual menu in the sidebar.

The My Albums view wasn't going to work for me, as I needed to look at and work with many of the albums, across many folders. But after the sixth time of doing the "right click, select Delete Album, tab to Delete in the confirmation dialog, press Return" dance, I was sick of it. Time for another Keyboard Maestro macro.

This one is very simple—it just replicates the actions required to delete an album. With it in place, I click on the album I wish to delete, then press Control-D. It's still more mouse interaction than I'd prefer—why can't I select albums via the keyboard?—but it's oh so much faster than using the contextual menu.

[continue reading…]