Skip to content

Apple Universe

Top-level category for all Apple, Mac, and OS X related topics.

macOS app: Test DNS servers with namebench

If you've got a speedy internet connection at home, but it seems slow, it's possible its' not the connection itself but the speed of your chosen DNS server.
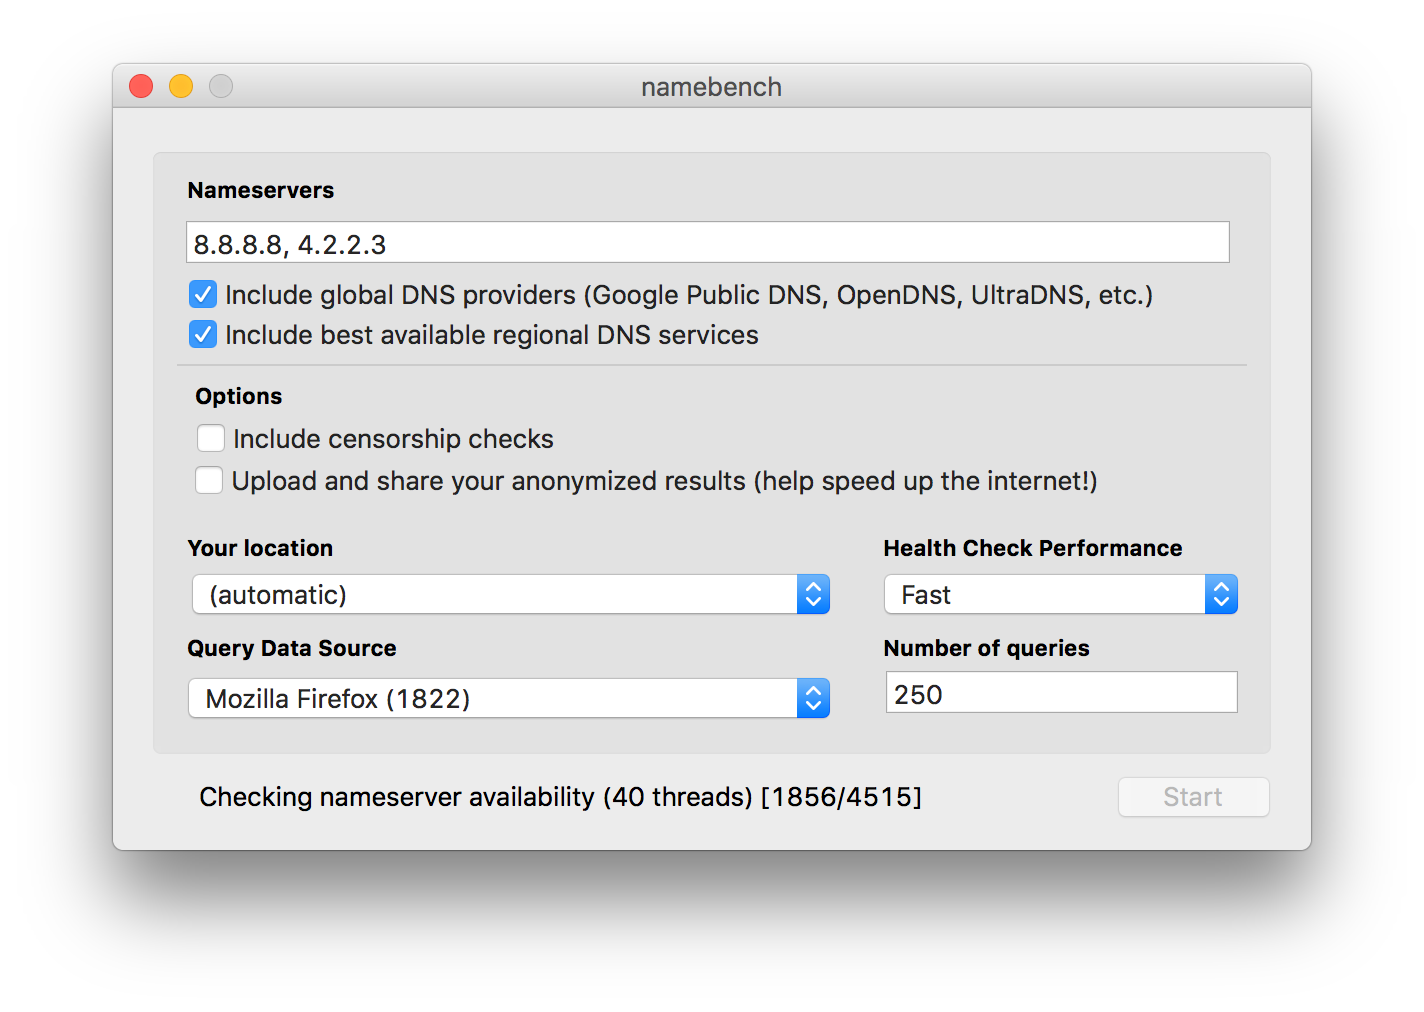
To figure out if the DNS servers are part of the problem, check out namebench, a DNS server benchmarking app. namebench compares your existing DNS servers to a large list of other DNS servers, and shows you how they all perform.

When namebench launches, you'll see a window populated with your current DNS server addresses, and a few other settings you can modify:

Click Start, then go ahead and find something else to do for a while—the benchmarking process may take 15 minutes or more, depending on how many name servers it can see.

[continue reading…]


macOS app: BackupLoupe examines Time Machine backups

I'm somewhat paranoid about backups—I have many of them, both online and offline, onsite and offsite. I test my backups to make sure they're good. In short, I do my best to make sure a hardware failure or natural disaster won't take out my data.

My backup strategy includes Time Machine, mainly for recovering from "oh crud I didn't mean to delete that!" moments. We also use it, via a Time Capsule (RIP, sigh), to back up our laptops.

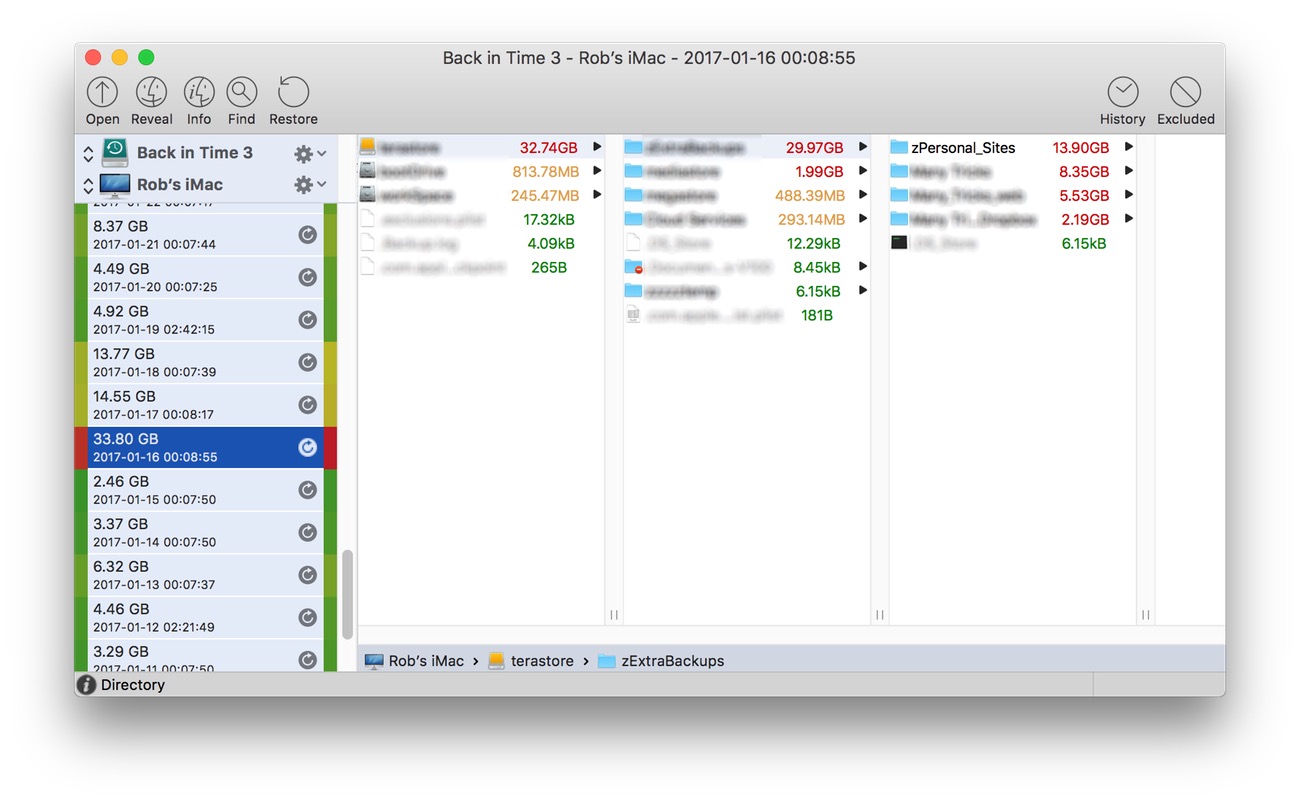
While I love how Time Machine works, I dislike that it doesn't tell you anything about a given backup other than how big it was. Enter BackupLoupe, a $10 "honorware" app. BackupLoupe examines your Time Machine backups and computes a "diff" for each one, letting you know exactly what was backed up in a given run:

Each backup is color coded—on the left of each backup's name, the color indicates the size of the backup, and on the right, the deviation of that size from the norm.

[continue reading…]


Transforming text via Keyboard Maestro

Recently, Melissa Holt wrote about transforming text via the Transformations menu. After seeing this article, a reader named Hunter wrote to me with this comment:

Today in The Mac Observer Melissa Holt wrote about using the TextEdit/ Edit/ Transformations command to change the case of a sentence or paragraph. However, there is no option to perform, "Sentence Case", i.e., capitalize the first letter of the first word, and keep all other words in lower case.

Is there a way in Terminal, or maybe Keyboard Maestro to add this option to Transformations? It seems to me that the given choices have rather limited uses.

In addition to not offering sentence case, the Transformations menu has a few other drawbacks:

  • Not all apps have a Transformations menu.
  • Only three very basic transformations (upper, lower, capitalize) are supported.
  • The transformations are buried in a sub-menu, requiring lots of mouse navigation to reach.

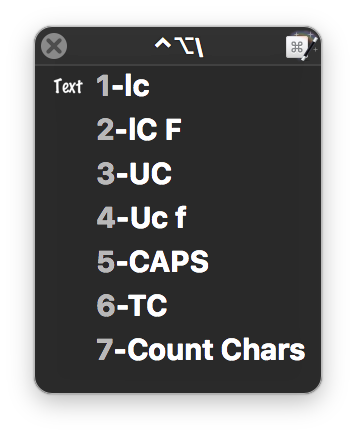
While I don't believe it's possible to modify the Transformations menu, it's pretty easy to use Keyboard Maestro to build a "Sentence Case" transformation…or more usefully, as seen at right, a palette with many more transformations. Unlike the Transformations menu, the Keyboard Maestro solution will work in any app where you can copy and paste text.

[continue reading…]


A tale of two remotes

Update: Thanks to John for pointing out the obvious: The old remote works with the new Apple TV. So I guess I can go ahead and replace the one in the bedroom.

We recently changed how we use some of our rooms (eliminated a kids' play room), and as a result, decommissioned a television set. With that TV was a new Apple TV; at first I thought "Great, I can replace the old Apple TV in our bedroom."

Then I remembered the remote. For a device that I often use either while running on the treadmill (yea, it's in our bedroom) or in the dark while going to sleep, the new Apple TV remote is unusable: The touch pad is a nightmare to try to use while running, and it's tricky to use in the dark. It's also nearly impossible to tell which side's up in the dark.

So no, new Apple TV, you're not going to replace the old one in our bedroom. I'm not sure what I'll do with the new one; we have another TV it could go on, but there's no open HDMI port (it's an old TV with just two HDMI ports, and it's got an Xbox and a Blu-ray player). Time for an HDMI switch box?

I'd love a non-touchpad remote for the new Apple TV, but I don't see Apple going that direction at all.


Useful site: Find and use fonts at Font Squirrel

I recently tweaked the look here a bit, greatly simplifying the fonts and lightening the visual weight of the site quite a bit.
As part of that process, I wanted to find a larger lighter yet highly legible font. So I went back to Font Squirrel, the same site I used in my 2014 redesign.

They offer a huge assortment of fonts, all licensed for free commercial use, with a nice set of categories and search engine. And free…though the tradeoff is a fairly heavy advertising load. After much looking and testing, I've got the site running on three font families: Open Sans for most of the content and sidebar, Open Sans Condensed for headlines, and Ubuntu Mono for code snippets.

As part of the cleanup, I was able to remove 40+ font-family and font-size statements from the CSS, and the site should scale a bit better on small-screen devices. (I'm still not completely happy with things, so expect minor changes going forward.)

Font Squirrel not only has a great collection of fonts, but they offer a free web font generator. Using the generator, you can create fonts that are embedded in your page, so that they're available even when users don't have those fonts installed locally. Just upload a font you're licensed to use, and Font Squirrel will create a web font, complete with CSS. Upload the converted web fonts to your server, copy and paste the CSS bit into your CSS master file, and you can use the fonts on your site.

There are 20 web fonts on the site now (two forms of 10 font faces across the three font families), and in total, they're 200KB in size—or less than the typical "larger" image I often post here.

There are lots of sites that offer free-to-use fonts; I really like the assortment at Font Squirrel, and the web generator is an added bonus.


Create a workload for your CPUs

Over the weekend, I was testing how some of our apps work when the CPUs are busy. One way to load the CPUs is to rip a Blu-ray disc, but I was looking for a more controllable CPU load.

A quick search through the Mac OS X Hints archive (use this tip to search the site) found the answer from 15 years ago: Just say yes in Terminal to generate sizable CPU loads…

More specifically, use this command in Terminal:

yes > /dev/null &

If there's an award for strangest Unix utility, yes might just be the winner. All it does is output y (or whatever you list after the y; the man page suggests an expletive) until you kill the task.

The above command sends the output (via the > redirect) to the null device, which discards it. The ampersand sends the job to the background, so you get your Terminal prompt back.

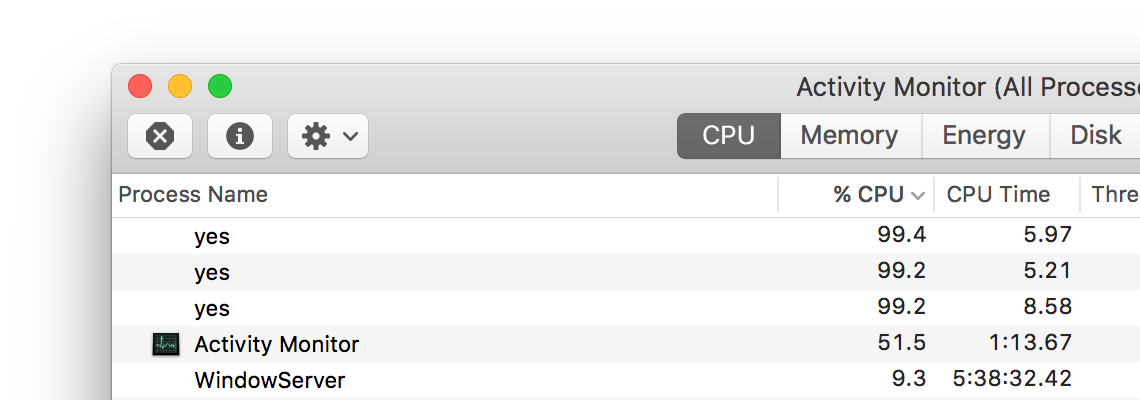
You can run this command multiple times, each loading the CPU even more heavily (the screenshot shows three yes tasks running). Keep an eye on Activity Monitor to see just how much CPU it takes—as shown above, it does a great job at loading the CPU.

You can kill the tasks by issuing the command killall yes in Terminal, or by quitting Terminal—you'll be told that quitting will terminate the tasks.


Install and configure Apache, PHP, and MySQL on macOS Sierra

Fair warning: Today's tip is over-the-top geeky.

After many years of not doing anything with web serving on my local Mac, I recently had a need to look at some mySQL/PHP-based web packages. While I could install these on robservatory as tests, I generally like to install things locally first, because I'll install a handful of packages until I find the one I like. But it'd been so long, I didn't have anything configured. (Remember when enabling Apache—i.e. web sharing—was a feature of the System Preferences' Sharing panel? Ah, good times!)

I could have opted to use the built-in Apache, but I wanted something that I could more easily keep up to date, and that, if I chose, would be easy to remove. The good news is that Homebrew has packages available for Apache, PHP, and MySQL. Homebrew installs everything in its own directory tree, and adding and removing packages is simple—exactly the setup I wanted.

So in theory, installation was as easy as three brew tap commands. The reality, though, is that the installation is a bit more complex. OK, it's a lot more complex. The good news is that, this being the age of the internet, help is but a search away. Or the advice of a friend away, which is what I used in this case.

A friend pointed me to this excellent installion guide that walks through the entire process, including installing two versions of PHP with the ability to switch between them on the fly.

It was this on-the-fly switching, though, that gave me troubles: I couldn't get a site to load unless I specified "index.php" or "index.html" as part of the URL. (Apache is configured to grab those files automatically.) Solving that one took a bit of time…

[continue reading…]


How to make Sims 3 work in macOS Sierra

When we upgraded all our Macs to macOS Sierra, my daughter was upset because Sims 3 broke. After much scouring of the internet, I found the solution and tweeted about it:

It dawned on me, though, that if that forum post ever vanishes, I'll be in trouble with future new Macs and/or reinstalls, so I thought I'd document it here, too. Read no further unless you (or a family member) play Sims 3 and want to get it working in macOS Sierra. And really, try the linked forum post first; this is just a backup plan.

[continue reading…]


macOS App: OmniDiskSweeper

There are tons of "where's my disk space going?" apps out there—search the Mac App Store for "disk space," and you'll get pages of results. Many are of the newer graphical style, where you see a pie chart or square or some other graphical representation of your files.

I've tried a bunch of these tools over the years, both graphical and text-based, but I still keep coming back to an oldie-but-goodie—and it's free: Omni's OmniDiskSweeper has everything I want in a disk space usage tool. It's got an intuitive interface, and a way to either delete what I find or open the containing folder to take a closer look.

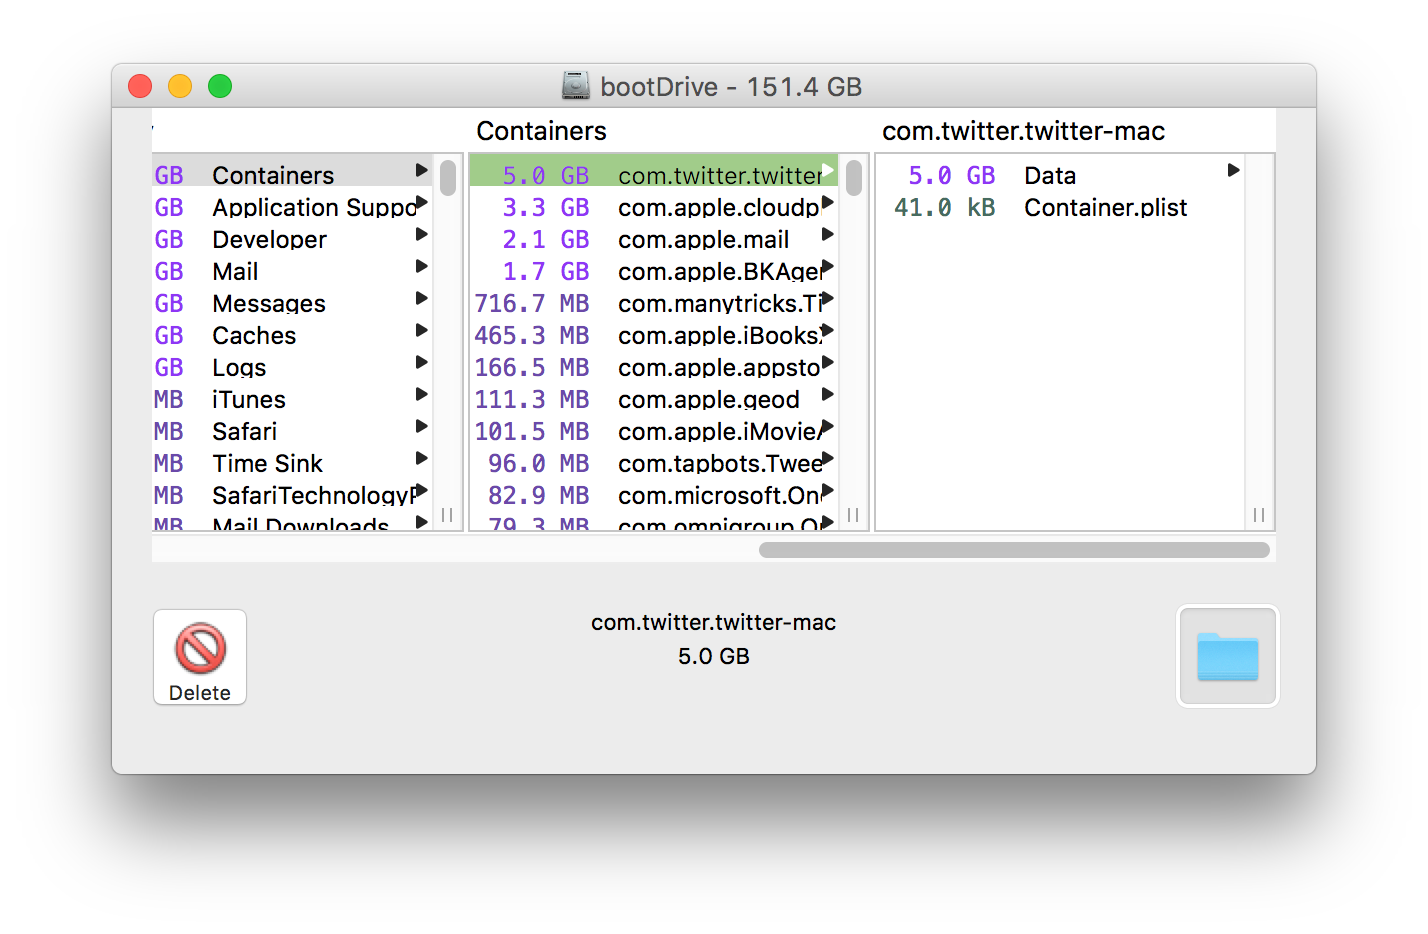
Perhaps it's because I'm a column-view Finder kind of person, but I love the columnar drill-down layout that OmniDiskSweeper uses. Select the drive you want to examine, then start drilling down into folders to see what's taking up all your space:

Oh look, five gigabytes of cached Twitter content. Just what I didn't need. This is where the bottom left button comes into play: Select an item, click that, and (after a warning), it's gone. This is not a "move to trash" operation, this is a destroy operation. Be very careful with it! This is why you'll see a warning before the delete proceeds, because there's no going back.

The folder icon on the bottom right is the one I usually use, though—it opens the chosen folder in Finder, where I can then manually remove the cruft.

If you're a more visual person, you probably won't like OmniDiskSweeper, because the layout is completely text-based and columnar. But for me, it's the perfect tool to manage the limited space on my iMac's boot SSD.


Create a pop-up web search tool using Keyboard Maestro

My original Keyboard Maestro special character palette (which has been replaced by a much better version), used the Conflict Palette to display a window from which you could pick the special characters.

While this turned out to not be ideal for the special character palette (no way to pick more than one at a time), the Conflict Palette is ideal for many other tasks.

I use the one at right to search a number of web sites—activate the palette with ⌃⌥L then press a, for instance, type a query, press Return, and my browser loads with search results from my old macosxhints.com site.

Feel free to download my macro if you'd like to use/modify it.

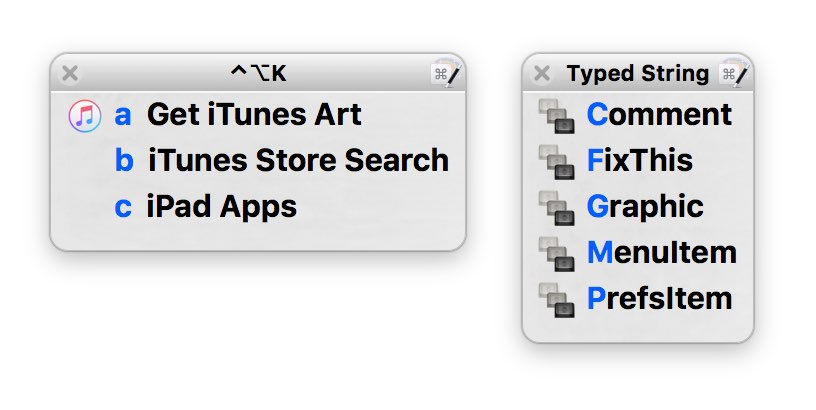
I use a couple additional palettes—one for retrieving iTunes' artwork and searching the store, and the other for inserting commonly-used bits of code while writing help files in Coda for the Many Tricks' apps.

Here's how the web search palette looks in use; I love being able to search a specific site from anywhere without first switching to my browser. And because I have Keyboard Maestro syncing its macros, I can do this from any Mac I own.

The advantage of using the Conflict Palette for these web searches is that I need only remember one shortcut, not 11 different ones, and the palette is a nice visual reminder of which service I wanted to search.

[continue reading…]