Recently, Melissa Holt wrote about transforming text via the Transformations menu. After seeing this article, a reader named Hunter wrote to me with this comment:
Today in The Mac Observer Melissa Holt wrote about using the TextEdit/ Edit/ Transformations command to change the case of a sentence or paragraph. However, there is no option to perform, "Sentence Case", i.e., capitalize the first letter of the first word, and keep all other words in lower case.
Is there a way in Terminal, or maybe Keyboard Maestro to add this option to Transformations? It seems to me that the given choices have rather limited uses.
In addition to not offering sentence case, the Transformations menu has a few other drawbacks:

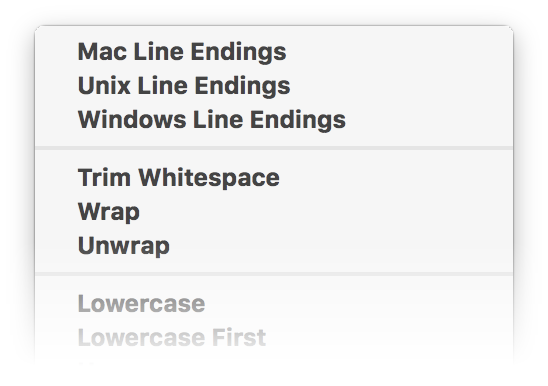
- Not all apps have a Transformations menu.
- Only three very basic transformations (upper, lower, capitalize) are supported.
- The transformations are buried in a sub-menu, requiring lots of mouse navigation to reach.
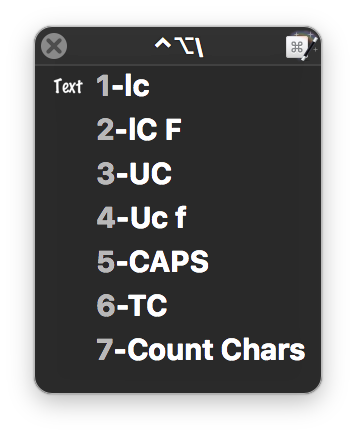
While I don't believe it's possible to modify the Transformations menu, it's pretty easy to use Keyboard Maestro to build a "Sentence Case" transformation…or more usefully, as seen at right, a palette with many more transformations. Unlike the Transformations menu, the Keyboard Maestro solution will work in any app where you can copy and paste text.
 Keyboard Maestro makes it incredibly easy to do all sorts of things to selections, including text transformations, thanks to its Filter Variable action. This action has a ton of choices; click the image at right to see them all.
Because it acts on a variable, all the macro needs to do is capture text to a variable, transform it, then write it back out, replacing the original text.
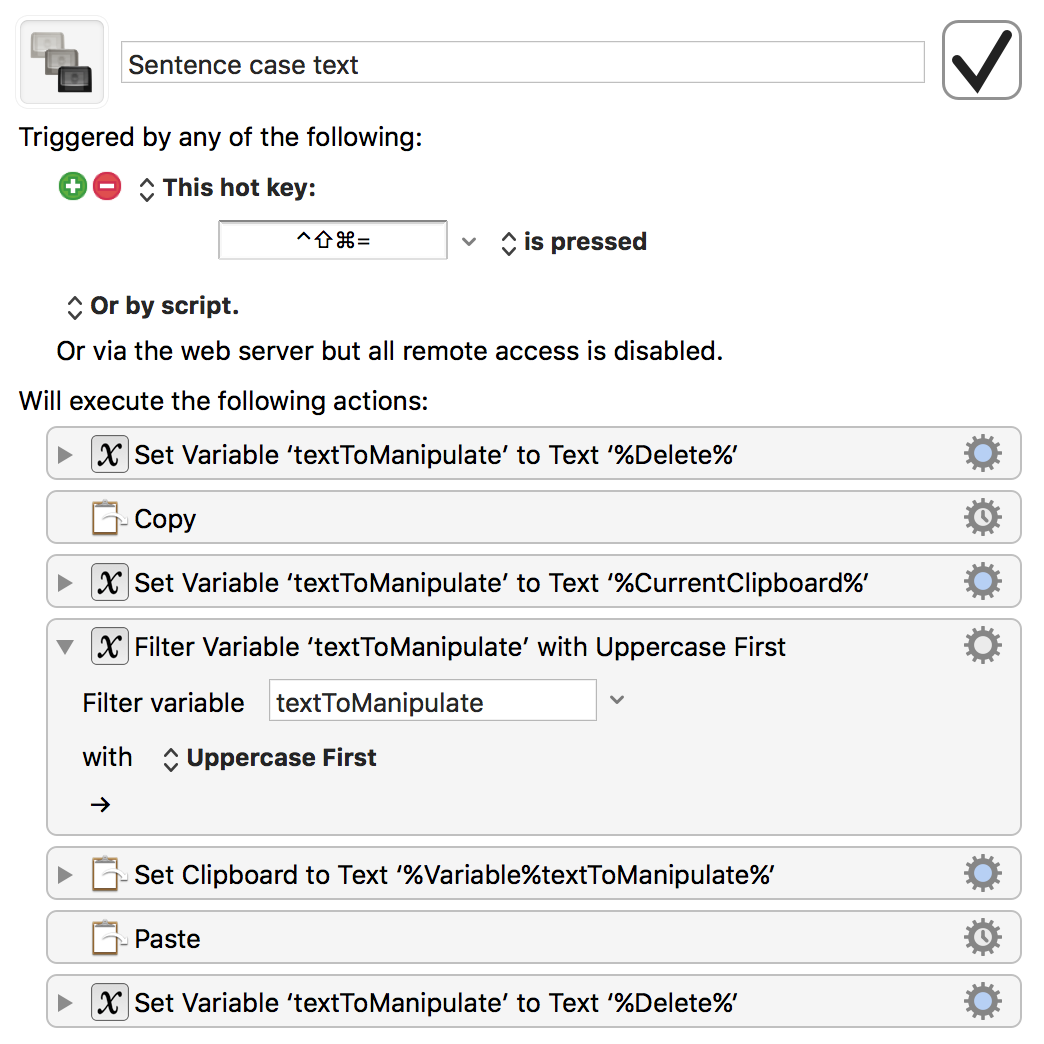
Here's how that looks in steps:

The macro assumes you have selected the text you want to transform; with a selection made, the macro does the following:
- Erase a variable—textToManipulate—to insure it starts empty.
- Copy the selected text to the clipboard.
- Set the textToManipulate variable to the contents of the clipboard.
- Apply the Uppercase First action, which capitalizes only the first letter of the text.
- Set the clipboard to the now-transformed text string.
- Paste the text, replacing the original (as it was selected already).
- Erase the textToManipulate variable when done.
Assign this to a keyboard shortcut, and it will work anywhere you can select text. But really, that's not the best solution in this case, because now you need to use two tools—the macro and the Transformations menu—to manipulate text.
Instead, you can use Keyboard Maestro's Conflict Palette to create the pop-up menu of transformations (and a non-transformation) shown above.
My palette contains seven actions—the first six manipulate text, the last is just an example of what else you can do with a selection of text; here's what each macro does:
- lc - Lowercase the entire string.
- lC F - Lowercase only the first letter, leaving the rest unchanged.
- UC - Uppercase the entire string.
- Uc f - Upper case the first letter, i.e. sentence case.
- CAPS - Uppercase the entire string.
- TC - Capitalize the first letter of every word, i.e. title case.
- Count Chars - Pops up a huge window showing the character count of the string.
Each of the first six macros is identical to the Sentence Case macro, but with a different transformation` chosen in the Filter Variable action. The last macro, Count Chars, is similar, but instead of replacing the selection, it just displays a huge window with the character count of the selection.
Download the macro to see each step in detail, and to customize it for your needs.
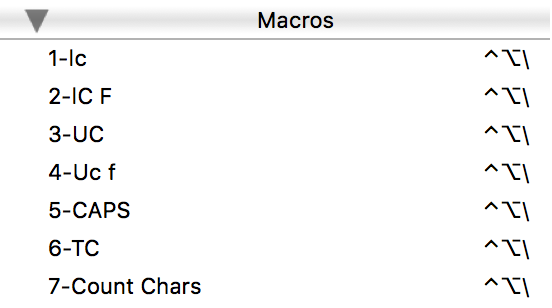
 As a reminder, the Conflict Palette appears automatically when two or more macros have the same shortcut. In the download version, each step is assigned Control-Option-Backslash. When that shortcut is pressed, the conflict palette appears. You don't have to use a keyboard shortcut, however. You could make the macro only available in Keyboard Maestro's menu item, for instance.
I've also named each macro with a number, which serves two purposes: It controls the order in which items appear in the palette, and it lets me activate each by pressing the associated number.
And, of course, you're not restricted to what I've shown here; there are a ton of options in the Filter Variable action to apply all sorts of transformations.
More Keyboard Maestro greatness. This is better than the KM setup I had been using. Thank you. I made one addition to each macro, and I'm pointing it out in case it's of use to anyone else: I added an action at the end of each macro to Delete Past Clipboard (that's clipboard #0) since that's not something I want to persist there.
Good addition; I always forget to do that.
-rob.
Comments are closed.