Skip to content

Macs

An in-depth look at moving from iPhoto to Photos

As noted in prior posts, I've recently moved to Photos from iPhoto. So far, it's been a mixed experience. There are some elements of Photos I like, but as of today, those things are outweighed by the things I don't like.

I've vented on a number of the things I dislike on Twitter, but wanted to expand on both the positives and the negatives in more detail. Hence, this "one week in" review (of sorts) of Photos, from the perspective of an experienced iPhoto user.

I've also included some tips for working with and migrating to Photos for those who haven't yet made the move from iPhoto. Finally, if you're still reading, I've listed the key features I'd really like to see come to Photos in a future update.

Note that I am not a great photographer, but I do take a lot of photos—I have over 40,000 photos and a couple thousand video clips in my database. To keep things organized, I use lots of keywords and Smart Albums, so much of my feedback on Photos is concerned with those areas of the program.

First off, my time with Photos hasn't all been bad; there are some things that I really like in Photos…

[continue reading…]


Making some marks on some iPhone 8 benches

With the arrival of my iPhone 8 Plus and its A11 Bionic CPU, I thought it'd be interesting to compare its benchmark performance (for the CPU and GPU) with some of the other gear in our home—iOS devices, Macs, and even a PC and a Linux box. In total, I tested 15 devices.

How did I test? I turned to Geekbench, which you can run on MacOS, Windows, and Linux (anywhere from free to $99), as well as on iOS ($.99). It has tests for both the CPU (using single and multiple cores) as well as the GPU (OpenCL and Metal on iOS/macOS; OpenCL and CUDA on Windows; CUDA on Linux).

What follows is far from a scientific study; I was just curious how the CPU and GPU in the iPhone compared to other tech gear in our home. As such, I didn't run the tests under "ideal lab conditions," I just ran them—one time per machine, with no special setup other than some basic stuff…

[continue reading…]


Frankenmac 2017: Fix distorted images at power on

When I originally set up Frankenmac 2017, I did so using an old 1920x1200 monitor, and everything looked fine from power on through booting to macOS.

But then, when it came time to get Frankenmac ready for production use (much more on that in a future post!), I connected it to my widescreen Dell 4K display, and was greeted with the ugliness that is a stretched Apple, as seen at right. This problem would fix itself relatively quickly during the boot process, but it was annoying.
Even more annoying was that the same distortion was present in the Clover boot loader that you see every time you power on the machine. In light of all my other issues, solving this problem was near the bottom of the priority list. But once I'd done everything I could on that front (again, more about that soon), it was time to tackle the distortion issue.

The solution turned out to be relatively simple, though not even vaguely describable as obvious. After much web searching, I wound up in this forum thread, where I found many possible solutions. Some seemed incredibly complex, but finally, on page four, I found a simple fix that worked—no more distortion, in either the Apple logo or the Clover screen:

If you're experiencing distorted images on your hackintosh, here's the fix that worked for me:

  1. Power up and enter BIOS (usually by hitting the Delete key)
  2. Find the Windows 8/10 Features setting—on my Gigabyte motherboard, it's in the BIOS Features section. Set it to Windows 8/10
  3. Once you do step one, a new option, CSM Support, will show up. Set it to Disabled.
  4. Confirm that Secure Boot is set to Disabled.

And that's that—with those changes (for me at least), the distortion was gone. As a side benefit, the boot screen is at the full resolution of the display, so there's no more jaggies and everything looks properly scaled. Ah, correct aspect ratio bliss!


See sensor stats in Terminal

Someone—perhaps it was Kirk—pointed me at this nifty Ruby gem to read and display your Mac's sensors in Terminal: iStats -- not to be confused with iStat Menus, a GUI tool that does similar things.

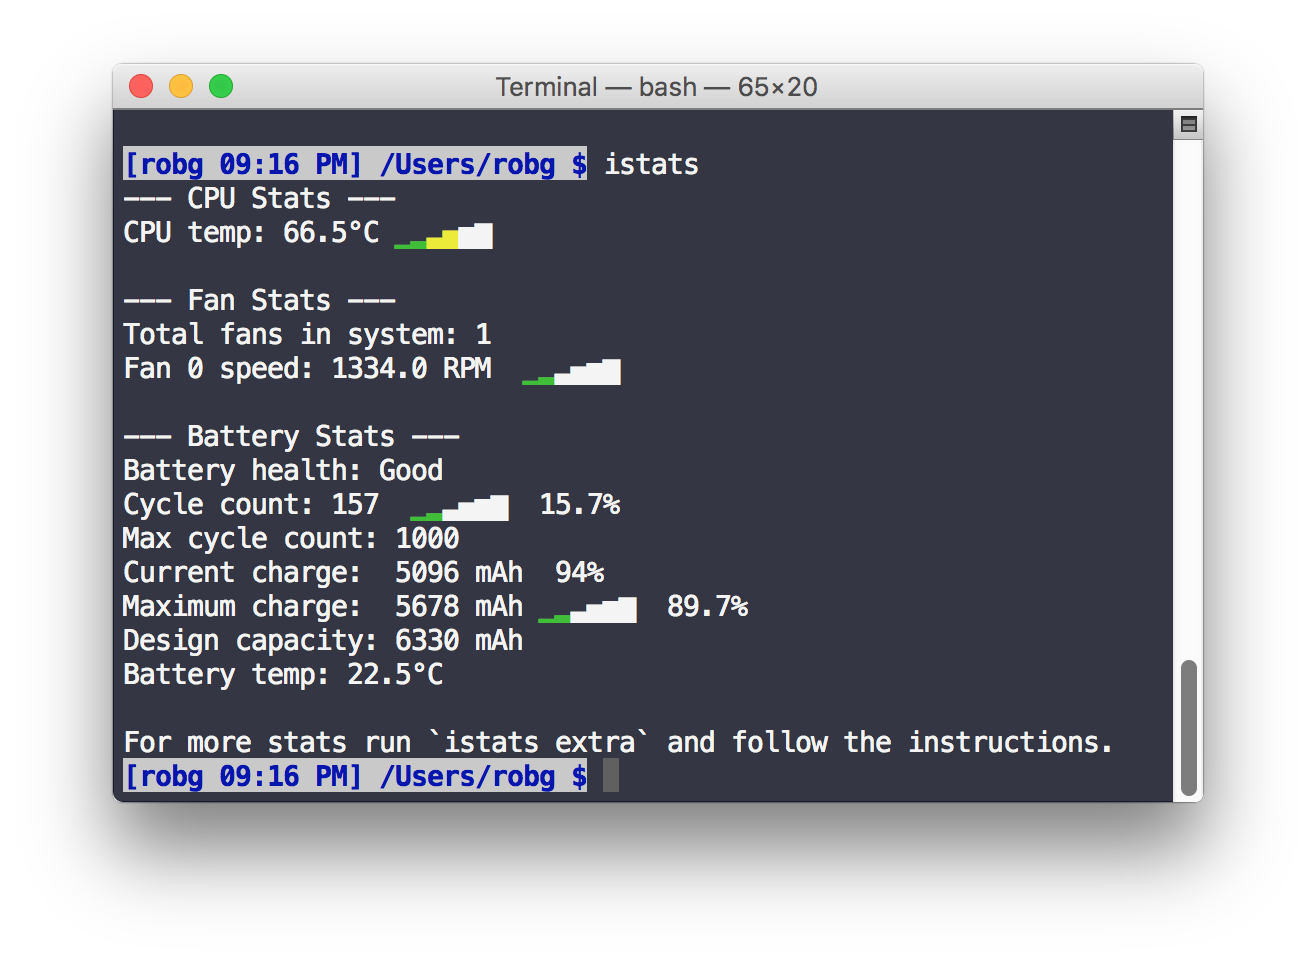
Installation is sinmple, via sudo gem install iStats. After a few minutes, iStats will be ready to use. In its simplest form, call istats by itself with no parameters. Normally I'd list the Terminal output here, but istats (by default, can be disabled) presents informatiomn with neat little inline bar graphs, so here's a screenshot:

This tool is especially useful on a laptop, as it provides an easy-to-read battery summary.

[continue reading…]


Frankenmac 2017: It’s (temporarily) dead, Jim

My purpose in writing this series of posts is to share everything about the hackintosh process, as experienced by a somewhat technical user who has built a number of PCs, and one prior hackintosh. That means sharing the good (the PC booted!), the bad (graphics card roadblock), and the ugly (today's story).

The ugly is this: Frankenmac is presently dead.

4pm Update: Frankenmac has returned to life. How? I'm not entirely positive, but I think it was a system date/time issue. I booted into single user mode (which worked) and noticed a lot of the system-installed files had dates of 1969 or 2037. Typing date at the command prompt returned some date in 2040. Yikes! I rebooted, set the date and time in the BIOS, reformatted the drive (for the sixth time), installed macOS, waited for the reboot…and it worked!

I was trying to get audio working after sleep (one of the last remaining little things to fix), and managed to get the machine in a state where it'd only boot to a black screen. No amount of web searching found a workable solution, so I thought I'd just start over. To do that, I needed to format the internal drive (using my iMac's disk dock). Disk Utility isn't enough, though, as the hidden EFI partition also needs to be removed, and you can't do that in Disk Utility. (You could, via a hidden debug menu, before Apple neutered Disk Utility in OS X 10.11.)

Some web digging found the solution: Write zeros to the boot sector with this command:

sudo dd if=/dev/zero of=/dev/disk1 bs=1024 count=1024

Very important: Don't do this unless you're absolutely positive you know what you're doing! You'll wipe a disk in a hurry, and there's no recourse. Also, see the comments for a much better way!

After zeroing the disk, I ran the installer again, and that's where things went south: The installer finishes, but upon reboot, when I tell the machine to boot from the internal drive, it starts the boot process, then reboots again.

And that's where things sit. So for now, Frankenmac is tabled while I seek the advice of experts.


Frankenmac 2017: From BIOS to installed macOS

Today, a look at how my Frankenmac went from the basic hardware BIOS setup screen to a usable (though not yet fully complete or natively bootable) macOS machine. If you're just tuning in, you may want to catch up…

  • The Beginnings: Resources, parts list, and ordering. (Steps 1 - 3)
  • The build: Turning the parts into something that powers on…but that's about it. (Steps 4 - 5)
  • The roadblock: A new graphics card and an old case and old power supply do not mix.
  • Transplanted: Frankenmac moves into a new home, with a new power supply, to get around the roadblock.
  • The parts list: A constantly-updated list of the parts I used and the cost of each part.

Now that Frankenmac is functional in its new home—roadblock averted—it's time to explain how I got to that point from the BIOS boot screen of step five a few days back. It's a tale filled with drama, dread, doubt, defiance, and in the end, domination. Well, OK, it's pretty much none of that, but I had a string of "D words" in my head, and had to use them somewhere…

[continue reading…]


Frankenmac 2017: Transplanted

After hitting a roadblock with the graphics card connector in Frankenmac's many-years-old case, yesterday I picked up a new case and power supply, and set out to transfer the machine to its new home.

The power supply

First, the boring stuff: The power supply I chose is a Thermaltake Toughpower 750W 80 Plus Gold. It works well, and (other than the CPU and motherboard power cables) is modular, so you only add the cables you need.

Very strangely (to me, anyway) is that Thermaltake packages its power cables in a nylon bag, as shown in the image at right. I'm not sure why—do people wander around with PC power supply cables often enough to require a sturdy carrying case? Very odd. Anyway, the power supply is nice and quiet, installed easily, and seems to do its job. But power supplies are boring…

[continue reading…]


Frankenmac 2017: The roadblock

Today I was going to write about the process of going from the BIOS boot screen to having macOS installed on Frankenmac 2017. That, however, will have to wait for tomorrow, due to a pretty big roadblock I hit while trying to get my GTX 1080 graphics card working. The roadblock looks like this:

On the left, that's my hand. More relevant to the problem is that six-pin PCIe connector (from the power supply) in my hand. On the right is my graphics card, with its eight-pin connector. Now, while this may look like a round-plug square-hole problem, I didn't think it was, mainly because of what I found on this page:

Because of both the physical design as well as the use of the sense signals, the six-pin power supply connector plug is backward compatible with the eight-pin graphics card socket. This means that if your graphics card has an eight-pin socket but your power supply has only six-pin connectors available, you can plug the six-pin connector into the eight-pin socket using an offset arrangement, as shown below.

And it's true, the plug fits just fine. And when I powered up Frankenmac, the card lit up and the fans spun. However, onscreen I saw a message about connecting the PCIe power cable to the card, so clearly, something was amiss.

[continue reading…]


Frankenmac 2017: The Build

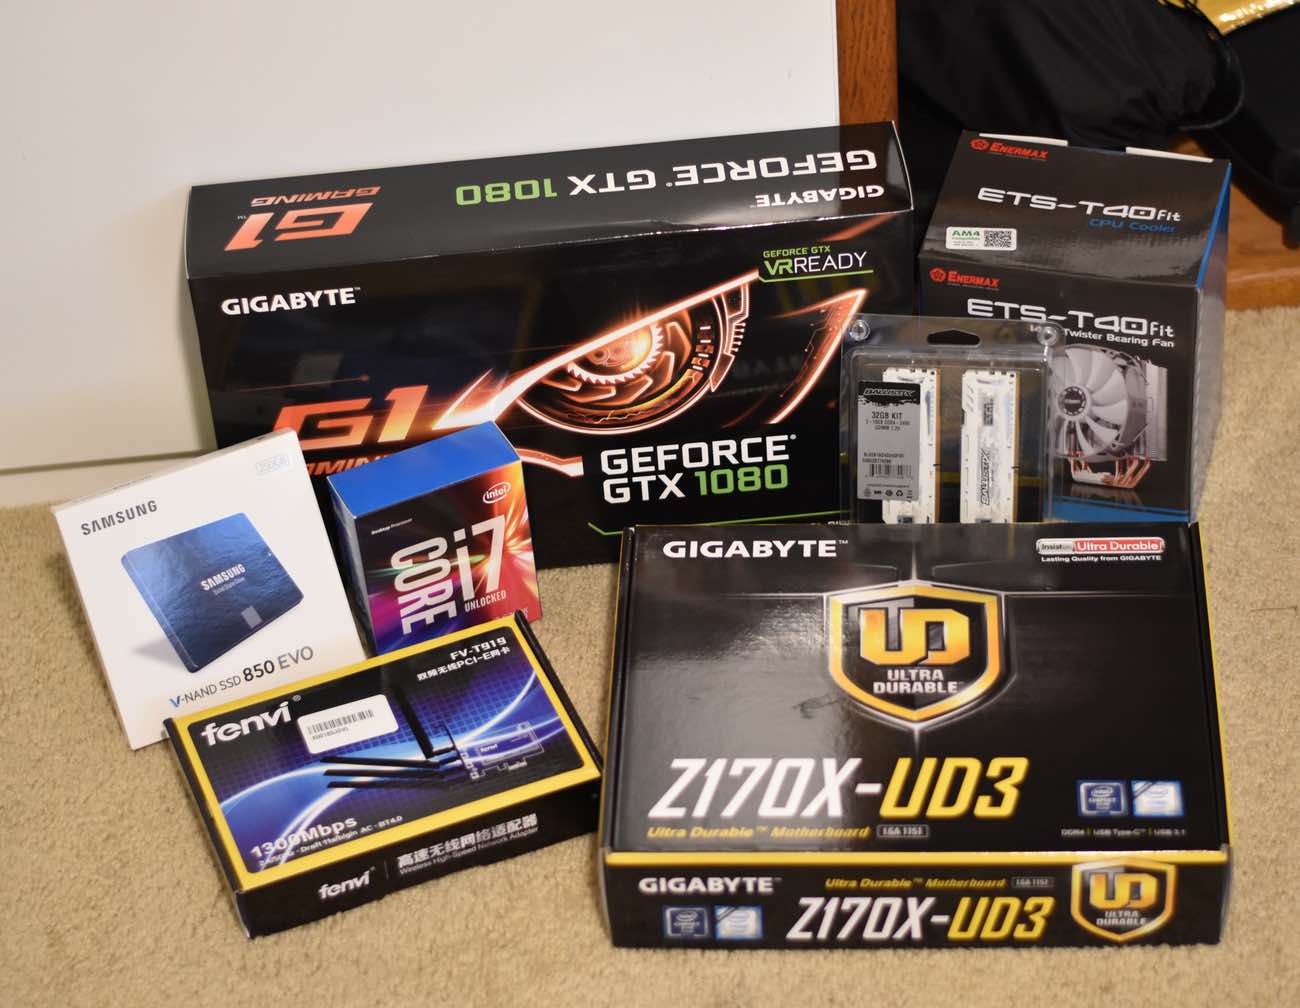
The continuing story of my homebuilt Mac, which I've named Frankenmac 2017. In the first installment, I covered resources, choosing parts, and ordering parts. Today, what do once the parts arrive, as mine did yesterday1Not shown: Keyboard, mouse, display, and the case.

Everything in that shot came via Amazon, except for the CPU heatsink/fan at the back right. That required more driving around than I'd care to admit (one business gone, one out of stock, another unexpectedly closed for the day), but I finally found something I liked. And with that, I had everything I needed to build the machine.

Note: This page contains an updated list (with links) of the parts I'm using in the project.

Now that I had the parts, it was time to try to turn them into a computer…

[continue reading…]


Frankenmac 2017: The Beginnings

It's been almost exactly nine years (wow!) since I last ventured into the land of Hackintoshes, or homebuilt PCs that can run macOS.

Back then, I built and used one, then wrote about the machine for Macworld, and they even lab tested it, where it held its own against real Macs costing much more.

Fast forward to 2017, and I've decided to tackle the project again. Why? Oddly, because there is a new Mac Pro coming, but it's a ways away. I want something I can use in the interim, without spending a huge amount of money on. When the new Mac Pro ships—assuming it's not an enhanced trash can design—I plan on upgrading, and the homebuilt Mac will become a gaming PC.

As I'm not writing about the project for Macworld this time around, I'm going to document things here on the blog as I go along. In today's installment, I cover the first steps in the process: online resources and parts decisions.

[continue reading…]