Skip to content

Mac OS X Hints

Create macOS automations using a little-known app

I use a lot of browsers for testing, so I created this launcher to make the process easier:

Browser launcher

You may be wondering what third-party tool I used to do this. Such things are possible in Keyboard Maestro through custom HTML prompts, but that's a lot of work. I'm sure there are other apps that can do similar things. Surprisingly, though, I used nothing more than a built-in app to create this launcher. The app has existed since macOS 10.15 (Catalina), but I doubt more than a handful of Mac users (outside its target user base) even know it exists—I didn't hear about it until yesterday.

What app is that? It's called Panel Editor, and the easiest place to find it is here: System Settings → Accessibility → Keyboard → Scroll down until you see the Panel Editor button.

[continue reading…]


Revisting old-school stock quotes

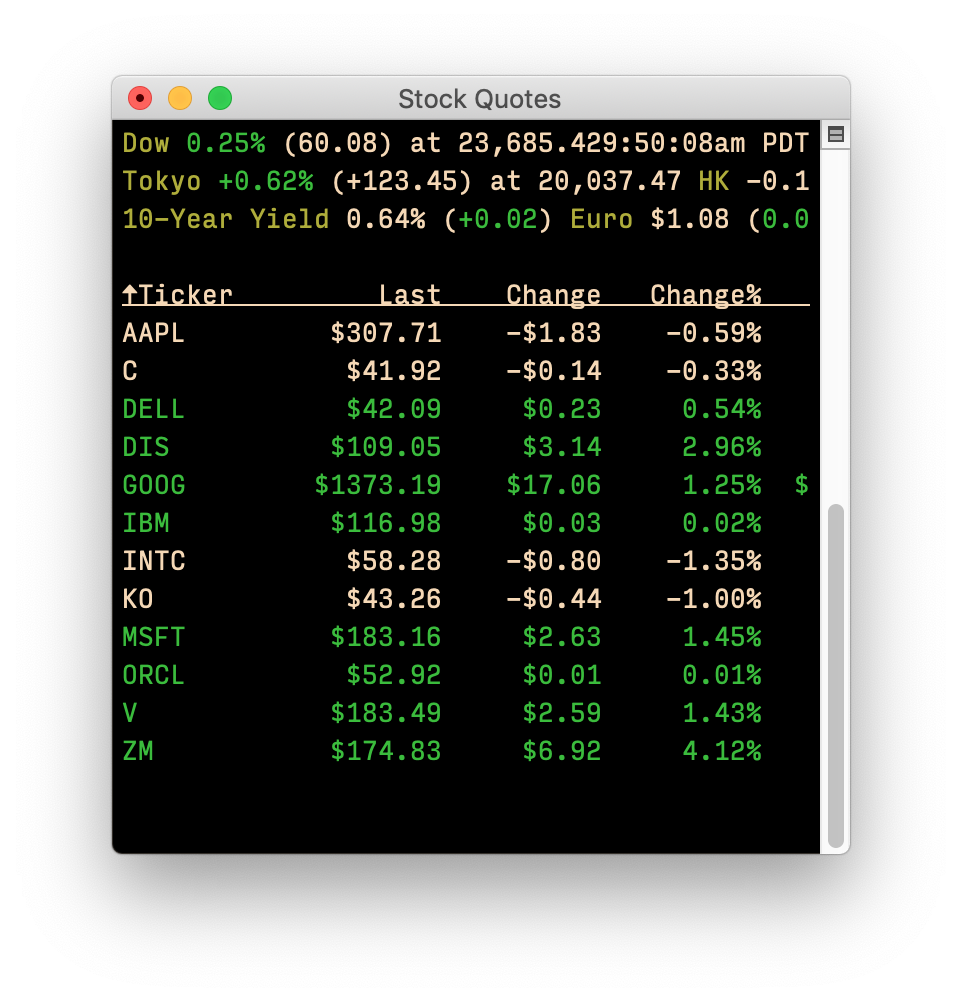
Back in 2020, I explained how to use Terminal to display stock quotes. Once set up, it looks something like the image at right, though that's a four-year old screenshot, so the prices are way off!

In a follow-up post, I showed how to quickly chart any of the stocks in your list. I've moved to a new Mac since then, which means (as always for me with a new Mac), I set it up from scratch.

Sometimes not everything makes the cut for the new Mac; in this case, my Terminal quotes were one of the things that didn't make the cut.

But I recently decided I wanted them back, and the good news is that it's gotten a bit simpler in four years since I last wrote about this. And I took the time to improve the stock charting macro, too.

Read on if you're interested in geeky Terminal stock quotes…

[continue reading…]


Fix a broken search in Photos

I was having some issues with my desktop photos (which I load from Photos) not working properly, and I noticed that one particular photo wouldn't preview in the Wallpaper System Settings panel. I noted the name, searched for it in Photos, and came up with no matches. Then I tried other searches, for photos I knew were there as I could see them onscreen, and still, no matches. Clearly Photos' search was broken.

I tried the (long, slow, painful) photo library rebuild process, but still, no search.

After much digging, I found a solution that works, which is to force Photos to rebuild its search database. Here's how to do that:

  1. Make sure you have good backup of Photos before you start, just in case.
  2. Also make sure you quit Photos before proceeding.
  3. In Finder, navigate to your Photos.library file and right-click on it. Select Show Package Contents from the pop-up menu.
  4. In the new window that opens, open the database folder. Inside of that folder is a search folder. Delete it, but leave the database folder open.

That's it, you're (almost) done. Now launch Photos, and it will start rebuilding the search database. This can take a while, depending on the size of your database—it took about five or so minutes for my 65,000ish image collection. There's also no onscreen indication that anything is happening, so use Finder: Open the newly-created search folder in Finder, and check the size of the psi.sqlite file. When the size stops changing, the rebuild is done.

I found this answer in a post by Michelle Lyons in this Apple Discussiosn thread. Michelle notes they found the answer elsewhere, but don't link to that source, so I don't know who originally discovered this. All I know is it worked for me!


Remove the AI bloatware from Logitech’s mouse driver

Note: Newer versions of LogiOptions+ have an on/off switch built into the app; find it in the app's Gear icon. The following is left as a historical footnote in the annals of the societal takeover by AI.

I absolutely love Logitech's Mac MX Keys keyboard and MX Master mouse (though I've now updated to version 3 of the mouse). And generally, their software has been pretty good, too.

But a recent update added an "AI Prompt generator" feature to the mouse side of things, which is absolute garbage—I'm not saying it's bad, as I've never tried it. It's garbage as in there's no reason my mouse needs an AI prompt generator connected to a button. Even worse, as Stephen Hackett discovered, it creates a folder (at the top level of your home folder, no less!) with the ugly name of ai_overlay_tmp.

Thankfully, when Stephen posted about this on Mastodon, user @flipneus posted the solution. And in case that post ever goes away, here it is:

In Finder, open the top-level Library → Application Support folder, then navigate to Logitech → LogiOptionsPlus, and open app_permission.json in your favorite pure text editor. Add a comma after the last } on the line before the final }, then add these lines:

 "aipromptbuilder": {
  "value": false
 }
}

When done, the end of the file should look like this (though the commands in yours may differ):

...
  },
 "backlight": {
  "value": true
 },
 "aipromptbuilder": {
  "value": false
 }
}

The important part is the added comma after (in my file) the backlight-related section. Save the file when done editing, and reboot.

After the reboot, you can delete the ai_overlay_tmp folder—and there won't be an AI generator option in the Logi Options+ app any more. (Alternatively, Stephen points out you can use SteerMouse to program the buttons on the Logitech.)

Thank you, Stephen and @flipneus!


A simple AppleScript to reveal System Settings’ anchors

I stumbled upon this simple AppleScript while looking for something else, but it's incredibly useful for scripting System Settings…so I'm posting it here in case the original site ever goes away.

To get the names of all the anchors for a selected pane in System Settings, just run this in Script Editor:

Run that on the Desktop pane, for instance, and the output is this:

{anchor "Dock" of pane id "com.apple.Desktop-Settings.extension" of application "System Settings", anchor "HotCorners" of pane id "com.apple.Desktop-Settings.extension" of application "System Settings", anchor "MenuBar" of pane id "com.apple.Desktop-Settings.extension" of application "System Settings", anchor "MissionControl" of pane id "com.apple.Desktop-Settings.extension" of application "System Settings", anchor "Shortcuts" of pane id "com.apple.Desktop-Settings.extension" of application "System Settings", anchor "StageManager" of pane id "com.apple.Desktop-Settings.extension" of application "System Settings", anchor "WindowsApps" of pane id "com.apple.Desktop-Settings.extension" of application "System Settings"}

With that information, you can jump directly to a given area in AppleScript with code like this:

I'd always wondered how people found the anchor names, and now I know.


More helpful help for Terminal commands

I use Terminal a fair bit, for any number of things. But I don't use it all the time, and that means I sometimes struggle to remember syntax of commands. "Was it rsync source destination or the other way around? Or was it ln that was backwards of what I thought it should be?"

You can open the man page for a command, of course, but sometimes there's so much there that finding the simple thing you want is tough. Enter tldr, installable via Homebrew or MacPorts. tldr skips most of the detail of the man pages, providing user-curated examples of how to use a given command.

As an example, here's the aforementioned rysnc command's man page:

[continue reading…]


Replace the mini music player that Apple took away

Back in the early Mac OS X iTunes era, there was a wonderful small window available that had control buttons, volume control, a visual progress bar, and a text display showing the artist, song, and album—it could even display a graphic equalizer in lieu of the artist-album-song info:

It was perfect. Sadly, it was last seen in iTunes 10 in Mac OS X 10.7. And today's version, while offering a mini mode, isn't nearly as mini or as functional as it used to be; read on for some details…

tldr summary: Mario Guzman's Music MiniPlayer is a full-retro near-perfect replacement for the original mini player. It's free, and I love it. If you're not into retro UI, Silicio on the App Store is also free and quite good, though you can't freely resize the window.

[continue reading…]


Speedier screen sharing startup in Sonoma

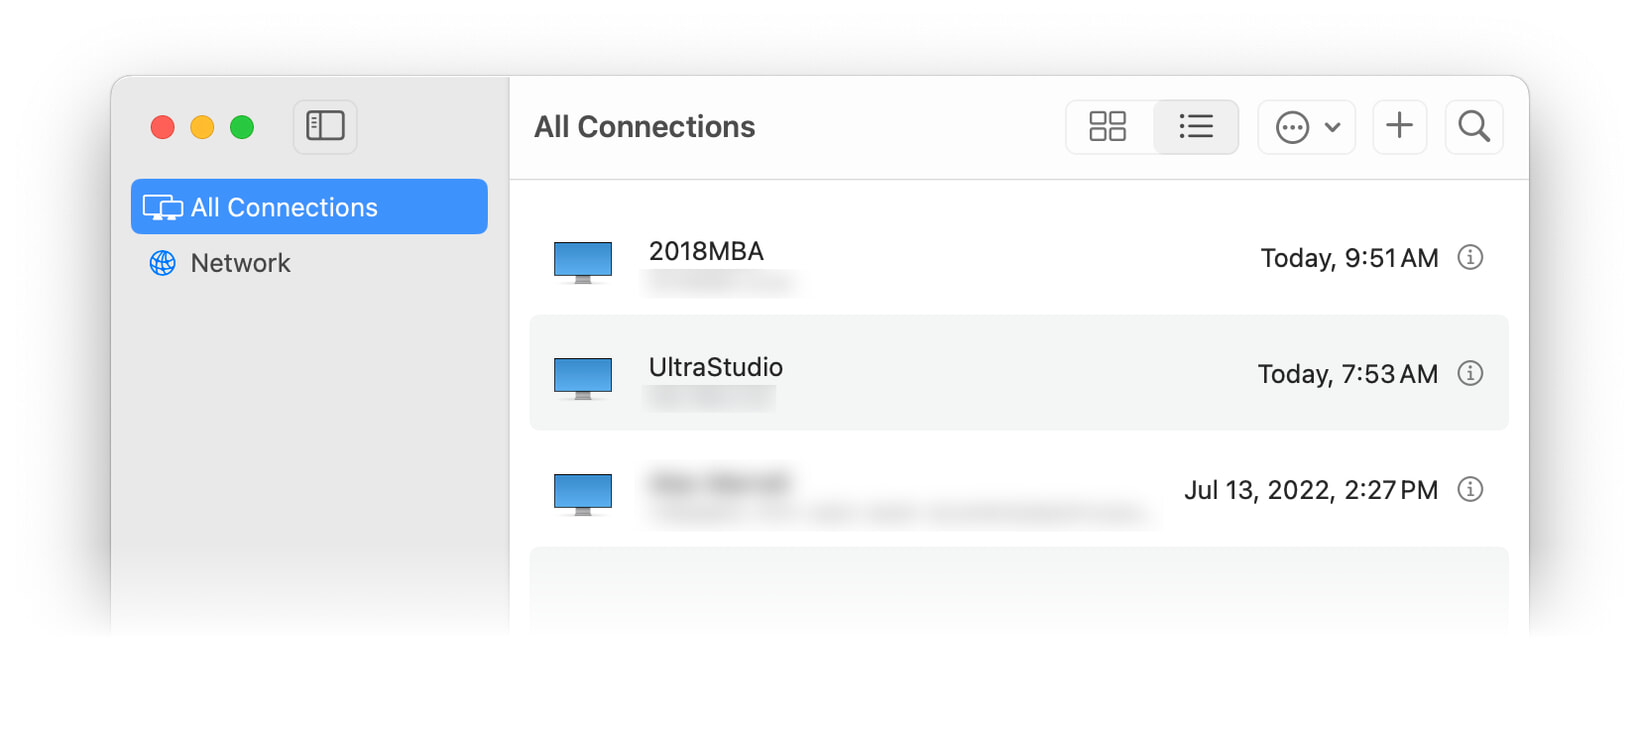
macOS Sonoma introduces a revised Screen Sharing application that lives in the Applications → Utilities folder1Though that's not really where it is, but that's not important…. It presents a list of recently-connected devices:

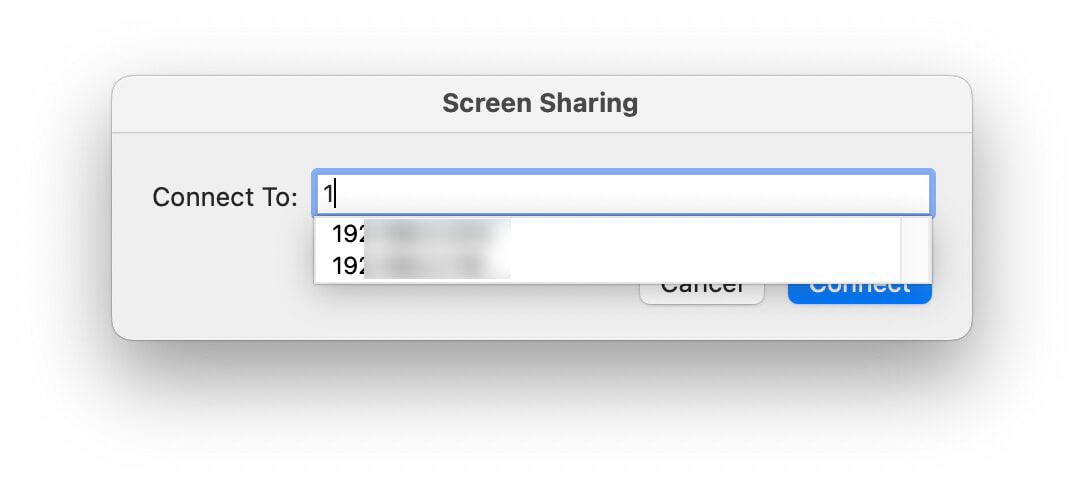
Select one, and you'll see the username and password dialog for that machine. While the GUI is nice to have, it's also slower than the old method: In Ventura and earlier, you could launch the (not in Utilities) Screen Sharing application, and start typing the IP address:

Select the host from the list, and you were done. This is much quicker than launching an app and waiting for the GUI, then navigating and selecting the desired machine. After just a bit of digging, I found a much quicker way to connect to my Macs in Sonoma (and earlier versions of macOS): The "vnc" URL scheme.

[continue reading…]


How to enable the “Beta updates” feature in macOS 13.4+

As of macOS 13.4, there's supposed to be a "Beta updates" button in System Settings > General > Software Update, as seen here:

Sure enough, that button is there on my iMac…but it wasn't on my MacBook Pro. Everything I read on Apple's site and elsewhere said it should simply exist, but it didn't. After much futzing around, I stumbled on the solution:

Click the ⓘ button on the Automatic Updates line to open the settings for automatic updates. My guess is that you'll find that the "Install macOS updates" setting is disabled. Enable it and click Done. The "Beta updates" feature may appear now, but if it doesn't, open that same panel again, and disable the "Install macOS updates" setting. You will now definitely see the "Beta updates" feature.

Nowhere in Apple's documentation does it mention that automatic updates must be enabled (at least once) in order to see the "Beta updates" feature. But that seems to be the case, as this fix has now worked for three Macs.