Skip to content

macOS Apps

Articles about OS X applications.

Get more details from transcode-video

While working on my massive Blu-ray ripping comparison, I wanted more information about what some of the transcode-video presets were doing. That is, if you pick --target big, exactly what settings are being used to rip the video?

It turns out there's --dry-run option for transcode-video that will tell you exactly that. (I've added some line breaks for readability here.)

What's neat is that you can also use this to see what the default options are for transcode-video when you don't supply it with any options. Just use the --dry-run parameter option but leave off any of the presets (i.e. --target big), and the output will show you the defaults.

In addition, you can use it on already-ripped media to get their details as well, regardless as to how you ripped the movie.

In a related vein, I was having issues with the above rip, because I thought that the surround sound track wasn't being ripped. Again, thanks to Don, I learned about a second command line option for transcode-video that reveals exactly what's in a ripped video.

[continue reading…]


Automatically prevent Messages’ URL Previews

I spend a lot of time in Messages in macOS, and one of its newer features is something called link previews, as seen at the right side of this text block.

While these previews can occasionally be useful, most of the time, they're just annoying: I'm talking with people I know, and we trust the links we send each other, so the preview is superfluous. Plus it makes it nearly impossible to rickroll anyone. But what's really annoying is that they make it impossible to send messages like this:

Oh, have you seen [paste copied URL]http://www.istocknow.com?

Try that, and the URL becomes a preview, and the question mark vanishes. It really interrupts conversational flow. You can prevent this by either writing text on both sides of the pasted URL, or surrounding the URL with angle brackets:

Oh, have you seen <[paste copied URL]http://www.istocknow.com>?

So there's the quick tip: To prevent link previews, surround your pasted links with either text on both sides, or more simply, angle brackets.

A cleaner solution: Use a dot at the front and end of the URL. Messages will make the dots vanish (if the URL is on its own line, otherwise it leaves the leading dot), and yet not preview the message. Thanks to reader Christopher for this tip—using it, URLs pasted on their own line are just clean URLs, no previews, no brackets. I updated my macro, changing the brackets to dots in the relevant steps. I haven't edited the version you see here, though.

But because I often forget to do that, I wanted it to be automatic. Thanks to Keyboard Maestro, I was able to make that happen: When I paste a link in Messages—using the system's standard ⌘V shortcut—it's enclosed in angle brackets. If I paste anything other than a URL, it's pasted as is. If I do want a preview, I can use the actual Paste menu item instead to get a link with preview.

This solution is perfect for my needs, as I always use ⌘V to paste, and I so rarely want to send a link preview that it's OK that it requires a trip to the menu. (If it ever does annoy me, I'll just remap Paste in Messages to ⌃⌘V or somesuch.

[continue reading…]


Semi-automatic Homebrew and video-transcode updates

As I've written about in the past, I use Don Melton's video transcoding tools to rip Blu-Ray discs. I also use Homebrew to install some of the transcode video dependencies, as well as other Unix tools.

Keeping these tools current isn't overly difficult; it only requires a few commands in Terminal:

$ brew update
$ brew upgrade
$ sudo gem update video_transcoding

My problem is that I often forget to do this, because—unlike most GUI Mac apps and the Mac App Store—there's no built-in "hey, there's an update!" system. Suddenly, two months and many revisions later, I finally remember (usually when I see a tweet about a new version of something.) So I thought I'd try to write my own simple update reminder.

I didn't really want a scheduled task, like a launchd agent—it's not like these tools need to stay current on a daily basis. (And one of them needs to run with admin privileges, which complicates things.) I just wanted something that would remind me if it'd been a while since I last checked for updates, and then install the updates if I wanted it to do so.

After mulling it over, I came up with a script that runs each time I open a Terminal window (which I do daily). The referenced script looks at the date on a check file, and asks me if I'd like to check for updates if that date is more than a week older than today's date. This is perfect for my needs: The reminder is automatic, but I can choose when to install the updates based on what I'm doing at the time. If it's been under a week since I last checked, nothing at all is different about my Terminal launch.

Read on for the script and implementation details. (Note: This is not written for a Terminal beginner, as it assumes some knowledge about how the shell works in macOS.)

[continue reading…]


Use sips to quickly, easily—and freely—convert image files

Quite often, I find myself with a number of images (screenshots, typically) that I'll want to convert from one format to another. If you search the Mac App Store, there are probably 300 apps that will let you do this; many are probably free. You could also use Automator, which has some good image conversion abilities, but can't (for example) specify the quality of a JPEG conversion.

But the best way I've ever found is to use a tool that's been included with every copy of macOS since the release of Mac OS X 10.3 (Panther) in October of 2003: A command line tool called sips. Yes, it requires using Terminal, but it's quite easy to use. sips can modify one file, or any number of files, converting from one format to another. You can also use sips to resize images, rotate images, and more.

Basic usage of sips is straightforward. (The following is written for Terminal neophytes, so apologies for any over-explaining). Assume you have an image named Beach party.tiff that you'd like to convert into a smaller JPEG, but with a relatively high quality setting. Here's how you'd do it using sips:

  1. Open Terminal, in Applications > Utilities.
  2. Type cd, then press the Space Bar, then drag in the folder that contains the image(s) to be converted. (Alternatively, you can use this tip to directly open the selected Finder folder in Terminal.)
  3. Type this, then press Return: sips -s format jpeg -s formatOptions 80 "Beach party.tiff" --out "Beach party.jpg"

When you press Return, sips will convert your image file—and it's really fast, even on larger files. The formatOptions item lets you set the quality of the JPEG in either percentage (as I used), or you can use words: low, normal, high, or best. Hopefully obviously, you specify the new filename after the --out string.

Note that the filename is enclosed in quotes. Those quotes are required, otherwise any spaces in your filenames will cause the command to break.

The real power of sips isn't in converting one file, though; it's in batch converting many files. Here's how to do that…

[continue reading…]


Peer into package installers before installation

Recently, I went looking for a new accounting package for Many Tricks. I found a few demos that I wanted to try, including Cognito's MoneyWorks line.

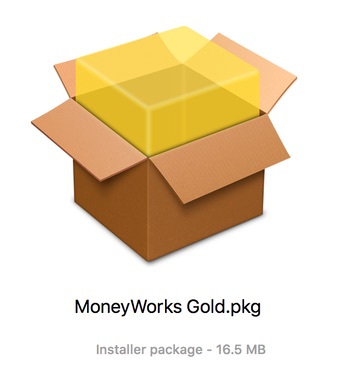
When I downloaded the demo, though, I was a bit surprised to see it was a package installer (.pkg extension). Typically, a package installer is used for system extensions, or other complex installs that have bits that go into many different places.

Being the curious sort, I wanted to see what the package would install before I installed it. You can do this the hard way, by drilling into the package in Finder (Right-click and Show Package Contents), but there's an app for that.

In the past, I've used CharleSoft's Pacifist to peer into packages. However, it's a $20 application, and somewhere along the line, I lost my registration information (or maybe I hadn't ever registered). In any event, I wondered if there were any less-expensive alternatives that did the same thing, as I only use an app like this maybe a few times a year.

A bit of web searching led me to the free Suspicious Package, so I gave it a try (hard to beat free). What I found is a very nicely done app that has replaced Pacifist for my occasional forays into packages.

[continue reading…]


Capture a series of screenshots and create a movie

At my day job with Many Tricks, we recently updated our time tracking app Time Sink to version two, and an updated web page was part of the project. For the header area, I wanted to create a time-lapse movie showing the Time Sink Activity Report window changing over an extended period of time (90 minutes), but compressed into a short amount of real-world time (about 14 seconds).

Before the how-to, here's how the final project came out:

To create the time-lapse movie, I'd need a series of screenshots recorded at a fixed interval. I wanted to shoot only the content area of the report window, as I didn't need the "chrome" for the movie (it would just distract from the content). So using the built-in screenshot tool wouldn't work—I didn't want to have to crop 500+ images (even by script).

While I'm sure there are many utilities that can do this (and I'll see them shortly in the comments), a brief web search found nothing that was designed to capture areas of the screen at a set interval. Luckily for me, though, Keyboard Maestro has a screenshot action that can record an area of the screen, along with repeat and wait actions I could use to capture a series of stills.

[continue reading…]


Easily insert special Mac characters using Keyboard Maestro

Note: I'm leaving this up for historical purposes, but there's a new special character palette in town, and the new one is vastly superior to this version. This hint might be useful for general Keyboard Maestro knowledge, but really, use the new version if you want a special character palette.

Between blog posts and documentation for Many Tricks, I find myself typing the Mac's "special character" symbols quite often: ⌘ (Command), ⌃ (Control), ⌥ (Option), ⇧ (Shift), and  (I think that's an Apple).

You can type some of these via keyboard shortcuts (the  is ⇧⌥K), or by using the Emoji & Symbols viewer. But I find both those methods clunky and slow; instead, I used Keyboard Maestro to create a couple of pop-up palettes that show all the characters:

I use two palettes because while I typically can paste the character itself, that doesn't work in some spots—like here in the WordPress' blog post editor, for instance. In those places, I need to use the HTML code for each character—so that cute little  appears when I insert &#xF8FF;. Ugh. Hence the character palette on the left and the HTML palette on the right.

When I want to insert a special character, I first type the activation keys for either the character (ccc) or HTML (hhh) palettes. When the palette appears, pressing one through five will insert the corresponding character or HTML code for that character. No keyboard shortcuts to memorize, no need to negotiate the Emoji & Symbols viewer. Just a few keystrokes, aided by a visual representation of each character, and I'm done.

As always, you can download these macros if you'd like to use/modify them for yourself.

[continue reading…]


An even easier way to use Excel’s Paste Special dialog

I recently explained how to use the keyboard in Excel's Paste Special dialog box, and this is a great timesaver on its own. But I use Paste Special a lot, especially with Formats, Formulas, and Values, so I made those three even easier to use via the keyboard…

Each one has its own direct keyboard shortcut, courtesy of Keyboard Maestro. Here's how I set it up; these instructions should work (with some changes, of course) for any app that can script keystrokes.

First, I created these macros in an Excel group, so they're only active when Excel is frontmost (no need to create global hot keys that you only use in one program). The actual macros are pretty trivial:

  1. Send Command-Control-V to bring up the Paste Special dialog
  2. Pause just long enough for the dialog to appear onscreen
  3. Send the chosen shortcut key—T, F, or V in my vase
  4. Send the Return key to execute the action

Then I just assigned each one to the same key used within the dialog, but with Command and Option to make it usable from anywhere within Excel.

[continue reading…]


Use the keyboard in Excel’s Paste Special dialog box

When I'm working in Excel, I spend a lot of time in the Paste Special dialog box—pasting formulas, pasting all but formats, pasting only formats, etc. You can call up the dialog with a keyboard shortcut (⌃⌘V), but it then looks like you're stuck using the mouse, because there aren't any keyboard shortcuts for the various actions. But really, there are…

(Note: This applies to the current version of Excel, i.e. the one in Office 365. Based on the comments, it apparently also works in Excel 2011 if you add the Command key.)

On Excel for Windows, one character in each option has an underline, indicating that option's keyboard shortcut. The good news is that these same shortcuts work on the Mac, even though they're not shown. (There is one apparent oversight: The O key should select Operation: None, but it doesn't seem to work on the Mac.)

Here are all the shortcuts, graphically:

Press the highlighted key, and that action will be selected; press Return to execute the chosen command, and you can use the Paste Special dialog without ever touching the mouse. (Note that the Paste Link action executes immediately when chosen, so it's a one-key operation.)

Because graphics are horrid for web searching, the text version of each shortcut, in alphabetical order, is shown below.

[continue reading…]


An alternative way to search Mail for senders and content

For better or worse—most might argue "worse"—I rely on the built-in macOS email client, annoyingly named Mail. (Why annoying? Try searching the web for help when you're having trouble with "Mail"…) I've tried nearly every third party replacement, but something (usually in the UI) always brings me back to Mail.

In any event, I have a huge database of messages that I've built up over the years, especially since starting at Many Tricks with Peter Maurer back in 2010. Often I want to find a message that's both from a particular person, and contains certain words. For example, I want to find all emails from Peter that contain the word "pricing."

The "correct" way to do this in Mail is to type From: in the search box, then start typing the name you want to match. As you type, a list of possible matches appears below the search box. Use the arrow keys (or reach for the mou…no, don't do that) to move down and select the right name from the list of matches, then press Return.

When you press Return with the desired name highlighted, the From: text in the search field turns into a token with the selected user's name, as seen at right. You can then continue typing the rest of your search terms; pricing in this case. Press Return again, and the search runs and returns the matches (17 messages in my example).

While this works fine, it's annoying and time consuming to interrupt the flow of typing a search by visually scanning a box, moving a selection, pressing Return, then starting to type again. So I thought I'd try the logical alternative—I just typed in my search query: from:peter maurer pricing. But this returned no matches.

On a lark, I tried reversing the order: pricing from:peter maurer.

Bingo! This works as expected, showing only messages from Peter that contain the word pricing. (Oddly, it finds two more matches than does the official method, and I cannot figure out why those messages are excluded from the other method's matches.)

[continue reading…]