Skip to content

View Unix man (help) pages in Preview

Today's tip goes well with yesterday's tip, which explained how to open any Finder item's folder in Terminal via Keyboard Maestro. Once in Terminal (and sometimes even when not in Terminal), I'll often want to check out the man page (help) for a given command.

You can do this directly in Terminal with man [name of command], of course, but then it opens on top of whatever you were working on, and you have to read it in Terminal. You could use another tab or window, but you'd still be reading in Terminal. There are times, too, when I'm writing about the Unix side of macOS, so I'm not even in Terminal, but still want to view a man page.

My solution to this problem is two different ways of doing the same thing: I open man pages as nicely-formatted PDFs in Preview. The method I use to get to that point depends on if I'm working in Terminal or not.

Update: I've modified the script and macro so that they properly handles two-argument man commands, such as man 3 printf.

In Terminal

Based on an old Mac OS X Hints tip, I created a very simple shell script:

The key to this little script is the -t option on the man command. From the (hehe) man man help file, here's what that does:

  -t     Use /usr/bin/groff -Tps -mandoc -c to format the manual page,
         passing the  output to stdout. The default  output format  of
         /usr/bin/groff -Tps -mandoc -c is  Postscript, refer  to  the
         manual  page  of /usr/bin/groff -Tps -mandoc -c for  ways  to 
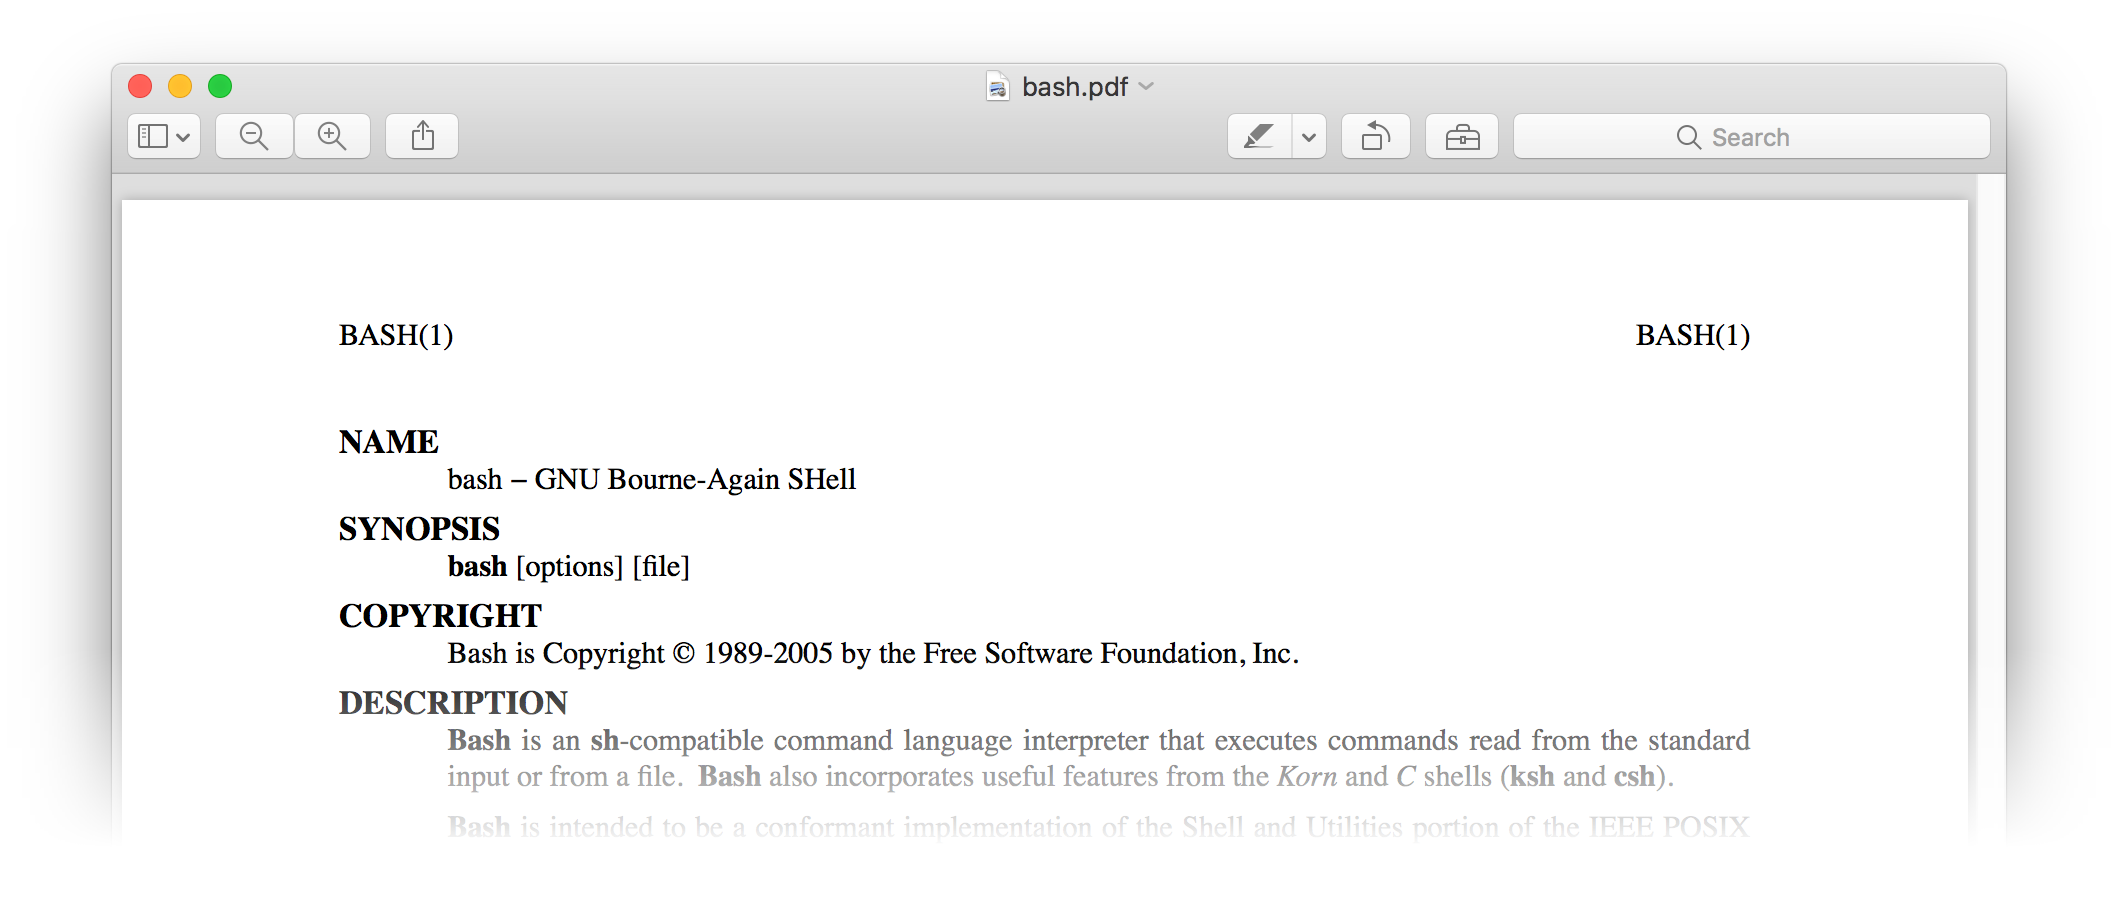
         pick an alternate format.

In other words, the -t converts the help page into a PostScript file, which is something that Preview can easily open (which is just what the last line of the script does).

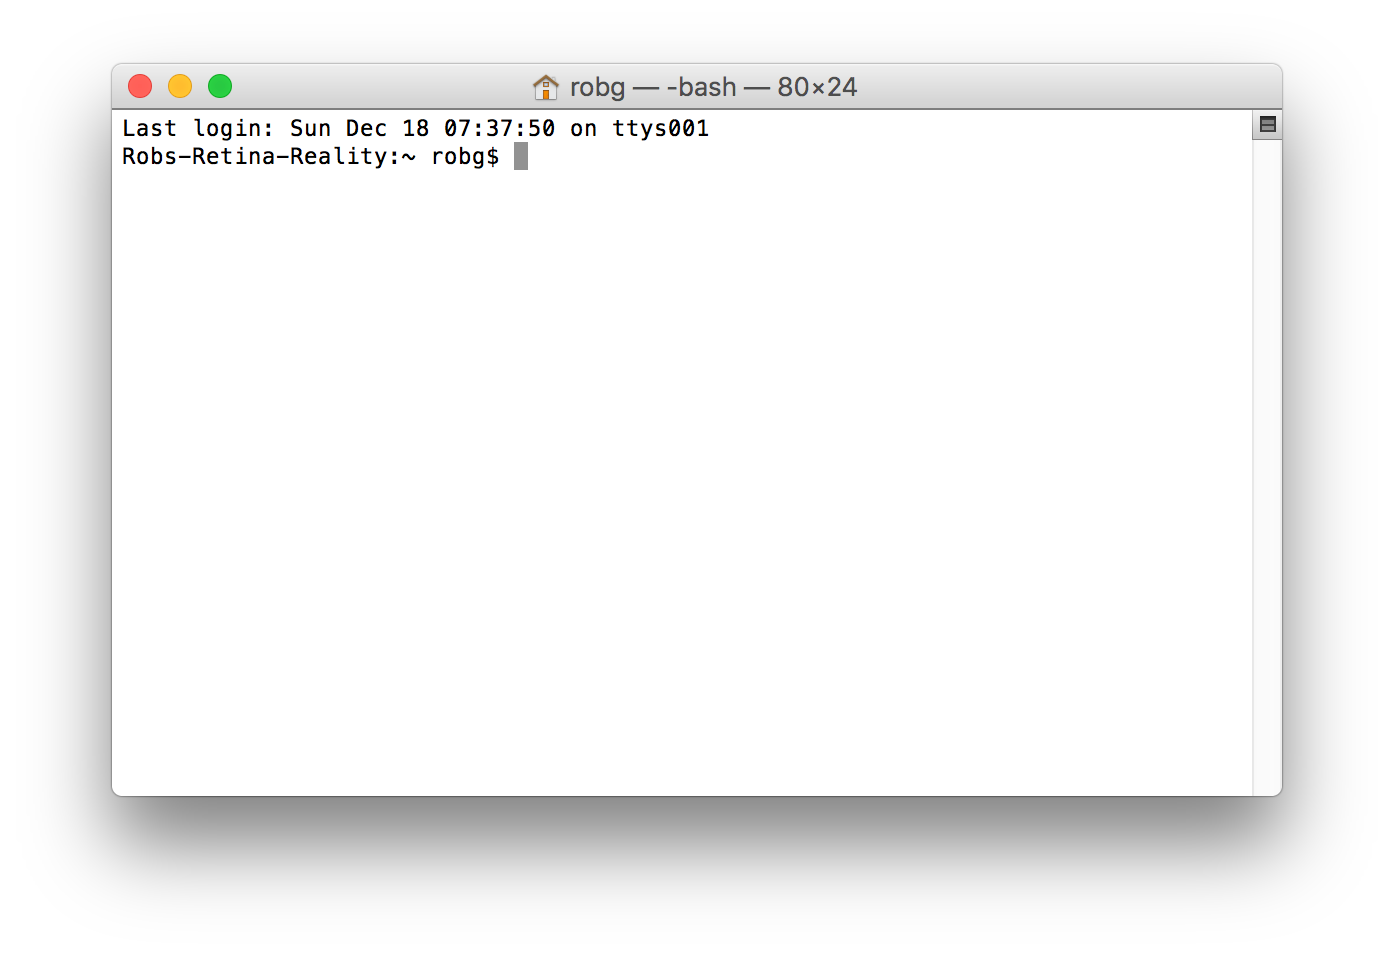
I named this script preman, because it uses Preview to open man pages. Once saved, I made it executable (chmod 755 preman), and I can then open any man page in Preview by typing, for instance, preman bash.

The output is nicely formatted, and by opening the man page in Preview, my Terminal session is uninterrupted. A quick adjustment with Moom, where I have a saved layout to position Preview and Terminal, and I can scan the man page while working in Terminal.

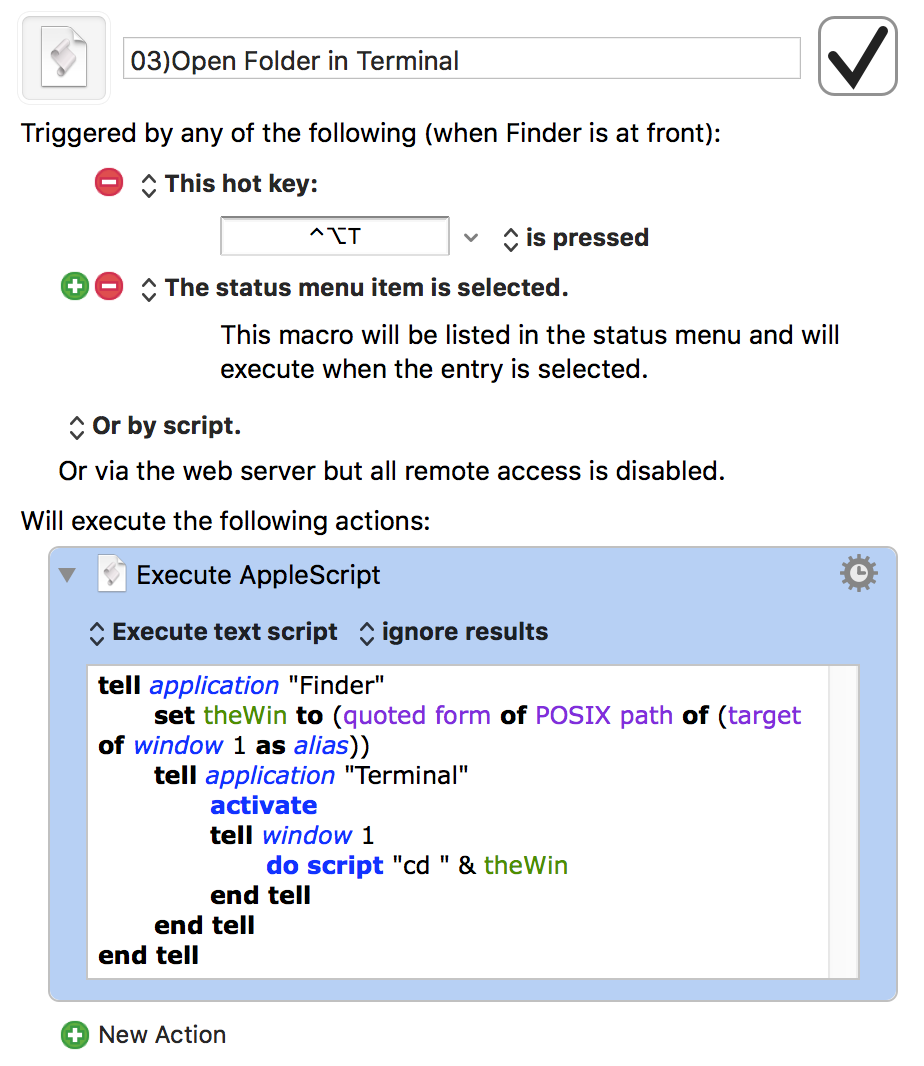
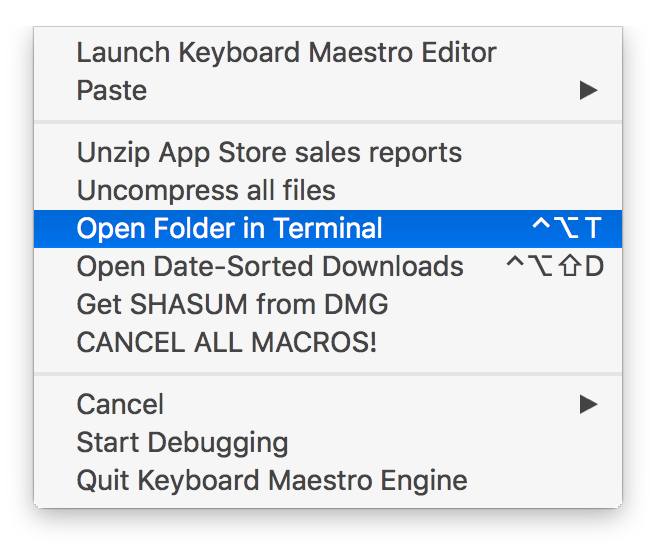
But what about when I'm not in Terminal? For that, I basically implement the same shell script, but with it set up to run within a Keyboard Maestro macro.

[continue reading…]


Open Terminal in selected Finder folder

Today's tip is just a re-implementation of a really old Mac OS X Hints AppleScript that lets you open a Terminal window with the working directory set to (i.e. cd'd into) the selected Finder folder.

This makes it really easy to jump into Terminal to do something from Finder, without having to do any mousing and minimal typing. What's new is that I've used Keyboard Maestro to turn the AppleScript into a macro that runs only in Finder, where it's available via hot key or menu bar trigger.

Here's the complete macro; download it now to look at and/or use as you wish. [Note: If you use iTerm2 instead of Terminal, you'll want to download this version instead. My good friend James, who runs Out of Control, did so. He tells me it works great.]

The name of the macro may look a bit odd—the 03) controls the sort order in the Keyboard Maestro menu bar item, and does not display when the menu is activated:

Keyboard Maestro also helpfully displays the assigned keyboard shortcut in the menu bar item, in case I've forgotten it.

[continue reading…]


The ridiculous economics of Real Racing 3

I used to play a lot of Real Racing 3 (RR3), an iOS auto racing game. Like, quite a lot. At one point, I owned all 132 cars available at that time, and had completed all the events.

To reach that point, I spent about $60 on in-app purchases—RR3's in-app purchases were really expensive. And yes, that's a lot, but I didn't own a console at the time, and I judged the app worth the cost of a console racing game. (I also took advantage of some programming glitches that enabled occasional free in-app purchase items; without these glitches, I doubt I would have made it as far as I did.)

Once I'd spent $60 and could go no further without spending more, I stopped playing; $60 was my limit. I did keep my iCloud save game file in case I wanted to revisit it someday. That someday was yesterday.

Since I left, the game has grown a lot: There are now 171 cars available, or 39 more than when I stopped playing. To finish the game again, I'd need to acquire (and upgrade) all of those cars (and race a huge number of new races). I thought "maybe it's OK to spend another $60 or so; it's been a few years."

But as I looked into what it might cost to finish the game, I found that the economics are still absolutely ridiculous. How ridiculous? About $3,665 ridiculous. Yes, I estimate it would cost me $3,665 to finish RR3. At that spending level, though, there are some other purchases I could consider…

Instead of finishing RR3, I could purchase a commercial-grade 48" gas range. Or I could buy a loaded Touch Bar Retina MacBook Pro with a 2.9GHz Core i7 CPU, 1TB SSD, and upgraded graphics.

The third option, though, is the best comparison: For $129 less than what I think it would cost me to finish RR3, I could purchase all of the following:

That's a full console-based driving setup, including a 65" 4K TV, for less than what I'd probably have to pay to finish (temporarily, until the next expansion) Real Racing 3. Yes, I'd say that's ridiculous.

But where do my numbers come from, and how could I possibly think it'd cost that much to finish the game?! Read the rest if you'd like the nitty-gritty on my $3,665 estimate.

[continue reading…]


Speed up your Mac via hidden prefs

Over my many years of running Mac OS X Hints, a huge number of defaults write hints were published.

For those who aren't aware, defaults write is a Terminal command that can be used to modify applications' settings. While you can use these commands to modify settings that are present in an app's Preferences panel, the more-common use of this command is to set non-visible (hidden) prefs that you won't find in the GUI.

Here are three of my favorites—three that not only perceptually but actually increase the speed of your interactions with your Mac. I still, to this day, execute these commands on any new Mac I set up.

Don't worry if you'd prefer to stay away from Terminal: I'll also show how to use the long-lived1The first reference to TinkerTool that I could find in the Mac OS X Hints archive was in March 2001. TinkerTool to set each of these options using a (relatively easy if crowded) GUI interface.

Tip 1: Change the sheet animation speed

Sheets are the attached windows that roll down from (and up into) the title bar of windows, such as the Save dialog in most macOS applications. The animation of these sheets, while visually appealing, does take some time.

Using this tip, you can basically eliminate the animation, greatly speeding the appearance and disappearance of sheets. Given how pervasive sheets are, this tip can save a lot of time each day. While the other tips offer actual speed improvements, they're nothing like the change you get by changing the sheet animation speed.

As a test, I opened and closed a Save sheet in TextEdit five times, both before and after applying this tip:

If you're scoring at home, that's a 47% reduction in the time required for just five cycles of a Save sheet.

[continue reading…]


At the 2017 Mac Pro launch event

Having sat through the introductory movie (great as always), the crowd hushes as Tim Cook strides to the stage…

As you know, I told everyone we had some great desktop Macs on the roadmap, and I'm here today to reveal our work to you: The 2017 Mac Pro.

First, let me say we know that this took too long for many of you. It's been three years since we last updated the Mac Pro, but we've been working super hard on it. Years and years of work went into what I'm about to show you. This thing is packed with amazing technology, and we think you're going to love it! So here it is…


Create an iTunes song info window using Keyboard Maestro

For those who aren't aware, Keyboard Maestro is a macro-creation tool, designed to help you automate routine tasks. But its powers let you do some really cool stuff, not all of which could be classified as automation. Such is the case with this project: Creating an iTunes song info pop-up window.

There are lots of apps out there—including Many Tricks own Butler—that can do this for you, and my Keyboard Maestro version is worse than most of those in many respects. However, I wanted to teach myself more about Keyboard Maestro, and this seemed like a good project with which to do so.

I use Buter's iTunes pop-up info window, which looks like this:

I wasn't really interested in the rating or volume controls (though they should be doable), but I wanted to see if I could get the album art and song info in a window via Keyboard Maestro. After some struggles, here's what I came up with in Keyboard Maestro:

My window is larger by design, so I can have somewhat more visible album art (aging eyes). And I can't decide on a background color or gradient, so it keeps changing—this was the look when I snapped the screenshot, but it's since changed again.

Read on if you'd like to know more about Keyboard Maestro, and how I used it to create this iTunes info window. (Note that this write-up assume some familiarity with Keyboard Maestro, though I try to explain each step in the process.)

[continue reading…]


A spreadsheet to track full-year running miles

2020 update: Everything here is out of date now, and has been replaced with my post on the 2020 version of the worksheet. In there you'll find a download link and full instructions. I'm leaving this article up only because it may be linked to from other places.

 
Update: I've created a much nicer run tracking workbook. Please use that version, as this one is out of date and is no longer maintained. I'm leaving it here because some of the "how to" bits are still applicable to the new version (and it's linked from that post), but I've removed the download link.

To help with my 2,016 miles in 2016 running project, I created an Excel workbook to track my progress. A couple people have asked for the workbook, so here it is…with some caveats and instructions.

First off, this was written for Excel 365, though it should work fine in recent versions of Excel. There is no Numbers version, there is no Google Sheets version…this is it. Start by downloading the worksheet and opening it in Excel.

The first thing you'll notice is that this is a really ugly workbook. The only thing I spent any time "prettifying" at all was the actual vs. goal chart, as that's the thing I tended to look at most often. The second thing you'll notice, depending on when you open the workbook, is that it appears nothing is working. The formulas will not work properly until January 1st, 2017.

[continue reading…]


A year on the run…literally

As I discussed in my first—and last—marathon completed post, I set a fairly outrageous goal way back in January: I decided I’d walk or run 2,016 miles in 2016. If you do the math on that, it means averaging 5.5 miles a day—for all 366 days in the year. I set this goal despite running probably no more than five miles in all of 2015. In my old "real world" job, my boss would call that a BHAG.

But as of yesterday, I have—amazingly to me—reached my goal, a full two weeks before year end. 2,016.74 miles in 352 days, or an average of 5.73 miles per day. (That'd be if I ran every day, which I didn't. More on that later.) After looking at this graph all year, it was incredibly satisfying to see it cross the goal line, even if by just a smidge—though there are two weeks left in the year.

I honestly can't believe I did it; it seems like a ridiculous amount of running to do in one year, unless you're a world-class marathoner, which I am definitely not.

If you'd like to see all sorts of geeky stats about a year's worth of running, as well as some of my thoughts on the experience, keep reading…

[continue reading…]


Detailed instructions for installing the transcode-video tools

My method of ripping Blu-ray discs relies on Don Melton's video_transcoding tools. While these tools work great, they are command-line only (i.e. Terminal required). In my guide, I glossed over the installation bit, referring back to Don's basic guide. But for those new to Terminal, even Don's instructions may be too light on the details.

Hence this detailed installation guide for Don's video_transcoding tools. This guide walks a new user through every step of the process, hopefully getting even someone brand new to Terminal up and running with Don's tools. This will only be of interest if you're having trouble getting the video_transcoding tools installed. If that's you, though, hopefully this will be helpful.

The entire installation of the video_transcoding tool set and all its dependencies will take place in Terminal, which is the direct line to the Unix core of macOS. Open Terminal, which you'll find in /Applications > Utilities, and you'll be greeted by a window with some text; something like this:

This lovely interface is where you'll spend the next chunk of time, installing the video_transcoding tools, and all the programs it uses to get its work done.

Note that this guide is not a detailed introduction to Terminal or Unix. (There are many such guides on the net, and if you're interested, they're well worth reading.) This guide is focused solely on how to use Terminal to install the video_transcoding tools, not how to use Terminal on its own. So let's get started…

[continue reading…]


Remap non-modifiable keyboard shortcuts in any app

Ever run into a program that has some pre-defined keyboard shortcuts you don't like? In most cases, they're associated with a menu item, which means you can use macOS' built-in keyboard shortcuts function to fix them. (In System Preferences > Keyboard > Shortcuts > App Shortcuts.)

But what if the shortcut isn't associated with any menu item? Such is the case in Excel 365, which replaced a couple easy-to-type shortcuts (⌃I and ⌃K for inserting and deleting rows and columns) with much harder to type versions: ⇧⌃= and ⌃-. If there's no corresponding entry in the app's menus, it seems impossible to remap the shortcuts—unless the app itself offers that feature, which Excel did in prior versions.

The good news is that it is possible to remap any keyboard shortcut in any app, as long as you're willing to add one more program to the mix: Some sort of macro app. My example uses Keyboard Maestro, but any app that can send a key sequence in response to another key sequence will do the trick.

[continue reading…]