Skip to content

macOS

Start Terminal sessions with a possibly-witty quote

Really long-time Unix users—as in mainframe-based Unix—are probably familiar with fortune. This silly little program grabs a random line from a collection of files holding quotes, sayings, jokes, etc. The Unix I used many decades ago would print an entry from fortune each time you started a new session. Here are some examples of what might greet me each time…

"It's a dog-eat-dog world out there, and I'm wearing Milkbone underware."
-- Norm, from _Cheers_

Mobius strippers never show you their back side.

All constants are variables.

Years ago, I had set up my Mac's Terminal to output a fortune each time I opened a new session (window). At some point, though, I forgot to set it up on a new system, so it was gone. While fortune isn't included in macOS' Unix core by default, there are many ways to get it back, and it's relatively simple to do so. Here's one way…

[continue reading…]


A much-improved special character palette

A while back, I created a pop-up character palette using Keyboard Maestro to allow easy insertion of the Mac's special characters (like , ⌘, ⌥, etc.). While this worked fine, I discovered a few major shortcomings:

  • I couldn't create more than one character without calling up the palette again.
  • I had to decide in advance if I wanted HTML entities or the actual characters.
  • Two palettes (HTML or character) meant two keyboard shortcuts to remember.
  • Adding characters to the palette was a real pain, because they had to be done twice.
  • I was out of digits for shortcuts, so I was going to have to change the palette structure.
  • It was slow: From calling up the palette to identifying which icon I wanted to use to selecting that icon, and then doing it all again for a second character was just really slow.

I set out to fix all of these issues, thinking I could use Keyboard Maestro's Custom HTML Prompt action, as I did for my iTunes song info window. And, in the end, that's what I used for the new-and-improved character palette:

This doesn't have to be used just for Mac special characters, of course. You could make yourself a customized pop-up for emoji, math symbols, whatever…

Read on for the how-to and download, if you'd like to put this to use…

[continue reading…]


Easily create animated GIFs from video via ffmpeg

I recently explained how I captured a series of screenshots and turned them into a movie. While I was working on my tweet about the write-up, I thought an animated GIF of the final movie would be a nice way to show what it was I was trying to do. So that's what I wound up doing:

So how did I create the animated GIF from the movie file? I know there are any number of great apps that will do this (ScreenFlow, for one), but I had another thought: While working on the animated screenshot movie (which I created using ffmpeg), I had happened to read about ffmpeg's ability to create high quality animated GIFs, so I thought I'd give that a try.

[continue reading…]


Get more details from transcode-video

While working on my massive Blu-ray ripping comparison, I wanted more information about what some of the transcode-video presets were doing. That is, if you pick --target big, exactly what settings are being used to rip the video?

It turns out there's --dry-run option for transcode-video that will tell you exactly that. (I've added some line breaks for readability here.)

What's neat is that you can also use this to see what the default options are for transcode-video when you don't supply it with any options. Just use the --dry-run parameter option but leave off any of the presets (i.e. --target big), and the output will show you the defaults.

In addition, you can use it on already-ripped media to get their details as well, regardless as to how you ripped the movie.

In a related vein, I was having issues with the above rip, because I thought that the surround sound track wasn't being ripped. Again, thanks to Don, I learned about a second command line option for transcode-video that reveals exactly what's in a ripped video.

[continue reading…]


Automatically prevent Messages’ URL Previews

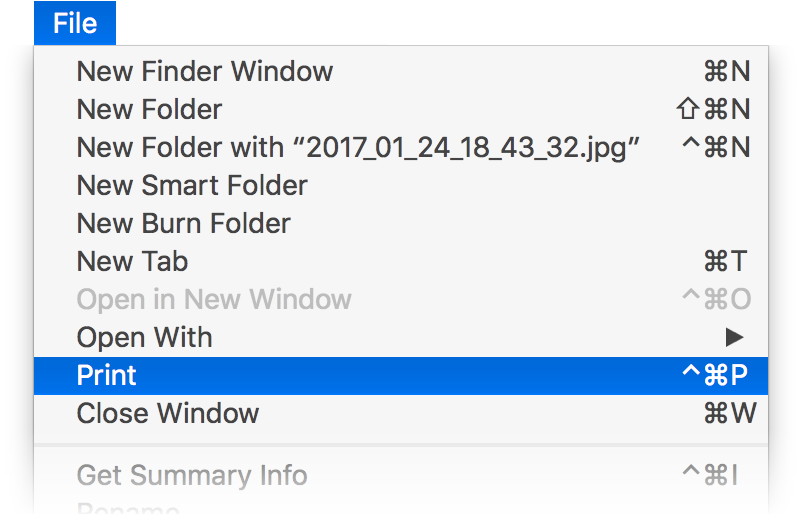
I spend a lot of time in Messages in macOS, and one of its newer features is something called link previews, as seen at the right side of this text block.

While these previews can occasionally be useful, most of the time, they're just annoying: I'm talking with people I know, and we trust the links we send each other, so the preview is superfluous. Plus it makes it nearly impossible to rickroll anyone. But what's really annoying is that they make it impossible to send messages like this:

Oh, have you seen [paste copied URL]http://www.istocknow.com?

Try that, and the URL becomes a preview, and the question mark vanishes. It really interrupts conversational flow. You can prevent this by either writing text on both sides of the pasted URL, or surrounding the URL with angle brackets:

Oh, have you seen <[paste copied URL]http://www.istocknow.com>?

So there's the quick tip: To prevent link previews, surround your pasted links with either text on both sides, or more simply, angle brackets.

A cleaner solution: Use a dot at the front and end of the URL. Messages will make the dots vanish (if the URL is on its own line, otherwise it leaves the leading dot), and yet not preview the message. Thanks to reader Christopher for this tip—using it, URLs pasted on their own line are just clean URLs, no previews, no brackets. I updated my macro, changing the brackets to dots in the relevant steps. I haven't edited the version you see here, though.

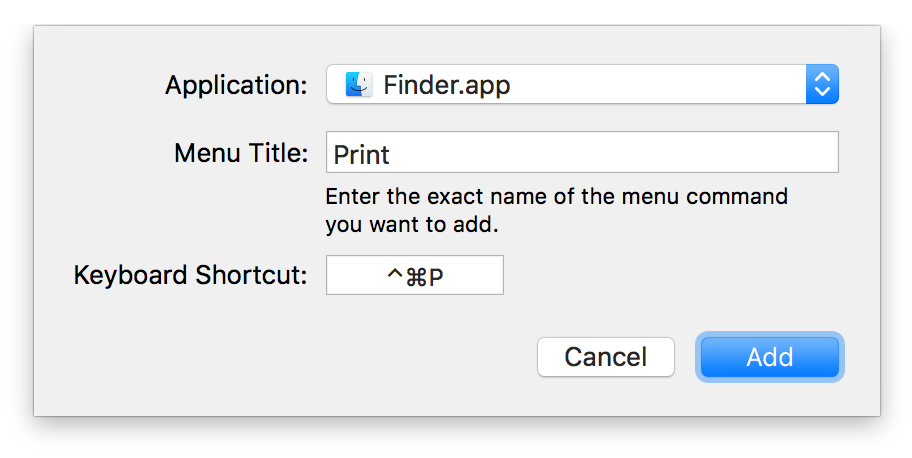
But because I often forget to do that, I wanted it to be automatic. Thanks to Keyboard Maestro, I was able to make that happen: When I paste a link in Messages—using the system's standard ⌘V shortcut—it's enclosed in angle brackets. If I paste anything other than a URL, it's pasted as is. If I do want a preview, I can use the actual Paste menu item instead to get a link with preview.

This solution is perfect for my needs, as I always use ⌘V to paste, and I so rarely want to send a link preview that it's OK that it requires a trip to the menu. (If it ever does annoy me, I'll just remap Paste in Messages to ⌃⌘V or somesuch.

[continue reading…]


A deep dive into HandBrake and Video Transcoding

An obvious interest area of mine is in ripping (and watching) movies using my Mac. I've talked about everything from installing the tools I use to how I rip to how to make sure I update the ripping tools. And though I've included some comparison pictures in the how-I-rip article, I've never done a deep dive into the various ripping options and how they compare on three key fronts:

  • Speed: Faster is better; measured in minutes required to rip.
  • Size: Smaller is better; measured in MB of drive space used.
  • Quality: Higher is better; the closer the image quality is to the original, the better.

An ideal rip would be one that happens in seconds, saves into a 10KB file, and has quality matching the original. The reality, though, is far from the ideal. Ripping a movie involves making trade-offs between those three competing measures: Maximizing any one measure requires some sort of tradeoff with one or both of the other measures.

After ripping so many DVDs and Blu-rays over the years, I was curious about how HandBrake and Don Melton's Video Transcoding tools handle those tradeoffs, so I decided to do some testing.

If you'd like to see what I discovered about ripping time, file sizes, and—with lots and lots of frame grabs—image quality, keep reading…

[continue reading…]


Prevent silly mistakes by modifying keyboard shortcuts

A tweet I sent last night triggered my memory of this very-useful tip that I've gotten worse about remembering to implement over the years. First, the tweet…

The issue, of course, is the macOS ships with ⌘O (Open) and ⌘P (Print) as pre-assigned keyboard shortcuts in Finder. Select a bunch of files to open, reach for the O and miss by just a touch, and you've started a dozen print jobs. Whoops!

Years ago on macosxhints.com, there was one of those "duh!" tips with an easy solution to this (and other similar) issues: Reassign the stock keyboard shortcuts. Here's a "fixed" Print shortcut in Finder, for example:

And with that simple change, no more accidental print jobs.

Changing the shortcuts is easy; start by opening System Preferences > Keyboard, then going to the Shortcuts tab. Scroll to the bottom of the left-hand pane, select App Shortcuts, then click the plus sign. You can then select an app—or all apps—from the first pop-up menu, enter the menu item to change/assign in the first input box, and type the shortcut to use in the third:

You can do this for as many of the stock shortcuts as you wish…and obviously, you can add some that you feel Apple left out. Read on to see what I change in the Shortcuts section—not just for applications, but in all of the sections (Launchpad & Dock, Mission Control, etc.)

[continue reading…]


Re-center the Spotlight search window

Starting with OS X 10.11 (El Capitan), the Spotlight search box was no longer anchored to the menu bar. Instead, it became a floating box you could move around. While this is incredibly useful, I couldn't figure out how to get the box back to center, so I did what any normal person would do: I asked the Twitterverse … and as hoped, the Twitterverse came through:

It really is that simple—just click-and-hold on Spotlight's menu bar icon to recenter the search box. And now, a gratuitous video (because I need all the practice I can get with screen recordings!).

Hooray for simple solutions, boo for Apple hiding them from easy discovery: The built-in help references the ability to move the box, but not how to move it back.


Semi-automatic Homebrew and video-transcode updates

As I've written about in the past, I use Don Melton's video transcoding tools to rip Blu-Ray discs. I also use Homebrew to install some of the transcode video dependencies, as well as other Unix tools.

Keeping these tools current isn't overly difficult; it only requires a few commands in Terminal:

$ brew update
$ brew upgrade
$ sudo gem update video_transcoding

My problem is that I often forget to do this, because—unlike most GUI Mac apps and the Mac App Store—there's no built-in "hey, there's an update!" system. Suddenly, two months and many revisions later, I finally remember (usually when I see a tweet about a new version of something.) So I thought I'd try to write my own simple update reminder.

I didn't really want a scheduled task, like a launchd agent—it's not like these tools need to stay current on a daily basis. (And one of them needs to run with admin privileges, which complicates things.) I just wanted something that would remind me if it'd been a while since I last checked for updates, and then install the updates if I wanted it to do so.

After mulling it over, I came up with a script that runs each time I open a Terminal window (which I do daily). The referenced script looks at the date on a check file, and asks me if I'd like to check for updates if that date is more than a week older than today's date. This is perfect for my needs: The reminder is automatic, but I can choose when to install the updates based on what I'm doing at the time. If it's been under a week since I last checked, nothing at all is different about my Terminal launch.

Read on for the script and implementation details. (Note: This is not written for a Terminal beginner, as it assumes some knowledge about how the shell works in macOS.)

[continue reading…]


Use sips to quickly, easily—and freely—convert image files

Quite often, I find myself with a number of images (screenshots, typically) that I'll want to convert from one format to another. If you search the Mac App Store, there are probably 300 apps that will let you do this; many are probably free. You could also use Automator, which has some good image conversion abilities, but can't (for example) specify the quality of a JPEG conversion.

But the best way I've ever found is to use a tool that's been included with every copy of macOS since the release of Mac OS X 10.3 (Panther) in October of 2003: A command line tool called sips. Yes, it requires using Terminal, but it's quite easy to use. sips can modify one file, or any number of files, converting from one format to another. You can also use sips to resize images, rotate images, and more.

Basic usage of sips is straightforward. (The following is written for Terminal neophytes, so apologies for any over-explaining). Assume you have an image named Beach party.tiff that you'd like to convert into a smaller JPEG, but with a relatively high quality setting. Here's how you'd do it using sips:

  1. Open Terminal, in Applications > Utilities.
  2. Type cd, then press the Space Bar, then drag in the folder that contains the image(s) to be converted. (Alternatively, you can use this tip to directly open the selected Finder folder in Terminal.)
  3. Type this, then press Return: sips -s format jpeg -s formatOptions 80 "Beach party.tiff" --out "Beach party.jpg"

When you press Return, sips will convert your image file—and it's really fast, even on larger files. The formatOptions item lets you set the quality of the JPEG in either percentage (as I used), or you can use words: low, normal, high, or best. Hopefully obviously, you specify the new filename after the --out string.

Note that the filename is enclosed in quotes. Those quotes are required, otherwise any spaces in your filenames will cause the command to break.

The real power of sips isn't in converting one file, though; it's in batch converting many files. Here's how to do that…

[continue reading…]