Skip to content

Terminal

Remove the macOS Catalina guilt trip from macOS Mojave

May 26 2020 Update: The 2020-003 Security Update for Mojave will reset the red flag (and deprecate the command used to ignore the update). However, these steps do still work, so you just have to repeat Miles' solution again. And after you do, do not open the Software Update panel, or the red badge will return. (But if it does, just run the commands yet again.)

May 9 2020 Update: Commenter Miles Wolbe has come up with a much better solution. Ignore everything in this tip, and just run this Terminal command:

sudo softwareupdate --ignore "macOS Catalina" && defaults delete com.apple.preferences.softwareupdate LatestMajorOSSeenByUserBundleIdentifier && softwareupdate --list

If you're interested in why this works, Miles explains it in more detail. I've tested this method, and it works—no more agent required!

I have no plans to move my main iMac to macOS Catalina, at least for the forseeable future. There are two key apps I use—Fujitsu's ScanSnap scanner software and the Many Tricks' accounting app—that are both 32-bit. In addition, there are changes in Catalina relative to permissions that make it somewhat Vista like and slow down my interaction with the system. (My MacBook Air is my "production" Catalina Mac, and I have an older retina MacBook Pro that I use for Catalina betas.)

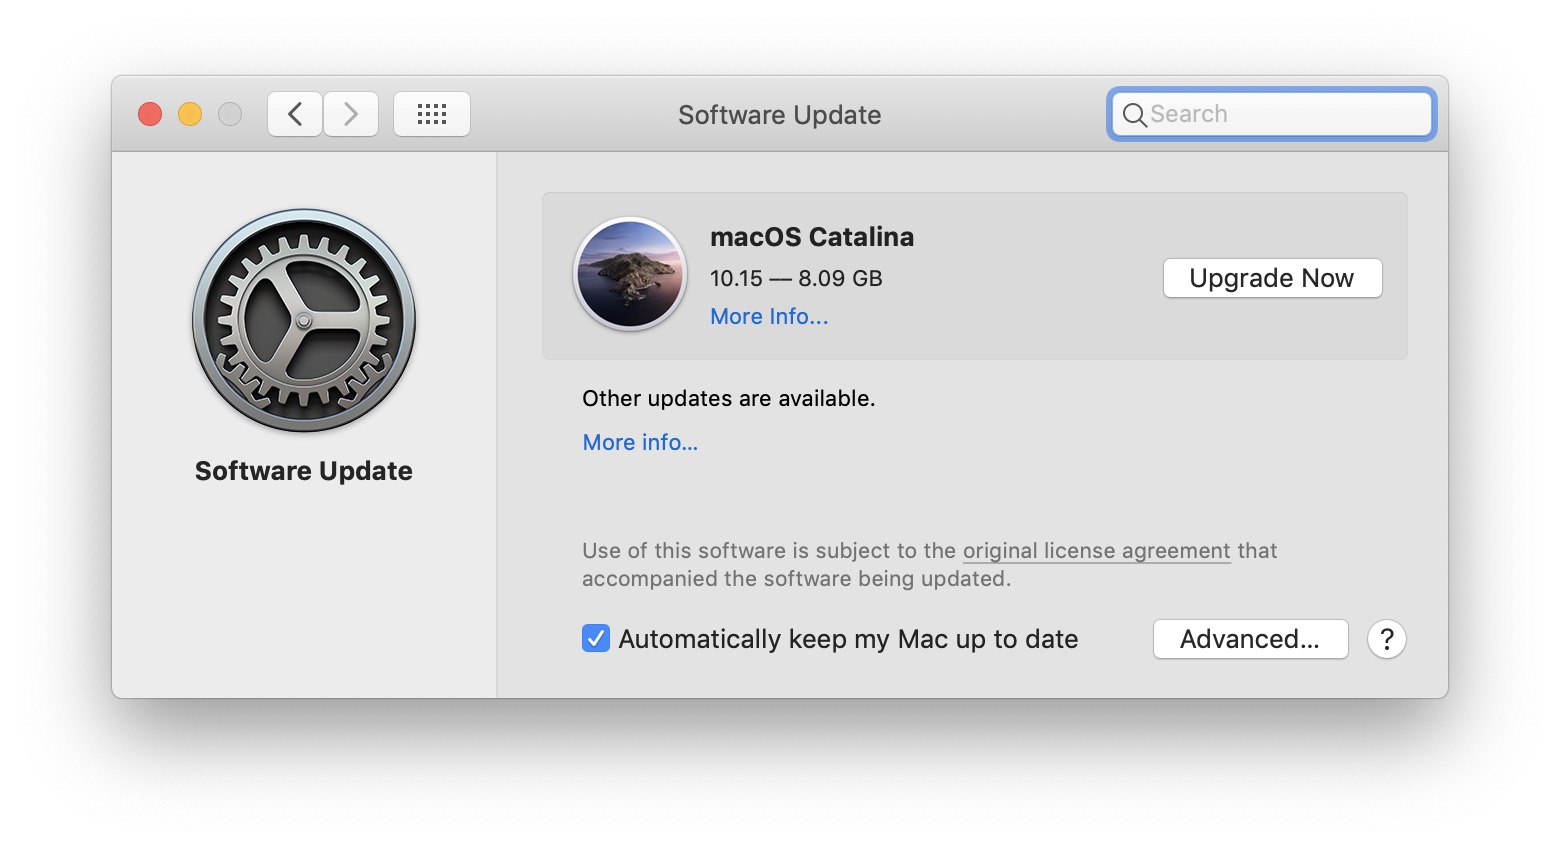
But Apple really wants people to update to Catalina, so they let you know about Catalina…constantly, it seems. In System Preferences > Software Update, you'll see this…
[continue reading…]


How to auto-crop huge images with ImageMagick

In my recent post A new set of Hubble deep space iMac retina desktops, I included a set of auto-cropped 5120x2880 desktops. In that post, I wrote:

These images were automatically cropped from the master image (after I cropped that; more detail on what I did is coming in a follow-up post), via ImageMagick.

So this would be that post: How to auto-crop huge images using ImageMagick. If you're not familiar with it, ImageMagick is a set of command-line tools to manipulate images. There are a number of ways to install ImageMagick, but I used Homebrew (brew install imagemagick).

[continue reading…]


Easily see any app’s bundle identifier

I occasionally need to help one of our customers get the bundle identifier for a given app, for some purpose with one of our apps. While the task isn't complicated—the value is stored in a file named Info.plist within each app bundle—it's not something that's necessarily easy to explain to someone who doesn't have a lot of Mac experience.

I figured there must be a less-complicated solution, and I was right, though it's probably higher on the geek factor. After some searching, I found this thread at Super User, which offers a number of solutions. The simplest—and always working, in my experience—was the very first one: Open Terminal and run this command:

osascript -e 'id of app "Name of App"'

The "Name of App" is replaced with the name of the app as it appears when hovering over its Dock icon. For Excel, for example, it'd be:

osascript -e 'id of app "Microsoft Excel"'

Run that command, and it returns com.microsoft.Excel, which is just what I need—I just have the customer copy the output and email it back to me.


View app-specific log messages in Terminal

March 29 2018 Update:

When this tip was first posted, it didn't work right: The log command ignored the --start, --end, and --last parameters. Regardless of what you listed for parameters, you'd always get the entire contents of the log file. I'm happy to note that this has been resolved in macOS 10.13.4, as log now functions as expected:

$ log show --last 20s --predicate 'processImagePath CONTAINS[c] "Twitter"'
Filtering the log data using "processImagePath CONTAINS[c] "Twitter""
Skipping info and debug messages, pass --info and/or --debug to include.
Timestamp                       Thread     Type        Activity             PID    TTL  
2018-03-30 09:26:15.357714-0700 0xc88a8    Default     0x0                  5075   0    Twitterrific: (CFNetwork) Task <9AD0920A-7AE7-4313-A727-6D34F4BBE38F>.<250> now using Connection 142
2018-03-30 09:26:15.357742-0700 0xc8d7a    Default     0x0                  5075   0    Twitterrific: (CFNetwork) Task <9AD0920A-7AE7-4313-A727-6D34F4BBE38F>.<250> sent request, body N
2018-03-30 09:26:15.420242-0700 0xc88a8    Default     0x0                  5075   0    Twitterrific: (CFNetwork) Task <9AD0920A-7AE7-4313-A727-6D34F4BBE38F>.<250> received response, status 200 content K
2018-03-30 09:26:15.420406-0700 0xc8d7a    Default     0x0                  5075   0    Twitterrific: (CFNetwork) Task <9AD0920A-7AE7-4313-A727-6D34F4BBE38F>.<250> response ended
 --------------------------------------------------------------------------------------------------------------------
Log      - Default:          4, Info:                0, Debug:             0, Error:          0, Fault:          0
Activity - Create:           0, Transition:          0, Actions:           0
$

This makes it really easy to get just the time slice you need from the overly-long log files. You can use s for seconds, m for minutes, h for hours, and d for days as arguments to these parameters.

This article provides a nice overview on interacting with log and predicates to filter the output—there's a lot you can do to help figure out what might be causing a problem.

And now, here's the rest of the original post…

[continue reading…]


Revisiting a PDF page counting script

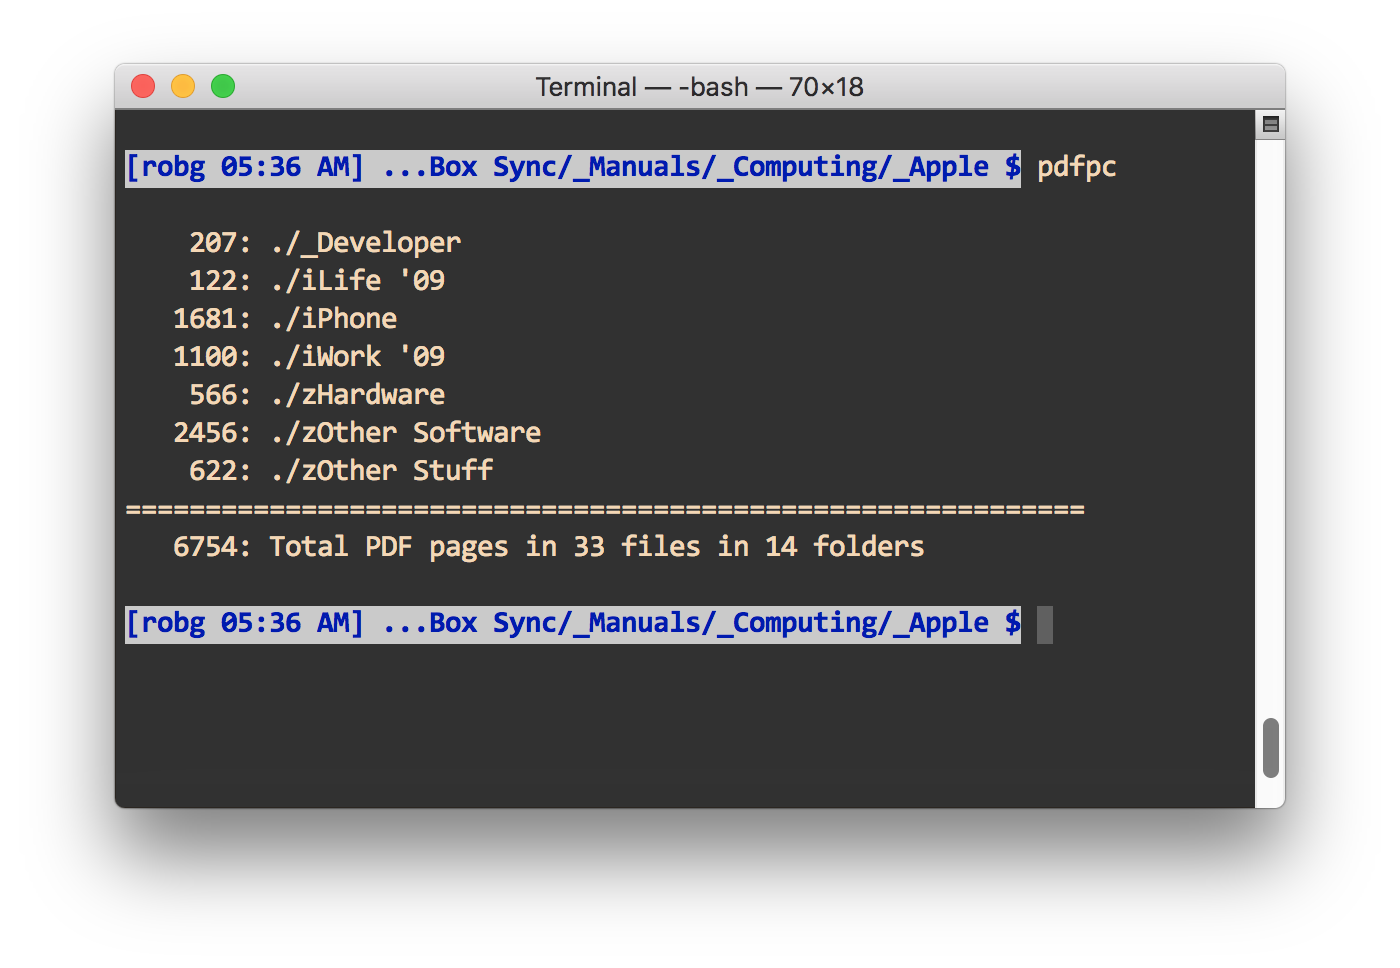
A couple of years back, I created a bash script to count PDF pages across subfolders. Here's how it looks when run on my folder of Apple manuals:

I use this script on the top-level folder where I save all my Fujitsu ScanSnap iX500 scans. Why? Partly because I'm a geek, and partly because it helps me identify folders I might not need to keep on their own—if there are only a few pages in a folder, I'll generally try to consolidate its contents into another lightly-used folder.

The script I originally wrote worked fine, and still works fine—sort of. When I originally wrote about it, I said…

I feared this would be incredibly slow, but it only took about 40 seconds to traverse a folder structure with about a gigabyte of PDFs in about 1,500 files spread across 160 subfolders, and totalling 5,306 PDF pages.

That was then, this is now: With 12,173 pages of PDFs spread across 4,475 files in 295 folders, the script takes over two minutes to run—155 seconds, to be precise. That's not anywhere near acceptable, so I set out to see if I could improve my script's performance.

In the end, I succeeded—though it was more of a "we succeeded" thing, as my friend James (who uses a very similar scan-and-file setup) and I went back-and-forth with changes over a couple days. The new script takes just over 10 seconds to count pages in the same set of files. (It's even more impressive if the files aren't so spread out—my eBooks/Manuals folder has over 12,000 pages, too, but in just 139 files in 43 folders…the script runs in just over a second.)

Where'd the speed boost come from? One simple change that seems obvious in hindsight, but I was amazed actually worked…

[continue reading…]


See how long an app has been running

For a recent customer support question, I needed to know how long our app Witch had been running. There are probably many ways to find this out, but I couldn't think of one. A quick web search found the solution, via ps and the etime flag.

You need the process ID (pid), which you can find via ps ax | grep [a]ppname.1That [s]quare brackets around the first letter are there so grep won't find itself—and thus list itself in the output. In my case, Witch runs a background task called witchdaemon, so I did it this way…

$ ps -ax | grep [w]itchd
  774 ??        26:40.73 /Users/robg/Library/PreferencePanes...[trimmed]

With the pid, the command to find that process' uptime is:

$ ps -o etime= -p "774"
11-03:17:12

The elapsed time readout is in the form of dd-hh:mm:ss, so Witch had been running for 11 days and a few hours and minutes. Note that you can combine these steps, getting the process ID and using it in the ps command all at once:

ps -o etime= -p "`ps -ax | grep [a]ppname | cut -d ' ' -f 1`"

It's messy looking, but this form saves time and typing.

June 2018 Addendum: If you add the lstart flag, you can see the exact start date and time for the process. For example:

$ ps -o lstart= -o etime= -p "16866"
Tue Jun  5 05:49:19 2018     09-06:11:25


Selective pruning of old rsync backups

In yesterday's post, I described a couple rsync oddities, and how they'd led me to this modified command for pruning old (older than four days) backups:

find /path/to/backups/ -d 1 -type d -Bmin +$((60*4*24)) -maxdepth 1 -exec rm -r {} +

After getting this working, though, I wondered if it'd be possible to keep my backups from the first day of each month, even while clearing out the other dates. After some digging in the rsync man page, and testing in Terminal, it appears it's possible, with some help from regex.

My backup folders are named with a trailing date and time stamp, like this:

back-2017-05-01_2230
back-2017-05-02_0534
back-2017-05-02_1002

To keep any backups made on the first of any month, for my folder naming schema, the modified find command would look like this:

find /path/to/backups/ -d 1 -type d -Bmin +$((60*4*24)) -maxdepth 1 -not -regex ".*-01_.*" -exec rm -r {} +

The new bits, -not -regex ".*-01_.*" basically say "find only files that do not contain anything surrounding a string that is 'hyphen 01 underscore.' And because only backups made on the first of the month will contain that pattern, they're the only ones that will be left out of the purge.

This may be of interest to maybe two people out there; I'm documenting it so I remember how it works!


How to not accidentally delete all your rsync backups

With my Time Machine-like rsync backups running well, I decided it was time to migrate over the cleanup portion of my old script—namely, the bit that removes older backups. Soon after I added this bit to my new script, though, I had a surprise: All of my backups, save the most recent, vanished.

In investigating why this happened, I stumbled across two rsync/macOS behaviors that I wasn't aware of…and if you're using rsync for backup, they may be of interest to you, too.

[continue reading…]


How to install ruby gems in Terminal

In yesterday's tip, See sensor stats in Terminal, I implied that installation of the iStats ruby gem was a simple one-line command. As a commenter pointed out, that's only true if you already have the prerequisites installed. The prerequisites in this case are the Xcode command line tools. Thankfully, you can install those without installing the full 5GB Xcode development environment.

(Rather than starting from scratch, I'm just going to borrow this bit from my detailed instructions for installing the transcode-video tools, because the Xcode command line tools are required there, too.)

Here's how to install the command line tools. Open Terminal, paste the following line, and press Return:

xcode-select --install

When you hit Return, you'll see a single line in response to your command:

$ xcode-select --install
xcode-select: note: install requested for command line developer tools

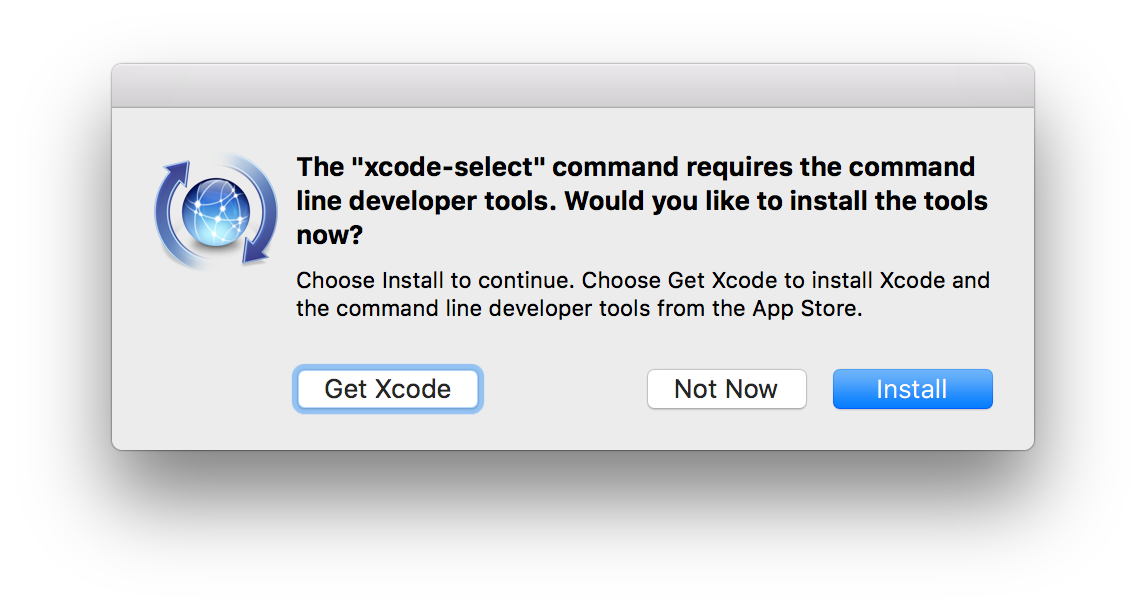
At this point, macOS will pop up a dialog, which is somewhat surprising as you're working in the decidedly non-GUI Terminal:

Do not click Get Xcode, unless you want to wait while 5GB of data downloads and installs on your Mac. Instead, click the Install button, which will display an onscreen license agreement. Click Agree, then let the install finish—it'll only take a couple of minutes.

If you're curious as to what just happened, the installer created a folder structure in the top-level Library folder (/Library > Developer > CommandLineTools), and installed a slew of programs in the usr folder within the CommandLineTools folder.

[continue reading…]


See sensor stats in Terminal

Someone—perhaps it was Kirk—pointed me at this nifty Ruby gem to read and display your Mac's sensors in Terminal: iStats -- not to be confused with iStat Menus, a GUI tool that does similar things.

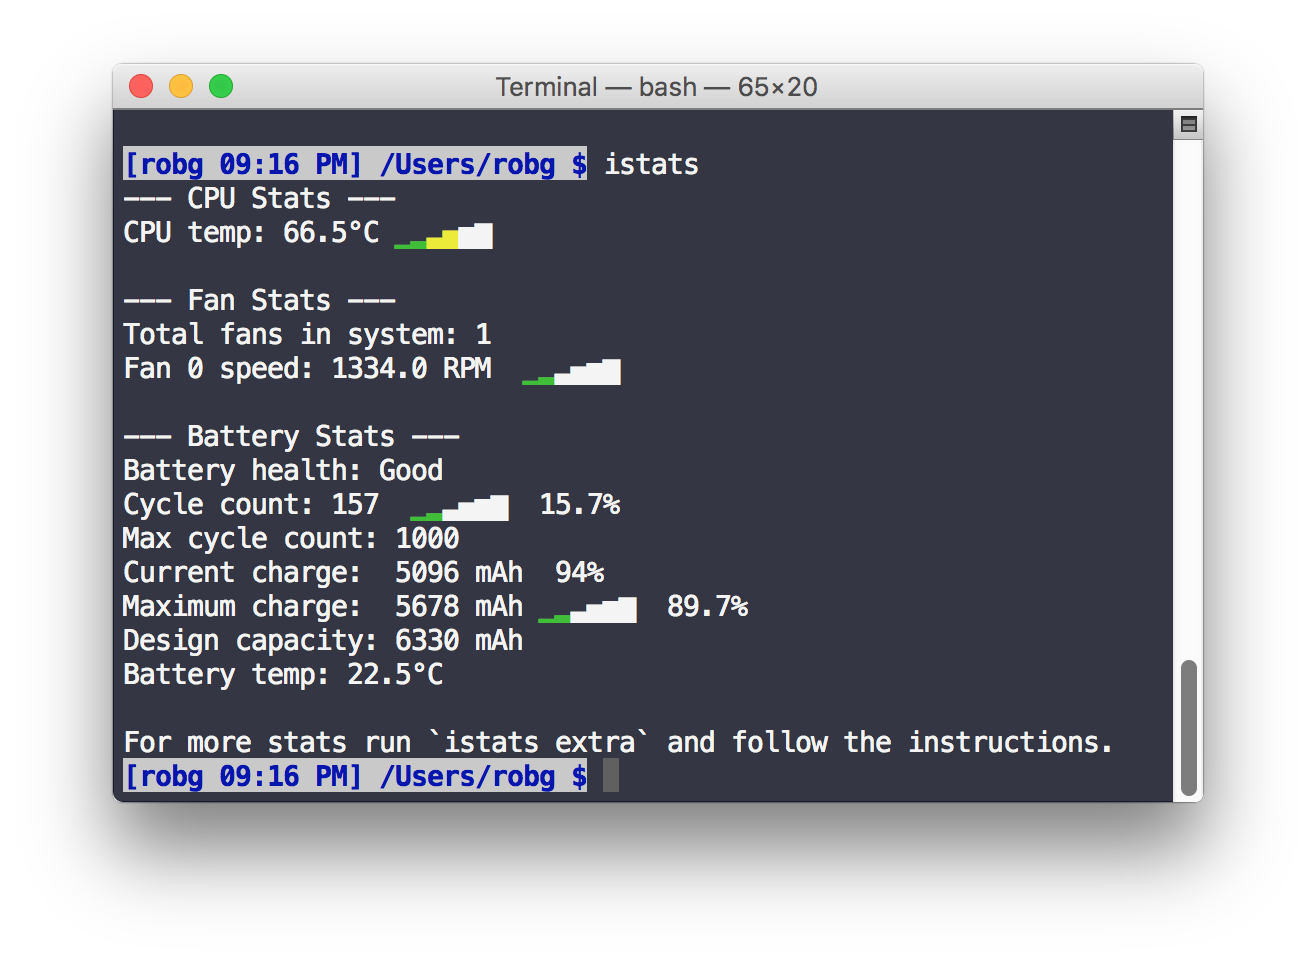
Installation is sinmple, via sudo gem install iStats. After a few minutes, iStats will be ready to use. In its simplest form, call istats by itself with no parameters. Normally I'd list the Terminal output here, but istats (by default, can be disabled) presents informatiomn with neat little inline bar graphs, so here's a screenshot:

This tool is especially useful on a laptop, as it provides an easy-to-read battery summary.

[continue reading…]