Skip to content

Mac OS X Hints

Gain control over Photos’ floating windows

As a recent somewhat-forced convert to Photos, I'm struggling with a number of things—more on that coming in a future post. But one of the tougher adjustments for me is that Photos uses a floating Info window, whereas iPhoto had an embedded info panel.

I keep the Info window open all the time, because I do a lot of work with keywords and location. (I also like to keep the Keywords window open, though this one was also floating in iPhoto.) I resize the iPhoto/Photos window quite often, depending on what I'm doing with other apps—sometimes I want my photos covering the screen, sometimes I don't.

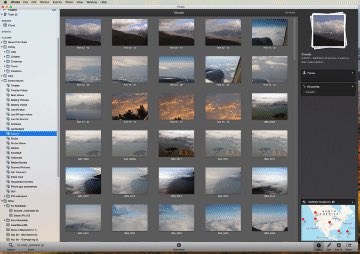
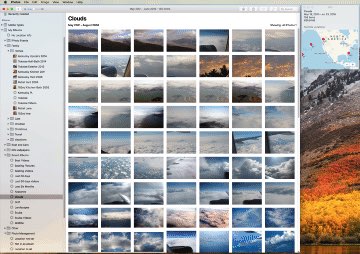
In iPhoto, this isn't an issue (dark-background iPhoto GIF), as the info panel is attached to the main window. In Photos, though, resizing the main window leaves the Info window floating in space (light background Photos GIF).

I don't like the big gap, either visually or operationally, so I wind up moving the Info window next to the newly-resized main window.

There are a few solutions to this problem, the best of which only Apple could provide. They could make the Info window a panel below the photos, or they could make it magnetic so that it would stick to the edge of the Photos window, even as it resizes. I don't suspect we'll see either solution coming from Apple, though.

Instead of waiting for Apple, I used one of Many Tricks' own apps, Moom, which (among its other tricks) has the ability to save window layouts, either within an app or across many apps.

[continue reading…]


Create ‘and/or’ Smart Playlists in Photos

I've recently—begrudgingly, forcibly—migrated from iPhoto to Photos. My iPhone 8 Plus was the main impetus, as Photos supports its new movie and image formats, as well as providing some additional editing features that I can't get in iPhoto. But in my limited time with the new app, my general conclusion is that Photos is not designed for someone who likes to actively manage their photo collection.

I may have more to say about this in a future post, but for now, consider this style of Smart Playlist that I used a lot in iPhoto…

This structure effectively creates an "and and or" logic, where you can have all conditions must be true at the top, yet have an "or" on the keyword: This playlist finds media that have the keyword Midnight or Moonlight (our cats), and are videos.

You simply cannot build this structure in Photos, because the Keyword field is a tokenized pop-up; you can only select one value. If I list the keywords as separate criteria, I wind up with a Smart Playlist that only finds videos with both Moonlight and Midnight. That's not what I want.

This structure is useful whenever you have multiple individual things—kids, lets say—and you want a smart playlist that will find any of your children and any other criteria, like year or camera or whatever.

My first thought at a workaround was to create a Smart Playlist called The Cats, which simply had the two Keywords as "or" criteria. I'd then create a second Smart Playlist that had one criteria set to "Playlist is The Cats" and the other set to find only videos. But Photos won't let you use a Smart Playlist as a criteria (neither will iPhoto, for that matter).

After some fiddling, I came up with an ugly but functional solution: I have to use an extra keyword. Now, any time I add photos of either cat, I have to set two keywords: One with the cat's name, and the other is The Cats. With two keywords on every cat photo, I can use this Smart Playlist to make my "video of either or both cats" Smart Playlist:

I'll have to do the same for our children; each picture of Erica or Kylie will also get a The Kids keyword. It really shouldn't be this hard; Smart Playlists should work as do Finder searches…

Perhaps in Photos 4…or 5…or 6. Sigh.


Bring the Buddy List window back to High Sierra’s Messages

With the release of High Sierra, Apple removed the last vestiges of support for AOL's AIM protocol in Messages: You can no longer login to an AIM account. Yes, this is ancient tech. But it had one feature that a small group of my friends, family and coworkers relied on: The Buddy List window, as seen at right.

The buddy list was a great way to know if someone was available to chat or not—unlike Messages, which simply assumes that it's OK to text someone anytime. You could also customize the away message, to let someone know you're on the phone or you'll be back in 10 minutes or whatever.

As someone who works all day at my desk, the buddy list was a nice way to let friends and coworkers know when it's OK to talk and when I was busy. Also, I could keep these chats exclusive to my Mac, and not have them appear on all my devices, which was a nice benefit (no messages received when I didn't want to receive them).

Alas, High Sierra took that all away…or did it? It did not, as it turns out—the above screenshot was actually taken in High Sierra. The solution? Jabber, another ancient (but open source, unlike AIM; history) messaging protocol.

[continue reading…]


See how long an app has been running

For a recent customer support question, I needed to know how long our app Witch had been running. There are probably many ways to find this out, but I couldn't think of one. A quick web search found the solution, via ps and the etime flag.

You need the process ID (pid), which you can find via ps ax | grep [a]ppname.1That [s]quare brackets around the first letter are there so grep won't find itself—and thus list itself in the output. In my case, Witch runs a background task called witchdaemon, so I did it this way…

$ ps -ax | grep [w]itchd
  774 ??        26:40.73 /Users/robg/Library/PreferencePanes...[trimmed]

With the pid, the command to find that process' uptime is:

$ ps -o etime= -p "774"
11-03:17:12

The elapsed time readout is in the form of dd-hh:mm:ss, so Witch had been running for 11 days and a few hours and minutes. Note that you can combine these steps, getting the process ID and using it in the ps command all at once:

ps -o etime= -p "`ps -ax | grep [a]ppname | cut -d ' ' -f 1`"

It's messy looking, but this form saves time and typing.

June 2018 Addendum: If you add the lstart flag, you can see the exact start date and time for the process. For example:

$ ps -o lstart= -o etime= -p "16866"
Tue Jun  5 05:49:19 2018     09-06:11:25


Create a savable list of 32-bit apps

Apple has announced that 32-bit apps have a limited future on the Mac: They'll be fully supported in this fall's High Sierra release; macOS' 2018 release ("Really High Sierra") will "aggressively warn" users about 32-bit apps, and I would assume, they won't work at all in the 2019 version of macOS ("That Was My Skull!").

But how do you know which apps on your Mac are 32-bit and which are 64-bit? MacObserver has an article that discusses the easy way, via the System Information app—just look in the Software > Applications section, and you'll be able to see a list of apps and a 64-bit Yes/No column. But seeing the list is all you can do—you can't easily save the list for future reference, for instance, nor can you copy/paste the info to another app.

So here's a geekier solution to generate a list of your 32-bit apps, saved into a text file for easy future reference. Open Terminal, and paste this command:

system_profiler SPApplicationsDataType | grep -B 6 -A 2 "(Intel): No" > ~/Desktop/non64bit.txt

This does the same thing as the System Information app, but it dumps the data in text form; the greater-than sign redirects the output to a text file named non64bit.txt, saved to your desktop. The grep is used to show only the 32-bit applications (the full line reads 64-Bit (Intel): No), and the -B and -A options are added to capture the lines before and after that line in the output.

This is probably not overly useful to most people, but I wanted a way to capture the list of apps, as I have over 290 32-bit apps on my machine, and it takes a while to run the System Information report each time.


Two ways to navigate column-view folders in Finder

If you use a column-view Finder window, and prefer to use keyboard navigation, here's a trick you may not be aware of—even though this dates back to the original release of Mac OS X. If I hadn't started the Mac OS X Hints site, I doubt I would've known this…

To drill down into Finder folders via the keyboard, you use the Right (down) and Left (up) Arrow keys-don't worry, that's not the tip, because that's totally completely obvious. The tip is this: After navigating into a given subfolder (and optionally selecting an item in that folder), the Shift-Tab key combo will navigate back up, but leave your "path" to the subfolder visible. Think of this like a "breadcrumb" trail that shows your navigation. (By comparison, if you use the Left Arrow, Finder "closes" each folder as you exit it, leaving you with nothing selected once you reach the top.)

One you've used Shift-Tab to navigate all the way back out, pressing Tab will navigate back down the highlighted path. Alternatively, pressing the Right Arrow key will jump immediately to the rightmost-selected item.

Update

As of Mojave (or maybe High Sierra), Apple changed the behavior of the Right Arrow after you back navigate with Shift Tab: It no longer jumps back to the end of the trail, instead it just works like a usual Right Arrow and selects the first item in the next column over.

I did some experimenting though, and found that Control-Tab will jump to the end of the breadcrumb trail.

Here's how that all looks in action—first is the normal arrow key navigation, then navigation using Shift-Tab and Tab.

You may not need/want the breadcrumb path all the time, but when you do, just remember to Shift-Tab your way out of the current folder. Using the arrow keys and the Tab/Shift-Tab keys together provides two complementary methods to navigate your column-view Finder windows.


Selective pruning of old rsync backups

In yesterday's post, I described a couple rsync oddities, and how they'd led me to this modified command for pruning old (older than four days) backups:

find /path/to/backups/ -d 1 -type d -Bmin +$((60*4*24)) -maxdepth 1 -exec rm -r {} +

After getting this working, though, I wondered if it'd be possible to keep my backups from the first day of each month, even while clearing out the other dates. After some digging in the rsync man page, and testing in Terminal, it appears it's possible, with some help from regex.

My backup folders are named with a trailing date and time stamp, like this:

back-2017-05-01_2230
back-2017-05-02_0534
back-2017-05-02_1002

To keep any backups made on the first of any month, for my folder naming schema, the modified find command would look like this:

find /path/to/backups/ -d 1 -type d -Bmin +$((60*4*24)) -maxdepth 1 -not -regex ".*-01_.*" -exec rm -r {} +

The new bits, -not -regex ".*-01_.*" basically say "find only files that do not contain anything surrounding a string that is 'hyphen 01 underscore.' And because only backups made on the first of the month will contain that pattern, they're the only ones that will be left out of the purge.

This may be of interest to maybe two people out there; I'm documenting it so I remember how it works!


How to not accidentally delete all your rsync backups

With my Time Machine-like rsync backups running well, I decided it was time to migrate over the cleanup portion of my old script—namely, the bit that removes older backups. Soon after I added this bit to my new script, though, I had a surprise: All of my backups, save the most recent, vanished.

In investigating why this happened, I stumbled across two rsync/macOS behaviors that I wasn't aware of…and if you're using rsync for backup, they may be of interest to you, too.

[continue reading…]


Add some System Preferences icons to the Dock

If you have certain System Preferences panels that you access a lot, and you're a Dock person (as opposed to a ⌘-Space and type person), here's a little timesaver: You can add any System Preferences panel directly to your Dock. You can't add it to the left side, as the individual panels aren't applications. But they are documents, so you can add them to the right side of the dock—just drag and drop from Finder.

You'll find the System-provided panels in /System/Library/PreferencePanes; third-party panels may appear in either your user's Library/PreferencePanes folder, or the top-level /Library/PreferencePanes folder. Find the one(s) you'd like in your Dock, then just drag and drop.

You can, of course, keep System Preferences itself in your Dock, and then right-click to see a list of all preference panels. For those panels you access often, though, this method is much quicker.


How to burn an ISO file to a USB stick

I wanted to install Linux on a hard drive in Frankenmac, as Clover is a multi-boot utility—it lets you choose from any OS it sees during power up. (I'll add Windows, too, eventually.) To do this, you need to get Linux onto a USB stick. I've done this in the past, and my vague recollection of the process was download the ISO, convert to an image file, write image file to USB stick. However, as it'd been a few years, I went searching for references to make sure I had all the commands correct.

I found a lot of pages with a general summary of the process, and few with the specific steps. I tried one of those, but my USB stick didn't work. The other specific pages contained the same basic process, so I was stuck. Until I found this page, which contained a critical step I was missing: Formatting the USB stick before copying the image file.

For future reference, here's the precise process to follow if you want to burn an ISO file onto a USB stick…

[continue reading…]