I wanted to install Linux on a hard drive in Frankenmac, as Clover is a multi-boot utility—it lets you choose from any OS it sees during power up. (I'll add Windows, too, eventually.) To do this, you need to get Linux onto a USB stick. I've done this in the past, and my vague recollection of the process was download the ISO, convert to an image file, write image file to USB stick. However, as it'd been a few years, I went searching for references to make sure I had all the commands correct.
I found a lot of pages with a general summary of the process, and few with the specific steps. I tried one of those, but my USB stick didn't work. The other specific pages contained the same basic process, so I was stuck. Until I found this page, which contained a critical step I was missing: Formatting the USB stick before copying the image file.
For future reference, here's the precise process to follow if you want to burn an ISO file onto a USB stick…
- Download the ISO of interest. In my case, I wanted to install the 64-bit version of Linux Mint Cinnamon, which I found on their download page.
- macOS can't do much with an ISO file, so you need to convert it to an image format. Assuming you're in the download directory, the command is:
hdiutil convert -format UDRW -o linuxmint-18.1-cinnamon-64bit.img linuxmint-18.1-cinnamon-64bit.iso
Replace the linuxmint… bits with the name of the downloaded ISO file (though you could name the new output file whatever you want). macOS will probably append .dmg to your filename; you can leave it or chop it off—it won't affect anything.
- Partition the USB stick. This should be possible in Disk Utility, but I didn't try it. The very important bit is making sure you have the proper disk identified, because this command will wipe out everything on the drive! If you launch Disk Utility, select the USB stick in the sidebar, and hit Command-I, you'll see the disk ID:
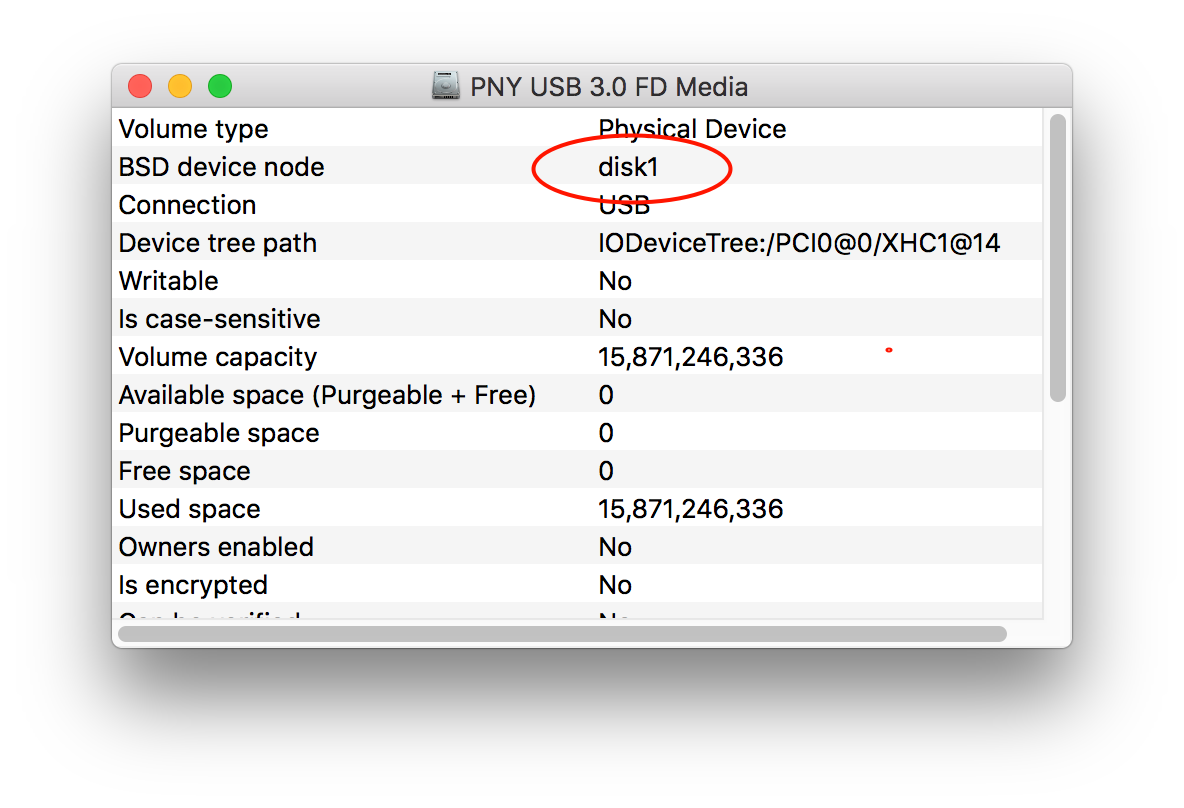
In this example, the USB stick is disk1. Back in Terminal, wipe the USB disk with this command:
diskutil partitionDisk /dev/diskN 1 "Free Space" "unused" "100%"
Have I mentioned this will delete everything on the disk?! Seriously, be certain you have the right disk before executing that command! And replace diskN with your actual disk number.
- The final step is to write the image file to the USB stick, with this command:
sudo dd if=linuxmint-18.1-cinnamon-64bit.img of=/dev/diskN bs=1m
As with the previous step, replace diskN with the proper disk number for the USB stick. Then sit back and wait a while; this step can be slow—it took about 40 minutes to write 2GB of Linux installer to my USB stick.

Once the image is burned, eject the disk when macOS prompts you to do so (assuming you wrote an ISO it can't read).
Hopefully with this here in one spot now, I won't have so much trouble remembering the process the next time I go to do this.
Use Etcher app https://etcher.io/ instead ! If you need to burn iso to a USB or SD.
Comments are closed.