Skip to content

Mac OS X Hints

Open Terminal in selected Finder folder

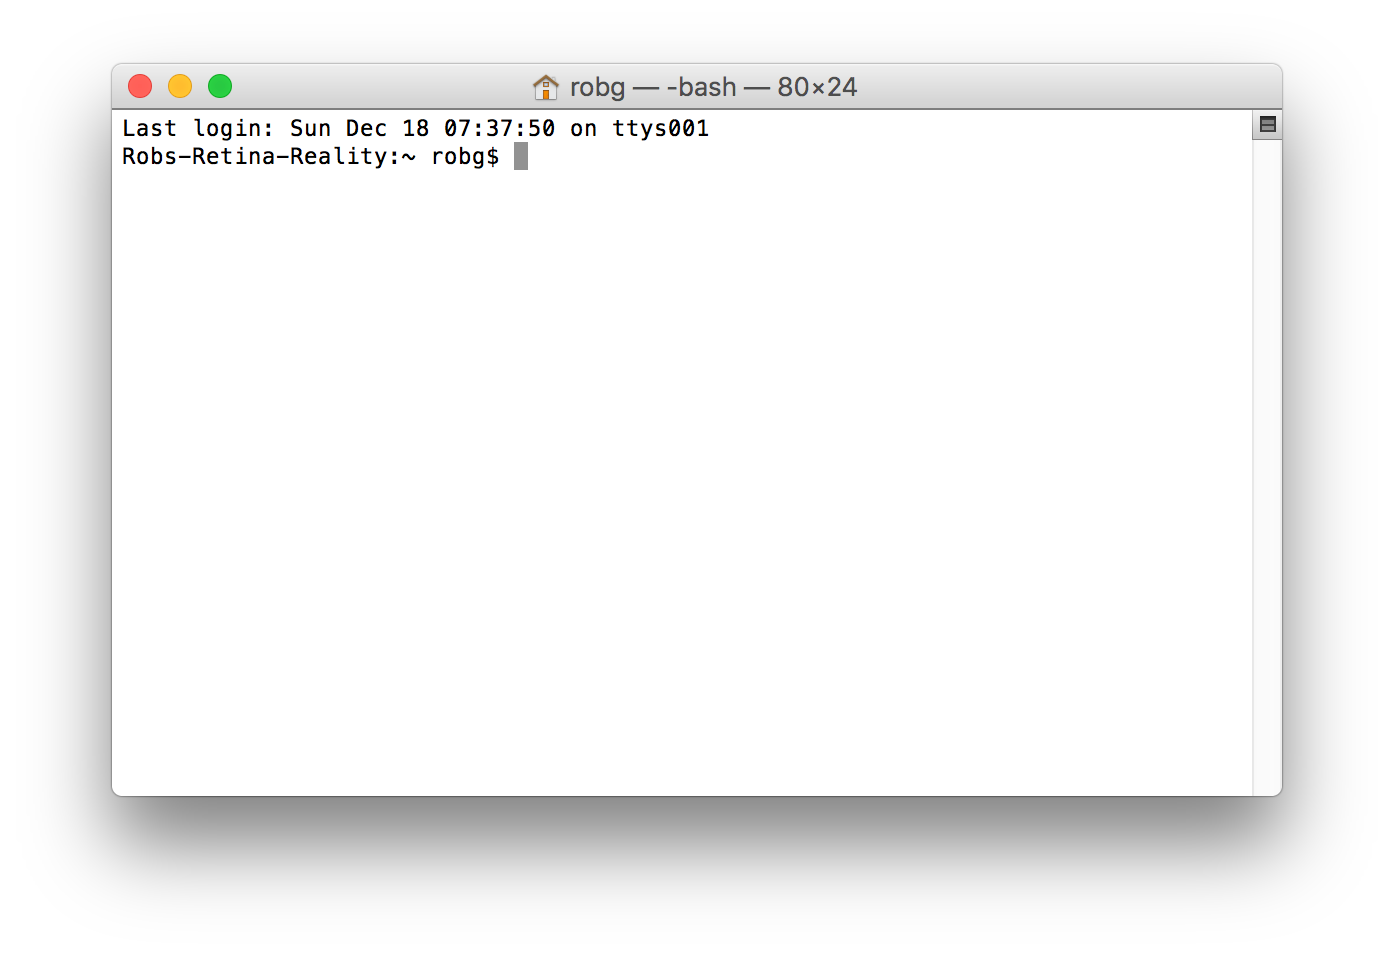
Today's tip is just a re-implementation of a really old Mac OS X Hints AppleScript that lets you open a Terminal window with the working directory set to (i.e. cd'd into) the selected Finder folder.

This makes it really easy to jump into Terminal to do something from Finder, without having to do any mousing and minimal typing. What's new is that I've used Keyboard Maestro to turn the AppleScript into a macro that runs only in Finder, where it's available via hot key or menu bar trigger.

Here's the complete macro; download it now to look at and/or use as you wish. [Note: If you use iTerm2 instead of Terminal, you'll want to download this version instead. My good friend James, who runs Out of Control, did so. He tells me it works great.]

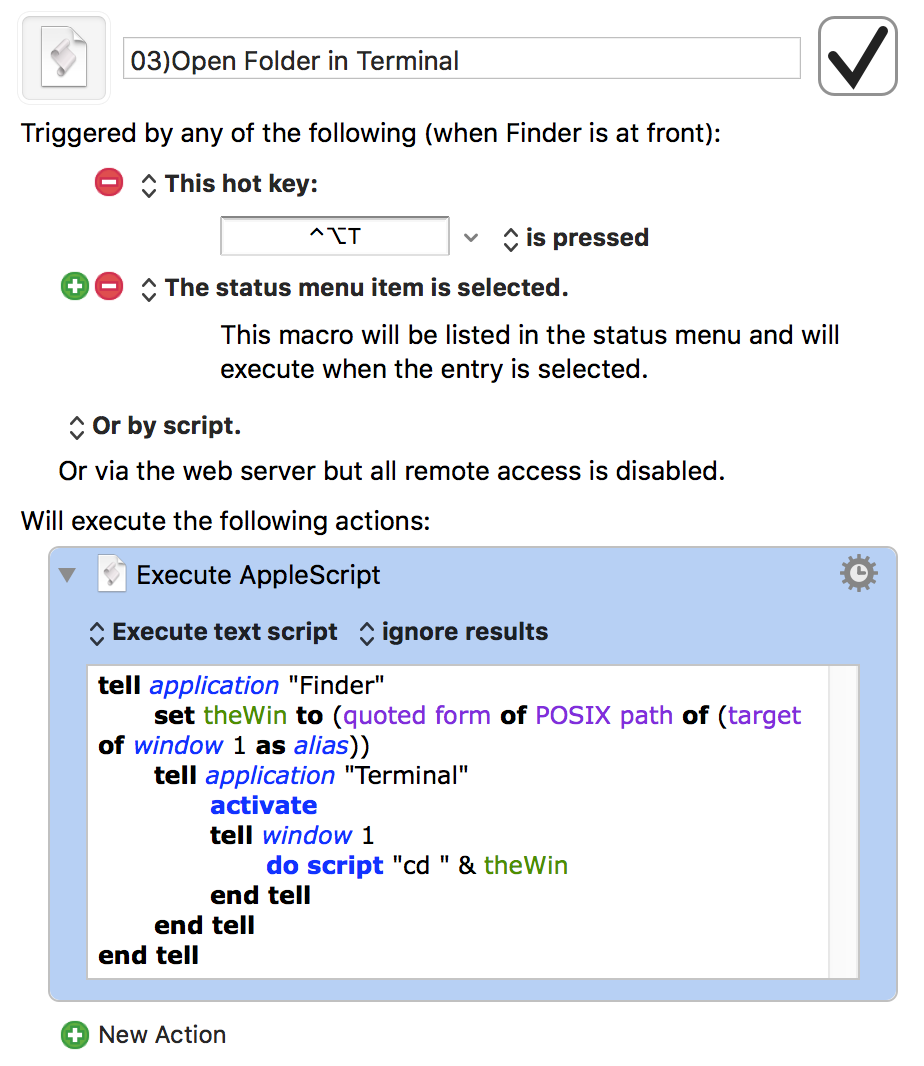
The name of the macro may look a bit odd—the 03) controls the sort order in the Keyboard Maestro menu bar item, and does not display when the menu is activated:

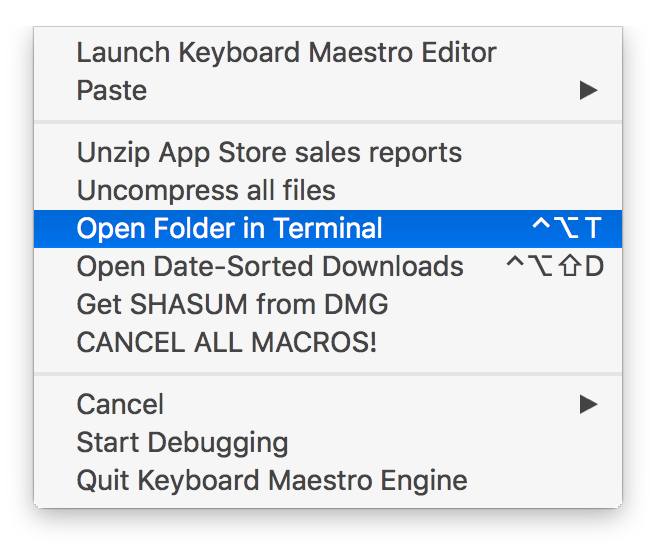
Keyboard Maestro also helpfully displays the assigned keyboard shortcut in the menu bar item, in case I've forgotten it.

[continue reading…]


Speed up your Mac via hidden prefs

Over my many years of running Mac OS X Hints, a huge number of defaults write hints were published.

For those who aren't aware, defaults write is a Terminal command that can be used to modify applications' settings. While you can use these commands to modify settings that are present in an app's Preferences panel, the more-common use of this command is to set non-visible (hidden) prefs that you won't find in the GUI.

Here are three of my favorites—three that not only perceptually but actually increase the speed of your interactions with your Mac. I still, to this day, execute these commands on any new Mac I set up.

Don't worry if you'd prefer to stay away from Terminal: I'll also show how to use the long-lived1The first reference to TinkerTool that I could find in the Mac OS X Hints archive was in March 2001. TinkerTool to set each of these options using a (relatively easy if crowded) GUI interface.

Tip 1: Change the sheet animation speed

Sheets are the attached windows that roll down from (and up into) the title bar of windows, such as the Save dialog in most macOS applications. The animation of these sheets, while visually appealing, does take some time.

Using this tip, you can basically eliminate the animation, greatly speeding the appearance and disappearance of sheets. Given how pervasive sheets are, this tip can save a lot of time each day. While the other tips offer actual speed improvements, they're nothing like the change you get by changing the sheet animation speed.

As a test, I opened and closed a Save sheet in TextEdit five times, both before and after applying this tip:

If you're scoring at home, that's a 47% reduction in the time required for just five cycles of a Save sheet.

[continue reading…]


Create an iTunes song info window using Keyboard Maestro

For those who aren't aware, Keyboard Maestro is a macro-creation tool, designed to help you automate routine tasks. But its powers let you do some really cool stuff, not all of which could be classified as automation. Such is the case with this project: Creating an iTunes song info pop-up window.

There are lots of apps out there—including Many Tricks own Butler—that can do this for you, and my Keyboard Maestro version is worse than most of those in many respects. However, I wanted to teach myself more about Keyboard Maestro, and this seemed like a good project with which to do so.

I use Buter's iTunes pop-up info window, which looks like this:

I wasn't really interested in the rating or volume controls (though they should be doable), but I wanted to see if I could get the album art and song info in a window via Keyboard Maestro. After some struggles, here's what I came up with in Keyboard Maestro:

My window is larger by design, so I can have somewhat more visible album art (aging eyes). And I can't decide on a background color or gradient, so it keeps changing—this was the look when I snapped the screenshot, but it's since changed again.

Read on if you'd like to know more about Keyboard Maestro, and how I used it to create this iTunes info window. (Note that this write-up assume some familiarity with Keyboard Maestro, though I try to explain each step in the process.)

[continue reading…]


Detailed instructions for installing the transcode-video tools

My method of ripping Blu-ray discs relies on Don Melton's video_transcoding tools. While these tools work great, they are command-line only (i.e. Terminal required). In my guide, I glossed over the installation bit, referring back to Don's basic guide. But for those new to Terminal, even Don's instructions may be too light on the details.

Hence this detailed installation guide for Don's video_transcoding tools. This guide walks a new user through every step of the process, hopefully getting even someone brand new to Terminal up and running with Don's tools. This will only be of interest if you're having trouble getting the video_transcoding tools installed. If that's you, though, hopefully this will be helpful.

The entire installation of the video_transcoding tool set and all its dependencies will take place in Terminal, which is the direct line to the Unix core of macOS. Open Terminal, which you'll find in /Applications > Utilities, and you'll be greeted by a window with some text; something like this:

This lovely interface is where you'll spend the next chunk of time, installing the video_transcoding tools, and all the programs it uses to get its work done.

Note that this guide is not a detailed introduction to Terminal or Unix. (There are many such guides on the net, and if you're interested, they're well worth reading.) This guide is focused solely on how to use Terminal to install the video_transcoding tools, not how to use Terminal on its own. So let's get started…

[continue reading…]


Remap non-modifiable keyboard shortcuts in any app

Ever run into a program that has some pre-defined keyboard shortcuts you don't like? In most cases, they're associated with a menu item, which means you can use macOS' built-in keyboard shortcuts function to fix them. (In System Preferences > Keyboard > Shortcuts > App Shortcuts.)

But what if the shortcut isn't associated with any menu item? Such is the case in Excel 365, which replaced a couple easy-to-type shortcuts (⌃I and ⌃K for inserting and deleting rows and columns) with much harder to type versions: ⇧⌃= and ⌃-. If there's no corresponding entry in the app's menus, it seems impossible to remap the shortcuts—unless the app itself offers that feature, which Excel did in prior versions.

The good news is that it is possible to remap any keyboard shortcut in any app, as long as you're willing to add one more program to the mix: Some sort of macro app. My example uses Keyboard Maestro, but any app that can send a key sequence in response to another key sequence will do the trick.

[continue reading…]


Quickly expand compressed files in Finder

In this post, I lamented on the incredible slowdown seen when expanding many compressed files in Finder. To save a trip back to that article, here's the tldr; version:

Expand 24 .gz filesFinder:
12.8 seconds
Terminal:
.013 seconds
Terminal is 984.6x faster than Finder

With a bit of work, though, you can harness the power of Unix in Finder, and get both the GUI and the speed when expanding files. There are many ways to do this, including third-party apps such as The Unarchiver. You could also write an Automator Service to do the work for you. But I chose to write a Keyboard Maestro macro, because I could make the macro a menu bar option that only shows when Finder is frontmost:

As seen, I actually have two expanders, one that expands just the Apple sales reports mentioned in my original post, and the other that will handle any mix of compressed files. (Yes, the 'all files' macro could also handle the Apple sales reports, but because of how it has to run for multiple file types, it's marginally slower than the dedicated macro.)

These macros both work in the same way—they call on Unix apps to do the expansion, bypassing Apple's slow GUI expander (which is called Archive Utility). If you're curious how they work, and/or would like to download them for your own use, keep reading.

[continue reading…]


Replace the departed free iTunes Radio with free iTunes radio

In case you missed the news, Apple has now officially ended the free streaming of iTunes Radio. To listen to these stations now, you have to subscribe to Apple Music, which isn't something I want to use. (If they offered a "use but don't integrate into library," I'd subscribe in a heartbeat…but they don't.)

There are any number of other radio services out there - Pandora, Spotify, etc. But I wanted something that existed in iTunes, as I didn't want to have to run another app, nor (shudder) use my browser as a radio station front end. Then I remembered that iTunes has a huge—as in tens of thousands—assortment of Internet Radio stations.

I hadn't looked at internet radio in a long time, as I'd been quite happy with my selection of iTunes Radio stations. But Apple's move inspired me to take another look, and so far, I like what I've found. If you'd like to explore the world of Internet Radio in iTunes, here are a few tips to ease the exploration.

[continue reading…]


Total PDF pages in subfolders across folder structure

Last week, I wrote a script that ran through a folder structure and output the page count of every PDF in all folders and sub-folders, and also spit out a grand total.

While this worked well, what I really wanted was a script that just totaled PDF pages by sub-folder, without seeing all the file-by-file detail. After trying to retrofit the first script, I realized that was a waste of time, and started over from scratch.

The resulting script works just as I'd like it to, traversing a folder structure and showing PDF page counts by folder:

$ countpdfbydir
    47: ./_Legal
     2: ./_Medical-Dental
    15: ./_Medical-Dental/Kids
    11: ./_Medical-Dental/Marian
     2: ./_Medical-Dental/Rob
    35: ./_Personal Documents/Kids
    87: ./_Personal Documents/Marian
    28: ./_Personal Documents/Rob
    10: ./_Personal Documents/Rob/Golf
    12: ./_Personal Documents/Rob/Travel
-------------------------------------------------------------------
   249: Total PDF Pages

It took a few revisions, but I like this version; it even does some simplistic padding to keep the figures lined up in the output.

[continue reading…]


Count pages in all PDFs within a folder structure

Please see this newer post, with a new script that provides subtotals by subfolder, which is what I really wanted when I wrote this one.

Recently I've been trying to go paperless (well, mostly paperless) via a Fujitsu ScanSanp ix500. (I'll have more to say about the scanner in a future post).

One way to go paperless is to just go from now forward—start scanning stuff and don't worry about history. I decided that I'd go the other route, and work through our old paper files: some would be scanned and kept, much would just be recycled. The process went really quickly, compared to what I had expected. It helps that the Fujitsu is a wicked-fast document scanner!

But I was curious about how much I was scanning, in terms of total PDF pages—not files, but counting the pages in the files. Spotlight to the rescue; the field kMDItemNumberOfPages returns the number of pages in a document, and it seemed accurate in testing via mdls:

$ mdls /path/to/somefile.pdf | grep kMDItemNumberOfPages
kMDItemNumberOfPages = 4

So I set out to write a script to traverse my "Scans" folder, and return the total number of PDF pages.

[continue reading…]


On the vagaries of saving from Mail

As I suspect is true of many of you, I buy a fair bit of stuff from Apple, whether in a physical Apple Store or in the various online stores. I receive electronic receipts for all these purchases, which look something like this (but with all the personal info filled in, obviously):

Until yesterday, I have just filed all these receipts in their own folder in Mail (in the On My Mac section, so they're stored locally). But in the process of going paperless, I wanted to move them directly to my hard drive, so I could store them in a more-organized manner, and keep them alongside my other receipts. That meant saving the messages from Mail to the disk.

I had only two objectives when saving:

  1. Maintain the formatting and images in the original receipt
  2. Have the message content indexed by Spotlight

You'd think this would be a simple proposition, but you'd think wrong…the above two criteria are basically mutually exclusive with Mail's Save As feature. Read on for the details, and my eventually-discovered workaround (and labor-saving shortcut).

[continue reading…]