Skip to content

Home

Things that happen in or around the home

The right tool for a (floor) stripping job

I haven't posted here the last couple days; between work, family, and a little remodeling project, time has just vanished. And as my blog reflects things going on in my world, today's post is decidely non-tech related: It's about the remodeling project.

We're re-doing our kids' bathroom with a mix of our own work and outsourcing the stuff I know I'd do poorly (tiling the shower, refinishing the tub). On the "own work" side of the ledger was "remove old linoleum floor," as we have some water damaged sub-floor to replace in the shower area, and we hated the linoleum in general. When I peeled up the linoleum, it left huge sections of glue and paper backing behind:

I had no idea how to remove this gunk, so I bought a few tools at Home Depot: A carbide-tipped scraper that looked like a larger putty knife, a "pull to scrape" device, and a heat gun.

[continue reading…]


Kwikset’s smart lock may require another purchase

Just a heads-up for anyone thinking of installing the well-reviewed Kwikset SmartCode 916 Touchscreen Electronic Deadbolt (and probably other similar Kwikset locks): Check your current deadbolt installation to see if you actually need more than what's included in the box.

In the box is one deadbolt (the "A" in the image at right), which assumes your deadbolt screws into a chiseled cutout in the edge of the door. But if—like me—your deadbolt isn't screwed into the door but just inserted in place, you need "A2," a drive-in deadbolt. This part isn't in the $190 lock kit, nor is it sold (best as I could tell) at Home Depot or Lowes or Ace Hardware.

Check your door before you order your lock, so you can add on a drive-in deadbolt if your door is non-chiseled. Me, because I didn't know about this, I didn't check. So I made a 40-mile round trip to Home Depot for a chisel set, then spent an hour chiseling out the door so the included deadbolt would fit.

Mission accomplished, but I think it's pretty dang cheap of Kwikset to not include both deadbolt styles in a $190 lock kit! (Or perhaps even better, they should design a deadbolt with a removable screw-in plate, then one deadbolt would serve all customers.) So, yea, I had a frustrating Sunday morning!


The magic corner cabinet

As yesterday was a cabinet-related post, I thought I'd stick with a theme and share this one I saw in a friend's home a while back. It's the perfect solution for those useless corner cabinets where most people stick a lazy susan, thus giving up on a bunch of storage space.

If we ever move and I have a chance to specify the cabinet hardware, I'm making sure one of these things goes into the corner cabinet!

(Don't worry, this isn't turning into a home remodeling blog; tech tips and stories return tomorrow.)


The end of the banging of the cabinet doors

I really hate the bang when a cabinet door closes. Years ago, I'd looked into soft-close mechanisms and found them pricey and a bit fussy to install. But this weekend, we were at Home Depot when I stumbled across these Liberty soft-close dampers. On a lark, I bought the 10-pack to see how well they'd work. The short answer: very well.

Installation is a breeze; they go into the corner of the cabinet with one screw—and the screw hole is angled at 60 degrees, so the pre-drilling goes quickly and at the proper angle. Here's how one looks installed:

I think it took me about 20 minutes to install all 10, and I probably spent five of that on the first one, making sure I did it right. These are not metal pieces; the body is metallic-painted plastic. However they have decent reviews on Amazon, and were reasoinably priced. There are other brands, too, but I haven't used any of those. All I know is that I'm thrilled with how they work…

Ah, the blissful sounds of a non-slamming cabinet door!


Out with fluorescent garage lights, in with LEDs

I've converted most of our home to LED lighting—costs have plummeted in recent years, and when you combine LED lights' long lives with low energy costs, the payback period is incredibly short. Newer LEDs are also warmer in tone—we found some "soft light" 60W equivalent bulbs that are nicely warm (and warmer when dimmed). Through all of this, though, I had one area of the house I'd ignored: The garage.

Our garage has six (five overhead, one over a workbench) 48" long fluorescent hanging fixtures. I hate fluorescent bulbs, but the cost to replace them with LED-equivalent fixtures was high—about $300 to do all six. But the other day at Costco, I noticed they had two-pack FEIT 4' LED replacement bulbs—like these at Amazon—for only $18 (versus $28 at Amazon as I write this).

A "normal" 48" fluorescent tube light, as in this Sylania four-pack is around $6 or $7 per light. So while the LED bulbs are more expensive, a $3 difference isn't much at all given the lower engery usage and long life. (And the fluorescents in my garage go out quite often, even compared to indoor incandescents.) So I bought one box, as a test to use over the workbench.

Within a couple minutes of installing the LED tubes, I was headed back to Costco to buy five more boxes—the difference is that notable. Instant on, brighter and more-even light distribution, no flicker, and they should last nearly forever.

[continue reading…]


It’s snowing…in slow motion!

It's just started snowing here in central Oregon, so I shot a bit of slow motion snowfall. The end result is very oddly mesmerizing (open the video in a new window to see it at full size):

The snow looks like some fake Hollywood effect when seen in slow motion. But hey, it's falling, it's sticking, and the kids may get a white Christmas after all!

I hope you and yours have a wonderful holiday…I'm outta here to go play in the snow!


Fake fire … enhanced

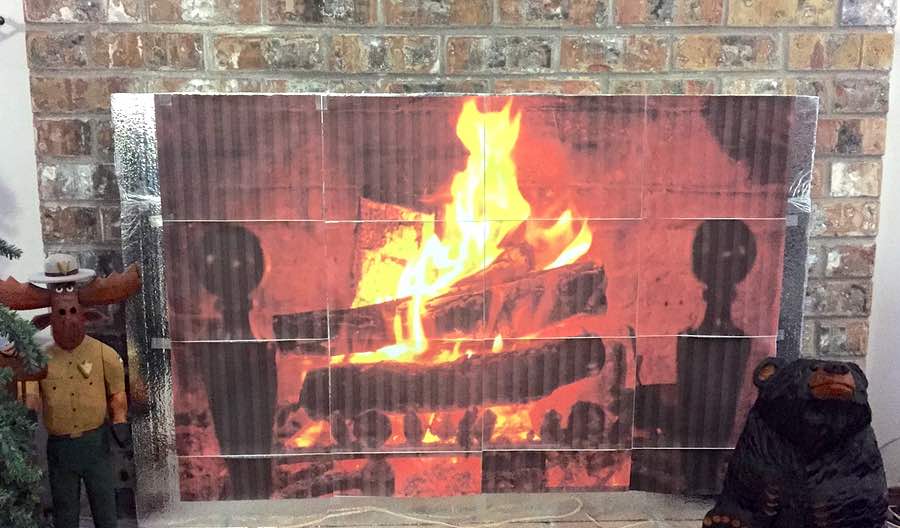
To make our winter-air-blocked non-functional fireplace more visually engaging, I printed a huge fireplace image across multiple pages, and taped them to the fireplace blocker. The end result was usable, but definitely not professional:

So I set out to find a shop to print a 36"x48" poster of the huge image. And because this was clearly an optional project, I wanted to do it as cheaply as possible. After much web searching, I found Poster Print Factory. Their online poster creation tool was easy to use, and the cost ($35 including shipping) was the lowest I found by at least $10.

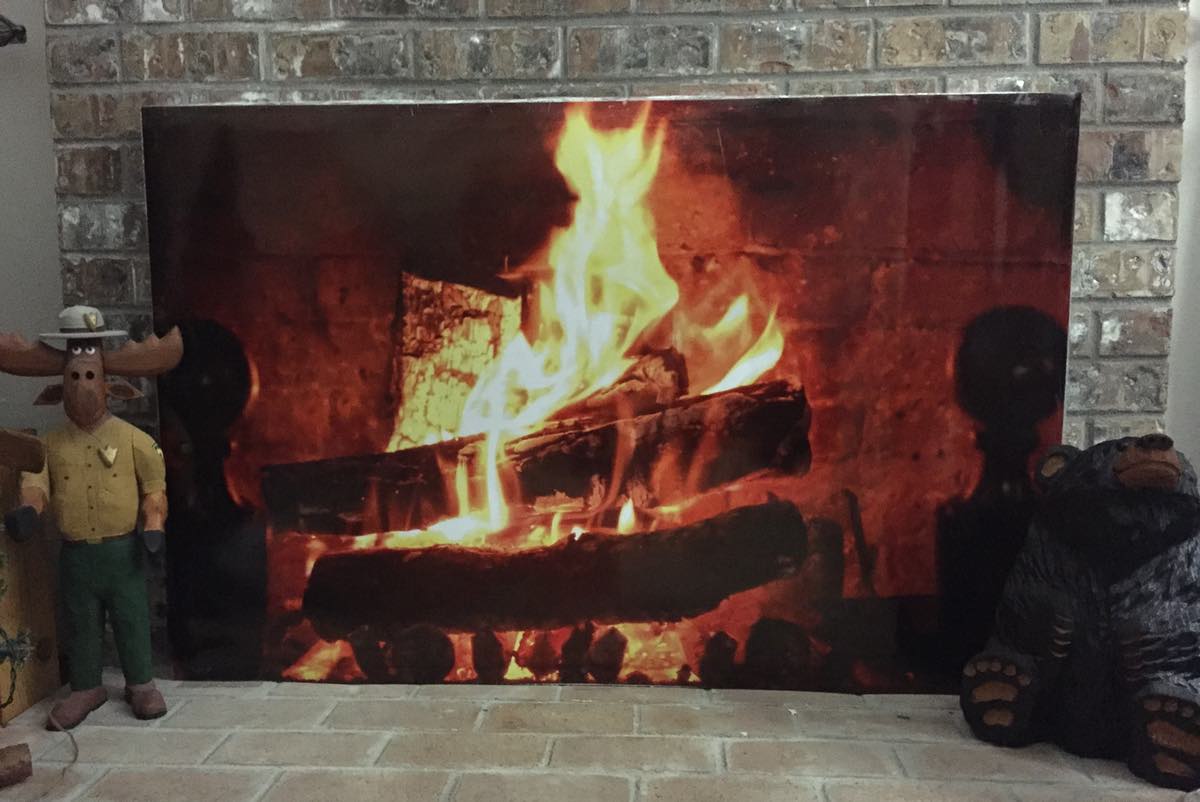
It took about a week, but the poster arrived and the quality is fine. It's printed on relatively thick stock, and the image itself looked stunning. So now, our artificial fire has been enhanced by a high quality poster overlay:

So much nicer to look at than the silvery surface of a piece of foam insulation! Anyway, if you're looking for some inexpensive poster-sized prints, I was happy with what I got from Poster Print Factory.


Cutting the land line (sort of)

Being old school—and just old in general—our family has always had a land line (i.e. Plain Old Telephone Service or POTS). We've also had the same POTS phone number for well over a decade, so it's the number that everyone uses to call us at home. Add in the fact that (at least until very recently) AT&T cell service at our home was marginal to poor, and there really wasn't much desire to cut our land line for all-cellular.

Until I looked at our bill, that is, and discovered that our POTS line was costing us over $30 a month. Even at that amount, we paid extra for caller ID, and still had to pay for long distance calls. So once AT&T upgraded the cell towers near our home, we started using our cell phones for all long distance calls. But still, our POTS number was well known to friends and family, so we didn't want to just kiss it goodbye. But that $30+ a month was basically a complete waste of money, so I started looking for other solutions.

Enter VOIP, or Voice Over IP. This technology has been around a long time, but I never really felt ready to make the move. Then I started looking into it, and found that I could save about 90% of the monthly cost of my POTS line, keep my phone number, and gain a number of useful features. That made the "go" decision quite easy to make; read on if you're curious about replacing a land line with a VOIP service.

[continue reading…]


Fixing a lawn mower, then and now…

On Sunday afternoon, I went to pull our mower from the garage to attack the jungle growing in our yard. Apparently while pulling a car into the garage at some point, I had managed to snag the mower's grass catcher between the car's wheel and a garage support post. The end result was a mangled piece of metal that more resembled avant-garde sculpture than it did a grass catcher. I borrowed the neighbor's mower for the day, which solved the problem in the short term. But long term, I was in need of a new frame and grass catching bag.

With the power of a time machine, here's how that task would have gone 30 years ago, and how it went on Sunday…

[continue reading…]


Shedding some light on the cost of lighting

In our home, our kitchen is lit with eight in-ceiling flood lights. Each uses a 65W incandescent bulb, and it seems to me that at least one of them is burned out at any given point in time.

Frustrated by the never-ending replacement cycle, and aware that there were longer-lived and more-efficeint options out there, I decided to look into replacing the incandescent bulbs with either CFL (fluorescent) or LED lights.

I was curious as to whether CFL or LED would be the better option for us, and how much it would cost to switch, in both the short and long term.

tl;dr summary: If you can afford the up-front costs, switch your lights to CFL or LED now. You will save a lot of money, and spend less time replacing bulbs. Read on for a full cost analysis of my kitchen light replacement project.

[continue reading…]