Skip to content

applescript

A simple AppleScript to reveal System Settings’ anchors

I stumbled upon this simple AppleScript while looking for something else, but it's incredibly useful for scripting System Settings…so I'm posting it here in case the original site ever goes away.

To get the names of all the anchors for a selected pane in System Settings, just run this in Script Editor:

Run that on the Desktop pane, for instance, and the output is this:

{anchor "Dock" of pane id "com.apple.Desktop-Settings.extension" of application "System Settings", anchor "HotCorners" of pane id "com.apple.Desktop-Settings.extension" of application "System Settings", anchor "MenuBar" of pane id "com.apple.Desktop-Settings.extension" of application "System Settings", anchor "MissionControl" of pane id "com.apple.Desktop-Settings.extension" of application "System Settings", anchor "Shortcuts" of pane id "com.apple.Desktop-Settings.extension" of application "System Settings", anchor "StageManager" of pane id "com.apple.Desktop-Settings.extension" of application "System Settings", anchor "WindowsApps" of pane id "com.apple.Desktop-Settings.extension" of application "System Settings"}

With that information, you can jump directly to a given area in AppleScript with code like this:

I'd always wondered how people found the anchor names, and now I know.


How to display the size of an app’s frontmost window

A user asked me a question about Moom

Say I’ve resized a window to the dimensions I want. Is there a way to figure out what these are so I can create a resize action in Moom?

Basically, the user wants to save a window size as a custom action, to make it easy to reapply that action to any window. (If it were just one window in one app, you could use Moom's Save Window Layout feature to save that layout for easy recall.)

There is a way to see this info in Moom, but it requires enabling our debug log and digging through a bunch of output. As an easier alternative, I was certain that AppleScript could do this; I fiddled a bit on my own, and did some web searching, which led me to this thorough post on StackExchange.

Using the very first bit of the first script there, I came up with this version:

Run the above, assuming Safari is running and has an open window, and you'll see this system notification:

Change Safari to whichever app you're interested in, re-run the script, and you'll have that app's window dimensions. This script is incredibly basic (no error checking, hardcoded app), but it works1If you see a message about ScriptEditor needing Accessibility access, open System Preferences > Security & Privacy > Privacy, click on Accessibility in the left panel, click the lock icon to unlock the panel, click the plus sign to add an app, and navigate to Script Editor in Applications > Utilities, then click Open..

Of course, me being me, I decided I'd spend a couple hours making it more useful, even though I probably won't use it all that often. So I modified it to work for whichever app is frontmost, and made it run from Keyboard Maestro. I then assigned it a gesture trigger with my mouse, so I can easily see any window's dimensions with a simple mouse movement.

[continue reading…]


A quick-toggle solution for macOS’ translucency feature

Note: This was originally published in 2015; I've updated it with a minor change required for Mojave, and clarified a bit of the text.

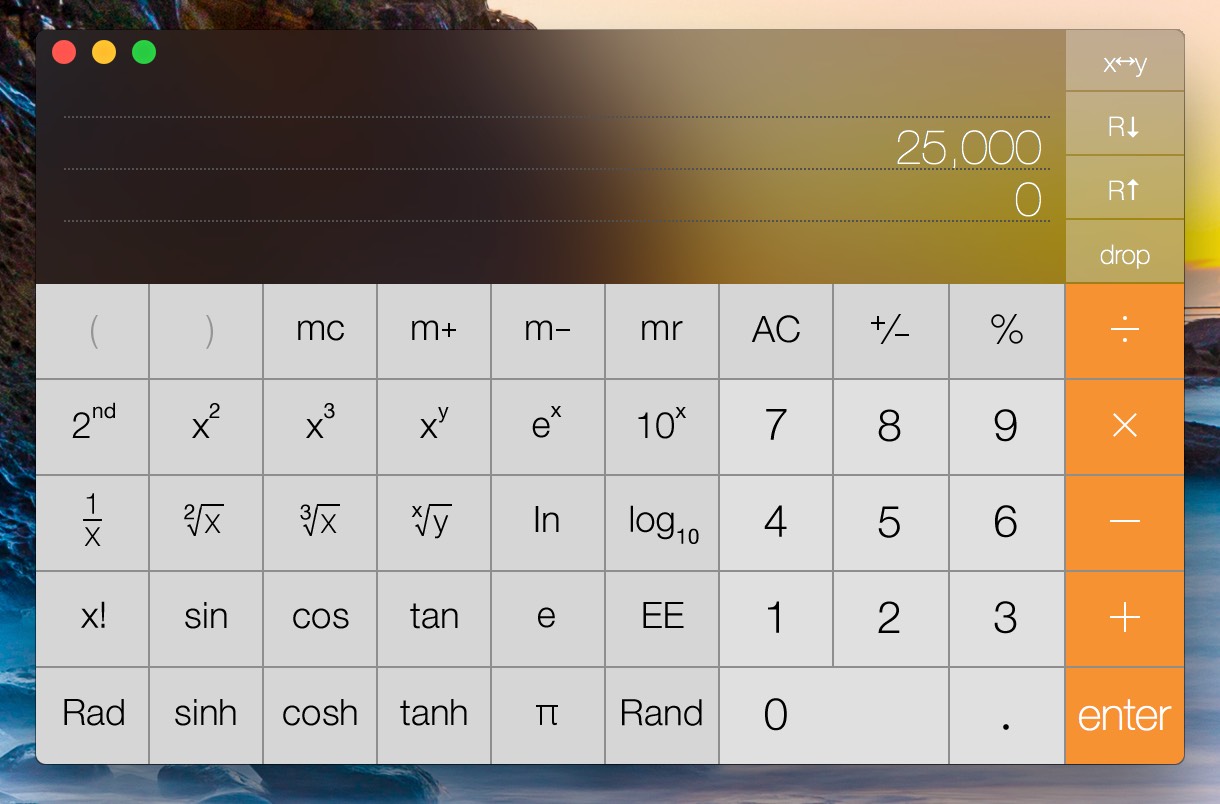
macOS includes—and enables by default—translucency, which gives you 'wonderful' effects such as this in Calculator:

This is just one example; lots of other apps (Mail and Messages, to name two) contain panes that become grossly distorted by background color bleed-through. I'm not sure who at Apple (Marketing?) thinks this feature is good for productivity , but I find it completely distracting.

As a result, I turn off translucency on every Mac I own. You can do so yourself in System Preferences > Universal Access > Display. Just check the Reduce transparency* box, and you won't get any more bleed-through. (You'll also get a solid Dock, and perhaps the world's ugliest Command-Tab task switcher. Such is the cost of usability.)

* It's ridiculous that Apple calls this transparency, which is defined as "the condition of being transparent," and being transparent means being see-through, clear, invisible, etc. This is clearly translucency, or "allowing light, but not detailed images, to pass through." But I digress…

However, when writing for Many Tricks or Macworld, I often need to take screenshots. And because most users won't disable translucency, I prefer to take those screenshots with translucency enabled, so that they're closer to what most users might see. That means a trip through System Preferences to toggle the checkbox, which gets annoying after the second or third time you've done it.

There had to be an easier way—and after some missteps, I eventually found it.

[continue reading…]


Easily see any app’s bundle identifier

I occasionally need to help one of our customers get the bundle identifier for a given app, for some purpose with one of our apps. While the task isn't complicated—the value is stored in a file named Info.plist within each app bundle—it's not something that's necessarily easy to explain to someone who doesn't have a lot of Mac experience.

I figured there must be a less-complicated solution, and I was right, though it's probably higher on the geek factor. After some searching, I found this thread at Super User, which offers a number of solutions. The simplest—and always working, in my experience—was the very first one: Open Terminal and run this command:

osascript -e 'id of app "Name of App"'

The "Name of App" is replaced with the name of the app as it appears when hovering over its Dock icon. For Excel, for example, it'd be:

osascript -e 'id of app "Microsoft Excel"'

Run that command, and it returns com.microsoft.Excel, which is just what I need—I just have the customer copy the output and email it back to me.


Show albums a given Photos’ photo has been added to

A friend asked if there was a way in Photos to see which albums a selected photo had been added to. This is one of those things that would be incredibly easy for Apple to provide: Select a photo, press Command-I, and in the info window, you could see a list of all albums containing the selected photo.

Unfortunately, Apple doesn't seem to think people might care about what albums a photo is in, so this feature exists only in my mind. Thankfully, Mac users Jacques Rious and léonie wrote an AppleScript to solve the problem. I used the first instance (version 4) of the script in that post and it worked fine in High Sierra. (In case Apple ever decides to remove its forums, I've recreated the script below.)

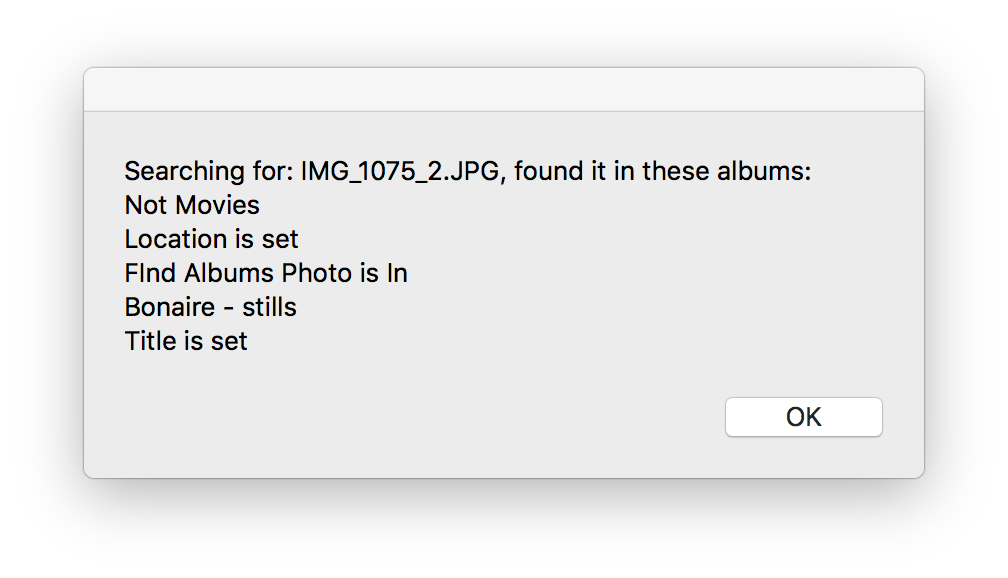
To use the script, paste it all into AppleScript Editor and save it as an application (or you can just run it in AppleScript Editor). In Photos, create a top-level album (I named mine Find Albums Photo Is In), and place the photo you want to know about into that album. Leave it selected, then run the AppleScript. You'll see one dialog stating what photo is being used, then after a bit, you should see a results dialog, like this:

As you can see, the album used for the search is included in the results; someone with better AppleScript skills than I could probably modify the script to exclude that album (any takers?). While I'd much prefer Apple include this feature directly in Photos, at least there's an alternative when you need this information.

[continue reading…]


Assign a photo’s Title field based on its filename in Photos

My migration from iPhoto to Photos continues, and today's snafu was my discovery that I couldn't rename files in Photos. This is something I've long done in iPhoto—not for every file, but for ones I'd like to group together using something other than Keywords.

For example, I have a collection of iOS wallpapers, for both the home and lock screens. I name each with either "H_" or "L_" as the start of the filename, which let me create this Smart Album to see them all together:

The inability to rename files isn't critical, in particular because the Title field can be used for the same functionality. But I had a problem: When I migrated, Photos created Titles for some, but not all, of my custom-named images. In particular, it missed all of the iOS wallpapers. I'm not sure if this is because these aren't photos in the traditional sense—they're edited photos I export as PNGs. But whatever the reason, I had hundreds of images that needed a Title that was equal to their Filename.

AppleScript to the rescue…this simple bit of code acts on the selection in Photos, and sets the Title equal to each image's filename.

To use this bit of code, just select the photos you'd like to modify in Photos, then run the script. You can make it a bit easier by saving the script into your user's Library > Scripts > Applications > Photos folder (create as many of those as don't exist). It will then be available in the AppleScript menu in the menu bar, assuming you've enabled that in the AppleScript Editor's preferences.

This saved me literally hours of work, copying and pasting filenames to the Title field. (I was surprised this worked, but it did—you can't change the filename, but you can select and copy it.)

April 28 2019 Update:

In the comments, Daryle W. asked about using this script when there wasn't a modified filename—he'd like to use the filename, but drop the extension. I did a quick bit of searching, and came up with the following, which seemed to work in my limited testing. Please have a good backup before trying this, as it's not nearly as well-tested as my original version.

This should work for any filename extension; I tested with JPG and HEIC and it worked fine. (I originally tried this without using a new variable, but it didn't work—I wasn't able to use the filename in the set cutPosition... line, for example.)


Be aware of this Applescript-with-droplet bug

Another post thanks to Many Tricks' Peter Maurer; this particular bug bit me last night—I spent 30 minutes trying to figure out why a compiled AppleScript with a droplet wasn't working. I never did get it, so I emailed Peter, and he pointed me to these tweets from a while back…

And yea, that was the problem: As soon as I added the +x to the compiled script, everything worked as expected. The exact syntax is:

chmod +x /path/to/compiled.app/Contents/MacOs/droplet

I'm documenting this here so that I can find it more easily the next time I save a compiled droplet AppleScript and forget about this not-so-little bug.


Fix Messages’ broken bundled AppleScripts

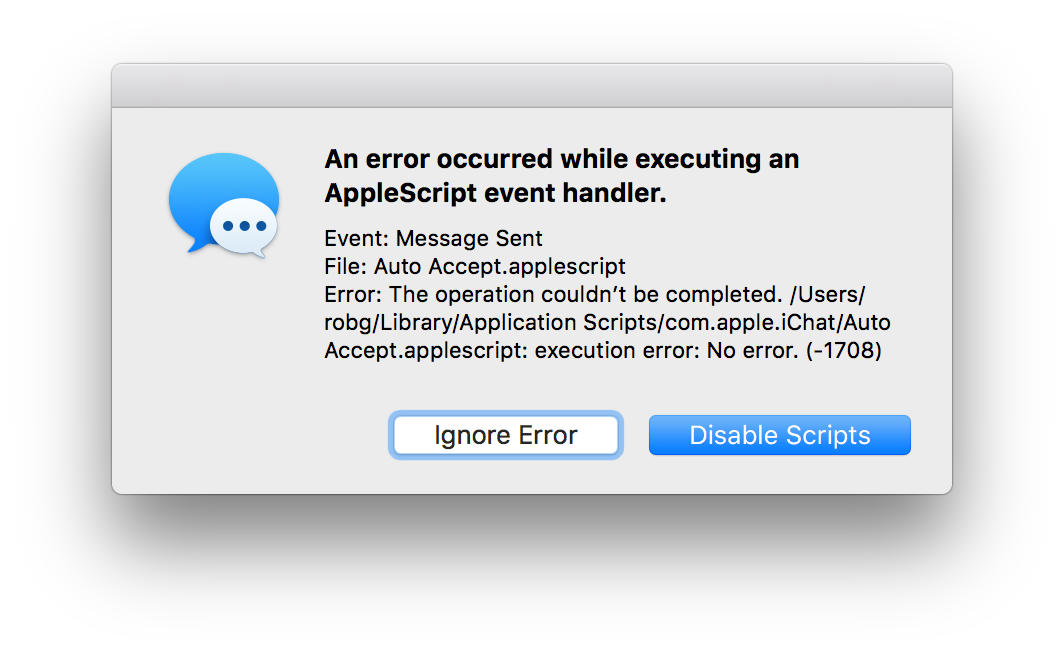
While playing around with Messages this morning, I noticed that it ships with a feature that, if used, throws an error. Steps to reproduce:

  1. Open Messages' preferences.

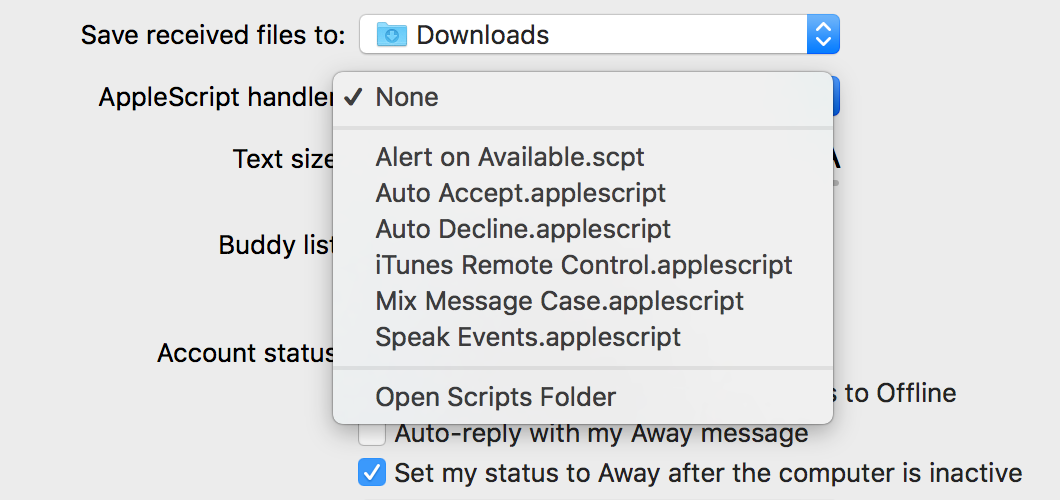
  2. Set the Applescript handler pop-up to any of the listed scripts:

  3. Close preferences, and try to send a message to anyone.

  4. Revel in the brokenness.

I especially like the execution error: No error message…it's that rare non-error that tosses up an error dialog!

In any event, I think it's shameful that Apple ships the app with a feature—plainly obvious in prefs—that breaks when used. Yes, I know AppleScript is probably dying, but that doesn't excuse shipping the app with a clearly-broken feature; if it doesn't work, just remove it. Apparently this has been an issue since Yosemite's release in October of 2014!

With all that said, fixing this is incredibly easy—it took me about 30 seconds of "work" to find and fix the problem. If you'd like to use the bundled AppleScripts in Messages—either as is, or in some modified form—here's what you need to do

[continue reading…]


Create an iTunes song info window using Keyboard Maestro

For those who aren't aware, Keyboard Maestro is a macro-creation tool, designed to help you automate routine tasks. But its powers let you do some really cool stuff, not all of which could be classified as automation. Such is the case with this project: Creating an iTunes song info pop-up window.

There are lots of apps out there—including Many Tricks own Butler—that can do this for you, and my Keyboard Maestro version is worse than most of those in many respects. However, I wanted to teach myself more about Keyboard Maestro, and this seemed like a good project with which to do so.

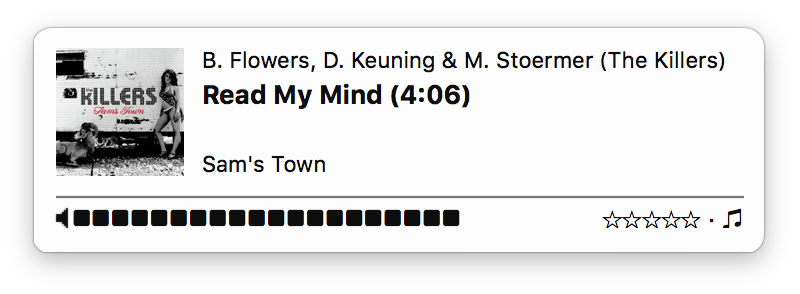
I use Buter's iTunes pop-up info window, which looks like this:

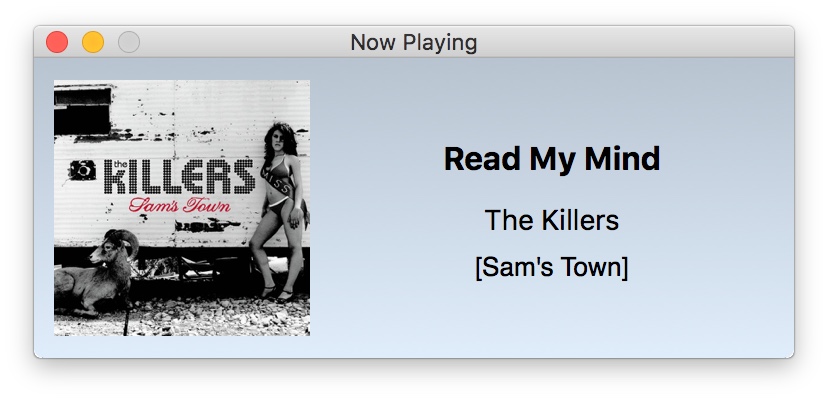
I wasn't really interested in the rating or volume controls (though they should be doable), but I wanted to see if I could get the album art and song info in a window via Keyboard Maestro. After some struggles, here's what I came up with in Keyboard Maestro:

My window is larger by design, so I can have somewhat more visible album art (aging eyes). And I can't decide on a background color or gradient, so it keeps changing—this was the look when I snapped the screenshot, but it's since changed again.

Read on if you'd like to know more about Keyboard Maestro, and how I used it to create this iTunes info window. (Note that this write-up assume some familiarity with Keyboard Maestro, though I try to explain each step in the process.)

[continue reading…]


Silently mute the mic input via AppleScript

Note: The scripts in this hint don't truly mute the mic input; they drop its volume to zero. That's because there's no way to mute an input source via AppleScript (while you can mute an output source). At zero level, the mic will still pick up sounds, but they're very quiet.

Thanks to John Welch, though, you can download an app that will mute the mic with a simple one-click HUD—he posted it in the first comment here, but that download link is broken. Instead, download it via this link, and you should be good to go.

While recording our weekly podcast, The Committed, I often want to mute the microphone input for one reason or another. (Yes, my microphone has a big Mute button on it, but pressing it results in an audible CLICK in the recording.)

There are any number of ways to do this quietly, including just sliding the level down in the Sound System Preferences panel (though it's hard to then get it back to exactly the right spot). There are also any number of App Store apps that will do this for you; some are free, some are paid. And doing it programmatically yourself is as easy as two one-line AppleScripts:

Save those separately, assign keyboard shortcuts (or more quietly, trackpad gestures) using your favorite third-party tool, and you're done.

But I wanted something more. I wanted one script to mute and unmute the volume. I also wanted a visual reminder when I was muted. After an afternoon of slogging around the internet, looking up obscure AppleScript command syntax, and diving into Sal Soghoian's AppleScript 1-2-3 book, I came up with something that seems to work. This short video shows one version of it in action:

Read on for the code and a how-to on putting it to use.

[continue reading…]