Skip to content

Time Machine

Create a Time-Machine-like backup of Keyboard Maestro macros

I use Keyboard Maestro a lot—a quick search here reveals how often I write about it, and I use it much more than I write about it.

I back up my macros reliably, as part of my overall backup plan. I also sync them between my Macs. And a while back, that caused an issue: Between the regular backups (Time Machine and removable external drive), I had a sync issue and I lost a few hours' worth of work on a new macro, and some untold number of old macros vanished. I recovered the older macros, but the new work was just gone.

So I set out to find a better backup solution for my macros.

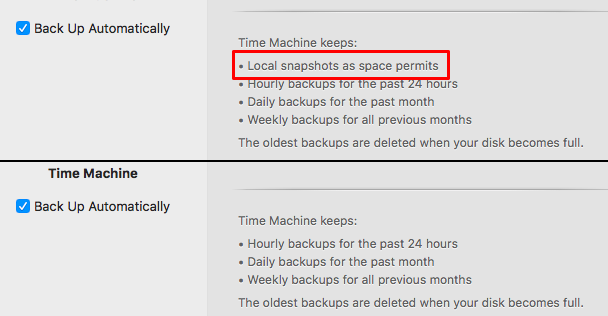
I wanted a tool that created something close to versioned backups that were browsable in Finder, that didn't take a ton of drive space, and that made it super-simple to restore any single macro or macro group*Time Machine backs up the entire macros file, not individual macros or groups from some point in history.

I also wanted it to be completely risk-free to use, never modifying my macros in any way (so no import tool in the macro). I wanted Keyboard Maestro Time Machine, basically. As I couldn't find an existing solution that worked in that manner, I wrote my own.

[continue reading…]


Create Time Machine-like backups via rsync

Taking a break from the recent Frankenmac posts, here's a little trick for creating "Time Machine like" backups of anything you'd care to back up1I don't know how well this might work for Mac files, as opposed to Unix files. But Mac files can be saved to the real Time Machine.. In my case, it's the HTML files off of my web sites, both personal and work. I used to simply back these up, but then realized it'd be better to have versions rather than totally overwriting the backup each day (which is what I had been doing).

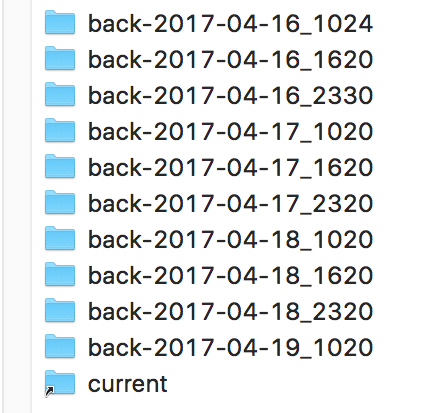
Once you've got it set up and working, you'll have a folder structure similar to the one at right, with one folder for each backup, and a "current" link that takes you to the newest backup.

I get zero credit for this one; my buddy James explained that he'd been using this method for a year without any troubles, and pointed me to this great guide2The original site that hosted this script is gone; I've linked to a copy I found on archive.org. Original URL:
https://blog.interlinked.org/tutorials/rsync_time_machine.html
that explains the process.

I used that guide and added the following to my backup script to create my own customized Time Machine for the files from here, robservatory.com:

/usr/local/bin/rsync -aP \
  --link-dest=/path/to/quasi/TM_backup/current user@host:/path/to/files/on/server/ \
  --exclude "errors.csv" \
  --delete --delete-excluded \
  /path/to/quasi/TM_backup/back-$newtime
rm -f /path/to/quasi/TM_backup/current
ln -s /path/to/quasi/TM_backup/back-$newtime /path/to/quasi/TM_backup/current

And that's all there is to it. Note that you may need a newer version of rsync than what comes with macOS now (2.6.9)—I use version 3.1.2 from Homebrew, so I can't say for sure that this script works with the stock version.

I've only been using this for a couple weeks, but it's working well for me so far.


Disable local Time Machine backups on laptops

Just noticed this post over on iMore…did you know that Time Machine automatically creates local backups on your laptop Mac? As described by iMore…

On Apple laptops, like the MacBook, MacBook Air, and MacBook Pro, Time Machine includes the added feature of creating local snapshots so that, if you disconnect your MacBook from its external hard drive, you'll still have backups stored on your internal hard drive so you can recover data if you need to.

While the iMore article points out how to disable/enable the feature (sudo tmutil disablelocal or …enablelocal in Terminal), here's a bit more detail not provided in the article.

First, this is not some hidden hack; you're merely changing a setting using an Apple-provided command line interface to Time Machine. Apple, for whatever reason, chose not to include this setting in the GUI, but you're not risking anything by making this change.

Second, you'll find the local backups in a root-only folder named .MobileBackups, at the top level of your hard drive. You can—sort of—see how much space they take up by selecting About this Mac from the Apple menu, then clicking on the Storage tab. On my MacBook Air, which has a 2GB local backup, I see 4GB of purgeable space, which I assume includes that backup.

To get the actual size of the local backup, run this command in Terminal:

sudo du -h /.MobileBackups/

Provide your password, then wait a bit. The last line of the output will be the total size of the folder, stated in gigabytes…

…
…
 23M	/.MobileBackups//Computer/2017-02-16-092144
2.0G	/.MobileBackups//Computer
2.0G	/.MobileBackups/

And finally, if you disable this command, how do you know you've done so, months from now when you've forgotten about this? Time Machine itself will tell you, on its System Preferences panel. (Sorry for the low-res shot; I only have local backups enabled on my 11" Air!)

As seen, after disabling the setting, Time Machine's System Preferences panel will no longer list local backups as one of the tasks it performs.


macOS app: BackupLoupe examines Time Machine backups

I'm somewhat paranoid about backups—I have many of them, both online and offline, onsite and offsite. I test my backups to make sure they're good. In short, I do my best to make sure a hardware failure or natural disaster won't take out my data.

My backup strategy includes Time Machine, mainly for recovering from "oh crud I didn't mean to delete that!" moments. We also use it, via a Time Capsule (RIP, sigh), to back up our laptops.

While I love how Time Machine works, I dislike that it doesn't tell you anything about a given backup other than how big it was. Enter BackupLoupe, a $10 "honorware" app. BackupLoupe examines your Time Machine backups and computes a "diff" for each one, letting you know exactly what was backed up in a given run:

Each backup is color coded—on the left of each backup's name, the color indicates the size of the backup, and on the right, the deviation of that size from the norm.

[continue reading…]