As I recently wrote about, I'm weird in that I prefer to buy my movies on physical media, versus electronic only. But I also enjoy the benefits that come from having an electronic version of the movie. The recent Frozen Blu-ray release, for example, was perfect: In the box was a Blu-ray, a DVD, and an easy-to-use redemption code for the iTunes digital version.
Other studios, though, want to force me outside the Apple ecosystem, and into the hell that is Ultraviolet. More and more, in fact, this is the norm. Which means I need to make my own digital versions.
![]() For DVDs, this isn't too troublesome (and well documented), but I'm only buying Blu-ray discs now, and that makes things a bit tougher. (Kirk McElhearn discussed Blu-ray viewing/ripping for Macworld last year. Kirk focused on playback; I'm ignoring playback, and expanding on the ripping tutorial.)
For DVDs, this isn't too troublesome (and well documented), but I'm only buying Blu-ray discs now, and that makes things a bit tougher. (Kirk McElhearn discussed Blu-ray viewing/ripping for Macworld last year. Kirk focused on playback; I'm ignoring playback, and expanding on the ripping tutorial.)
If you're interested in creating your own digital copies of your Blu-ray discs, read on to see how I do it.
Before we begin, the obligatory disclaimer:
And after that disclaimer, a bit of rationalizing: ripping a Blu-ray disc to watch on a limited-resolution device is somewhat senseless: the extra pixels in the Blu-ray will be lost due to the limited resolution. You'll get very good results—and get done much faster—by using the DVD version of the movie.
But if you're watching your rips on a 27" iMac, on your big screen TV, or on a retina device (yes, even one as small as the fifth generation iPod touch), then you'll probably notice the quality difference that comes from the high-res Blu-ray. (I'm working on an image quality comparison follow-up post.)
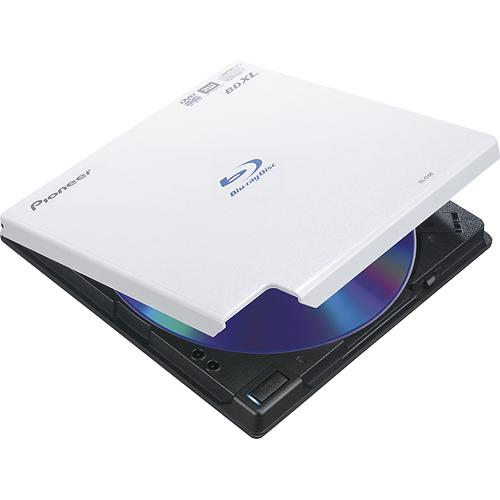 To create your own digital version of a Blu-ray movie, you'll first need a Blu-ray drive for your Mac. There are many out there to choose from, and I'm sure they're all basically the same. I went with a Pioneer BDR-XD05W [Best Buy | Amazon], mainly because it was well reviewed, and on sale for $80 at the time I bought it.
This drive is small and light, and USB powered, so it's easy to take with me, if I want to do so. So far, though, it's just stayed home, as I take the digital versions of the movies I've created, instead of the physical movies. (Keep in mind that you can't watch a Blu-ray disc on your Mac without software; Kirk's article links to the one app that works for this.)
Once you have the drive, you need a tool to get the movie's data onto your hard drive, and then some way to convert that data into a more-usable file size. I'm aware of only one way to get the movie data off a Blu-ray drive, and that's via an app called MakeMKV; at first glance, you'll think it's Windows only, but head over to the download page, and you'll find a Mac version.
MakeMKV is a $50 program, but it's also in perpetual beta (and has been for years). The current beta key is always posted in the MakeMKV forums. If you find it works well for you, of course, you should purchase a license.
MakeMKV won't wow you with its beautiful Mac-specific user interface; it's got that typical Java app appearance:
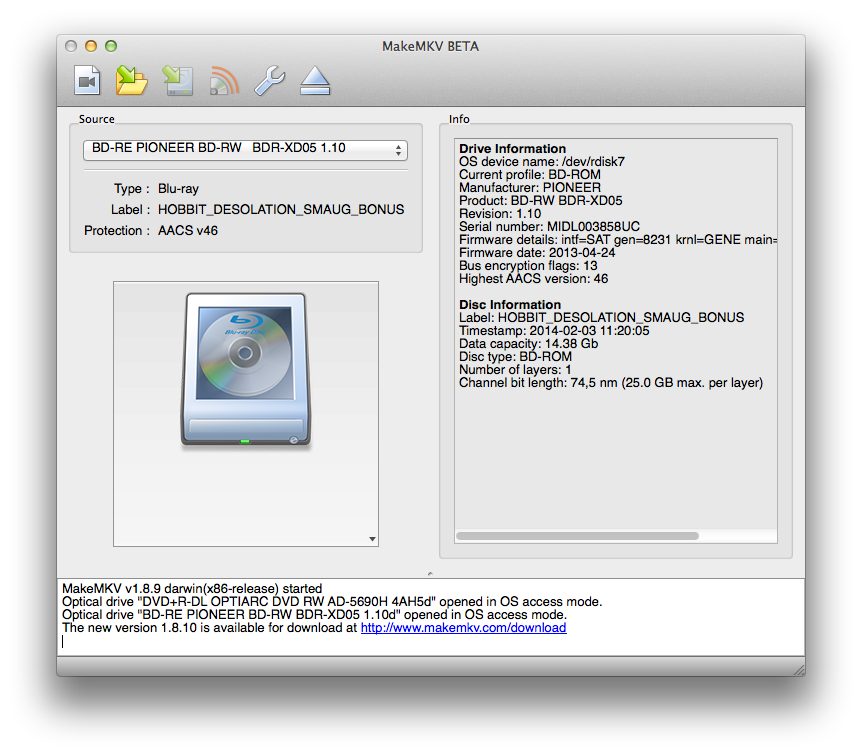
But the interface is more than fine for what the program needs to do.
There are at least two ways to grab the content from the Blu-ray. First, you can have MakeMKV process the disc and create an MKV-formatted file. This is how I processed my first Blu-rays, but the problem is that the MKV format isn't easily portable to iOS devices. (You can convert the MKV container to a format that is portable, and this process is relatively fast. However, compressing on your own gives you more control over the final video quality.)
The second way to use MakeMKV, and the way I use it now, is to simply create an encryption-free backup of the disc, without applying any additional compression or format conversion. You do that via the app's File > Backup menu item, or by clicking the second icon from the left in the toolbar. This opens a simple dialog with just two options to set:
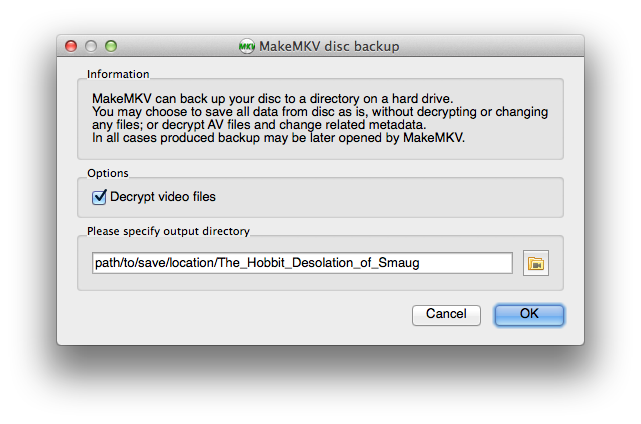
Make sure you check the "Decrypt video files" box, and then click the ugly folder icon to set the path to where you'd like the file to be saved.
 Warning: Because you're merely copying the contents of the Blu-ray without changing its compression or format, the resulting files can be very large. (They also include everything on the disc, i.e. music, graphics, etc.)
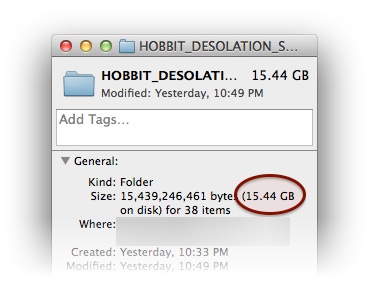
The extras disc for The Hobbit: Desolation of Smaug, as seen at right, takes up 15GB of drive space in backup form—and the extras only run 37 minutes! A long complex movie with a dual-layer Blu-ray can easily approach 50GB. (Mission Impossible: Ghost Protocol was 44GB; the much visually simpler and shorter So I Married An Axe Murderer was "only" 21GB.)
So make sure you have a lot of free drive space, make sure you remove these backup copies when done with the conversion step, and if you make backups (you should!), make sure you exclude the folder that holds your raw Blu-rays from your backups.
The process of creating a backup doesn't take overly long (though it's dependent on drive speed), because the drive is just copying data to your Mac, and decrypting. (That's not to say it's fast, either; it takes a while to copy and decrypt up to 50GB of data at Blu-ray speeds. Frozen, for instance, took about 45 minutes to copy. But compared to the next step, it's like lightning.)
Once you have the movie on your drive, the next step is to convert it into a format that'll work on all your devices. There are quite a few programs that do such video conversion; my favorite is HandBrake (free).
Launch HandBrake, and you'll be greeted with its oh-my-gosh-can-we-have-any-more? settings screen:
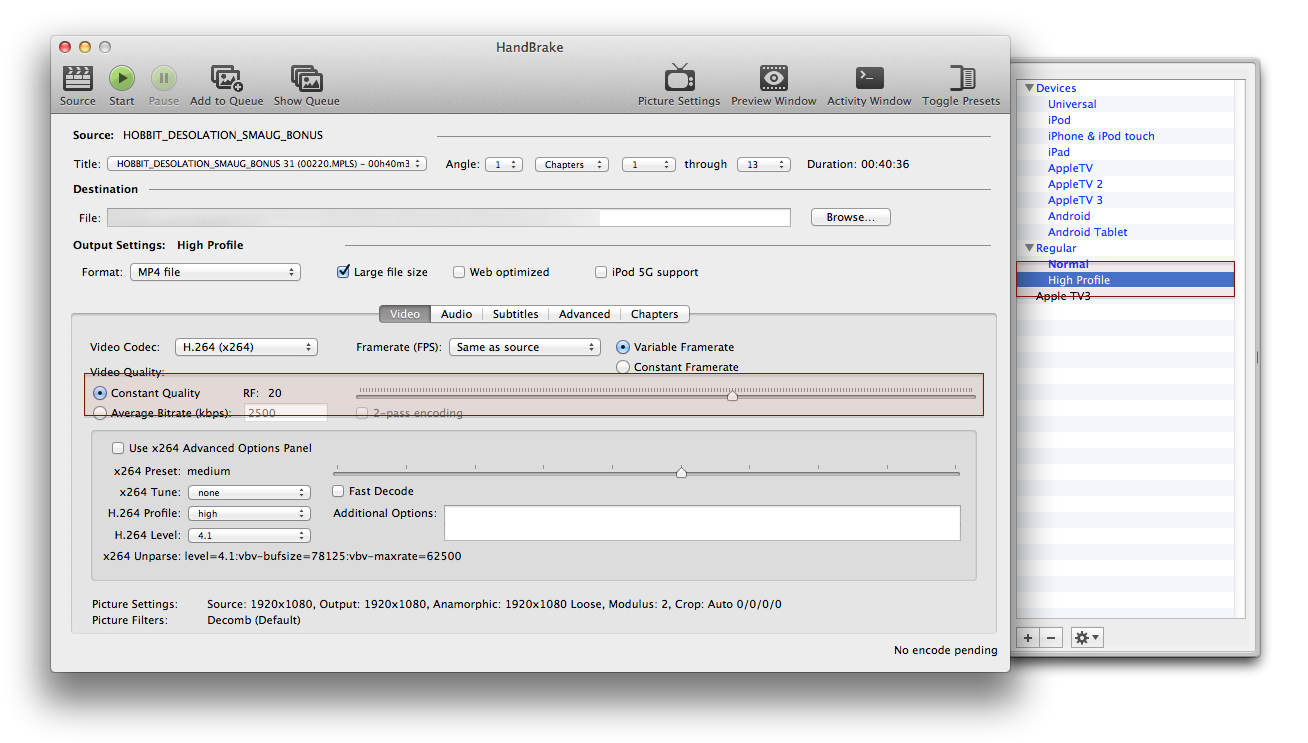
Click the Source button, and navigate to the folder containing the backup you created with MakeMKV; HandBrake will take a minute or two to process the folder. When it's done, it will have chosen a Title to rip; it's usually accurate on movie discs (the longest entry is the movie), but can get confused on extras discs (where there can be many short titles).
Confirm that the Title is the one you want to rip, then click File in the Destination section and point it at the spot where you'd like the final movie to reside. When ripping a Blu-ray, I choose the High Profile entry in the drawer (highlighted in the screenshot above).
I then make sure the Format is set to MP4, and that the Large File Size box is checked. Finally, I check that the Video Quality is set to Constant Quality; you can change the value here if you want (20 is the default). This area is also highlighted in the above screenshot.
Note that quality goes up as the number goes down, so 19 is better than 20. Small changes in the Constant Quality slider make a big difference in file size, and not much difference in image quality; I usually leave it at 20, and haven't ever gone lower than 18.5.
When everything is set the way you like, click the Start button. And then wait. A long time. A really long time. Depending on your settings, the length and visual complexity of the source movie, and what else your Mac is doing, this process can take anywhere from "slightly better than real time" to "much worse than real time."
On my mid-2011 iMac (3.4GHz Core i7 Sandy Bridge, 16GB RAM), I usually see final average frame rates of 12 to 18 frames per second, depending on the above variables.
As one example, the 37-minute Desolation of Smaug extras disc took 67 minutes for my iMac to convert to MP4 format. My machine wasn't just processing the movie, though; I was working on this blog post, handling email, chatting, and doing the other normal stuff I do. So if you want the Lord of the Rings trilogy for that long flight to New Zealand, don't wait until 20 minutes before you leave to start the process!
Once HandBrake finishes its work, you should find a notably smaller MP4 file on your drive. The Smaug extras shrinks from 15GB to 3GB; Mission Impossible dropped from 45GB to 6GB; and Axe Murderer came in at 7GB. Still not tiny, but not that much larger than the HD versions you'll find on the iTunes Store.
The finished movie can be added to iTunes for easy viewing on your iOS devices, though it's overkill for non-retina devices. However, it should work just fine on those, and on any other iOS device you may use. Just remember that, depending on your iTunes settings, when you add the movie to iTunes, you'll be making a copy of it—yet another way to make your drive space vanish in a hurry!
As a final step, remember to delete the backed-up version of your original Blu-ray (lest you wonder why your drive space is vanishing so quickly).
When all is said and done, you'll have nice high-quality digital versions of your Blu-ray discs. Just how good is the quality, compared to the original disc, a DVD, or the iTunes digital version? That's a subject for another day…
One more thing...add metedata to your freshly minted recording using iFlicks 2.
Oddly, I never consider metadata … I probably should, but the collection is small enough to manage without too much trouble. I'll take a look at iFlicks 2; thanks.
-rob.
metaz is open source and you can tell handbrake to use it (instead of metax). when your encode is finished the file queued in metaz. if you have a nights worth of encodes going you can handle the metadata for all them in one swoop in the morning.
how much blu ray iso bun charg of 8 copy ?
Comments are closed.