The Shortcut Manager
This is the heart of Quick Web Search, and the key to making future upgrades completely trivial. All work with shortcuts should go through the shortcut manager.
On first use
The very first time you launch the macro, you'll be asked to answer some questions that the macro in general—and the Shortcut Manager in particular—need in order to work correctly. Two of the questions are relatively trivial—your preferred dialog style and the default "no shortcut" search site—but the last is critically important.
The last question asks you to select a folder where a Quick Web Search folder will reside. In this folder, the macro will generate the shortcuts database, which holds the bundled shortcuts, your changes to those shortcuts, and any shortcuts you add. when you install a new version of the macro, it will automatically read the database into the new macro, so you're ready to go as soon as you update.
If you use more than one Mac, select a folder on a cloud drive to hold your Websearch folder, and you'll be able to use your customized list from any Mac you use.
The Shortcut Manager's menu
You access the Shortcut Manager by clicking the Manage button (or pressing ⌘M) in the input dialog window. You'll then see the main Shortcut Manager window:
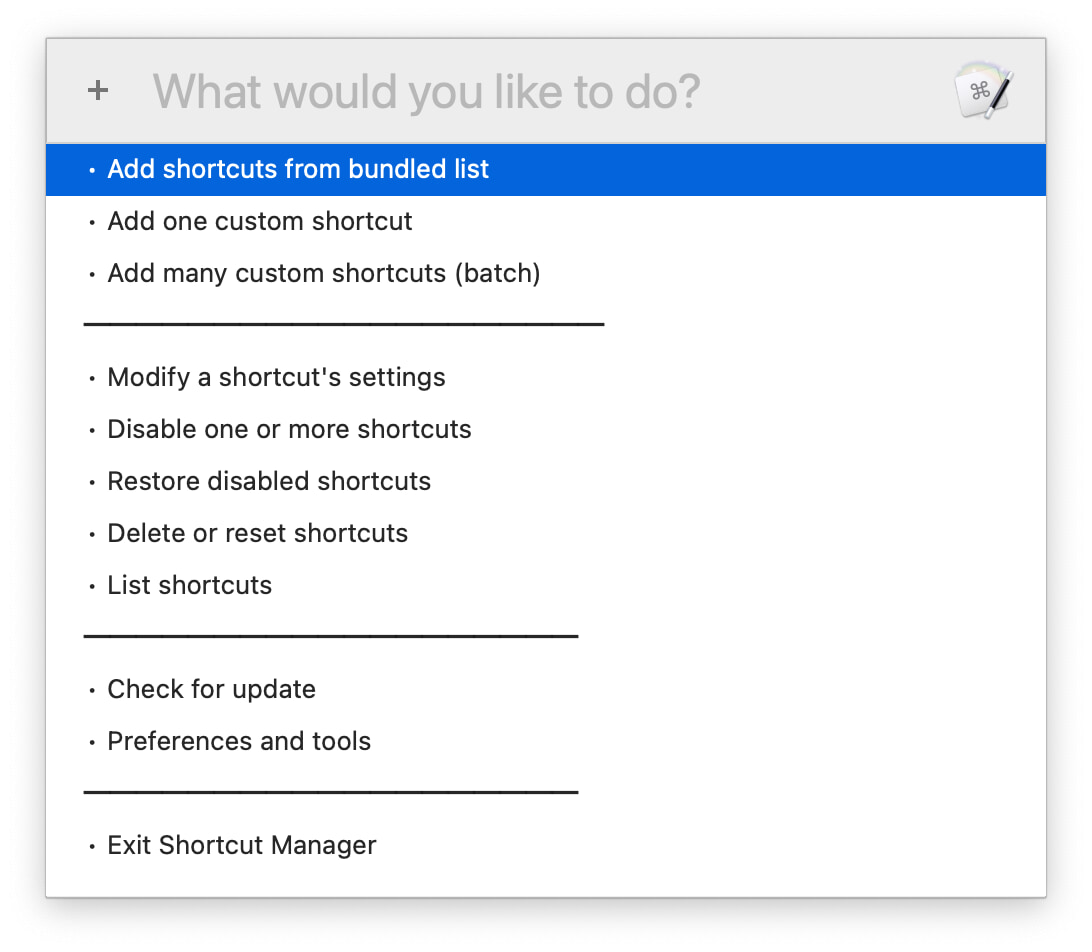
The name explains what each option does, but here's how to use each one…
Add shortcuts from bundled list
Web Search via Shortcuts includes a list of about 100 pre-configured sites, with 18 active by default, and the remainder ready to go if you want them. All you need to do is activate them, and you do that through this menu item. When selected, a new window opens showing all the optional shortcuts, organized into rough categories:
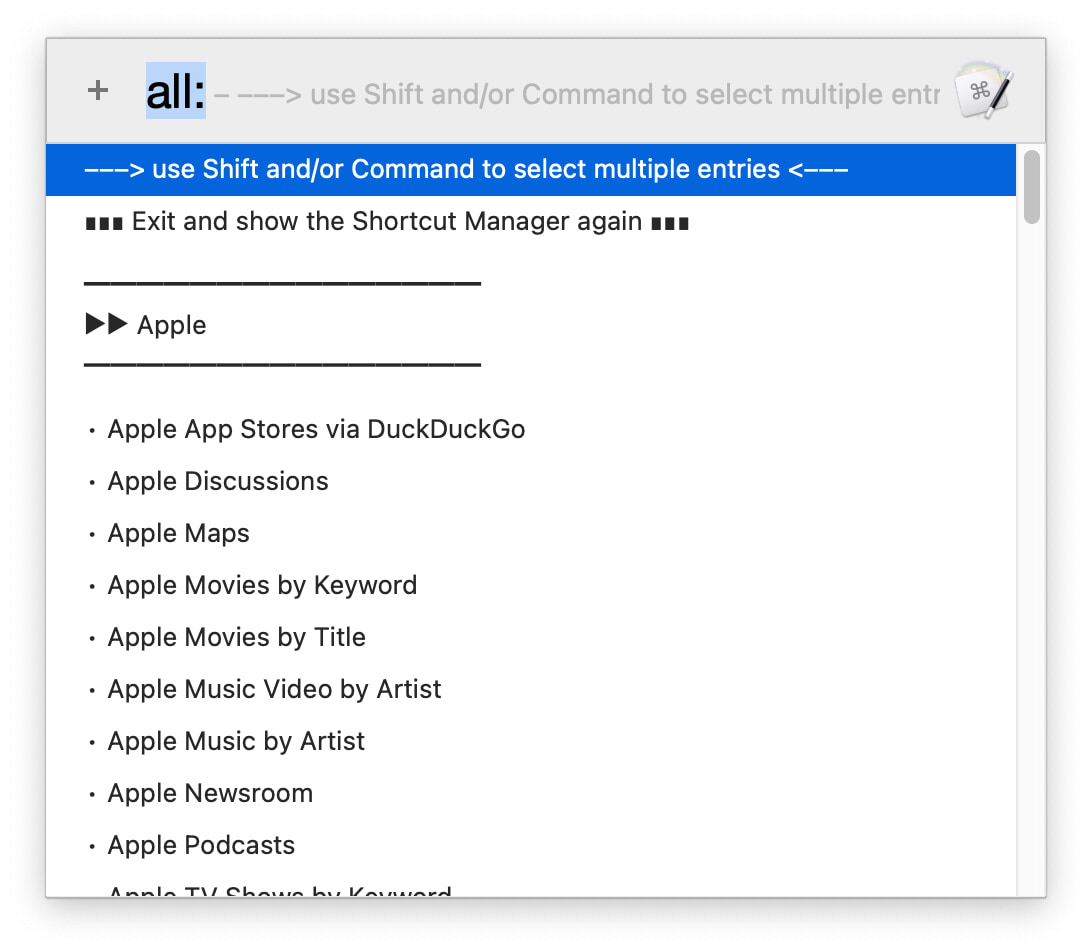
You can type to select, if you wish, but if you're planning on adding more than one, use the Shift and/or Command keys to make multiple selections. Once you've selected the ones you'd like to activate, double-click the mouse on one of the selected items (or just press Return) to move to the next step.
After making your selections, you'll see a dialog for each selected shortcut, asking you what shortcut you'd like to use:
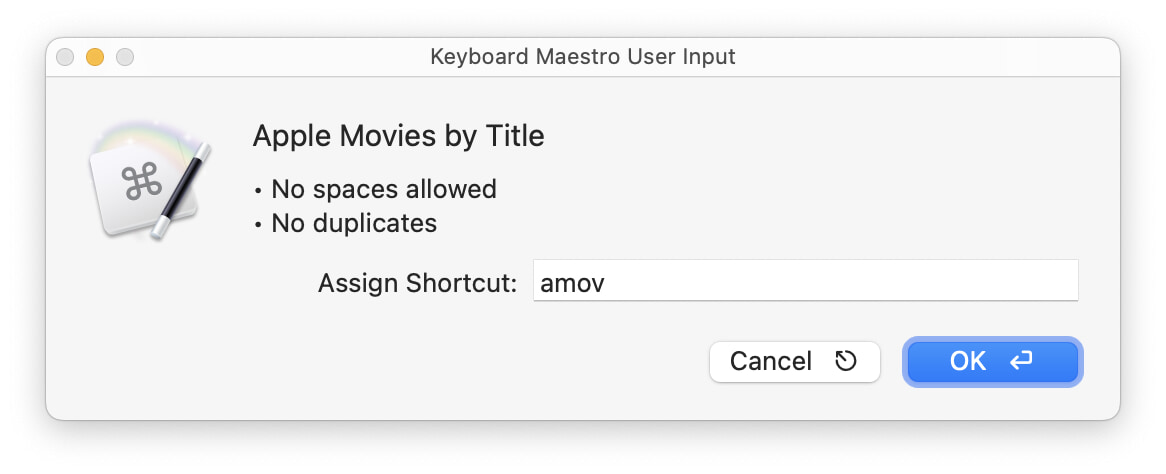
Click OK to process your shortuct; the macro will insure that each shortcut is unique (and doesn't contain any spaces), then proceed to the next site you selected. Once you've assigned all the shortcut keys, you'll be taken back to the Shortcut Manager.
Add one custom shortcut
Use this option when you want to add a new custom shortcut of your own; it presents an input box for you to complete:
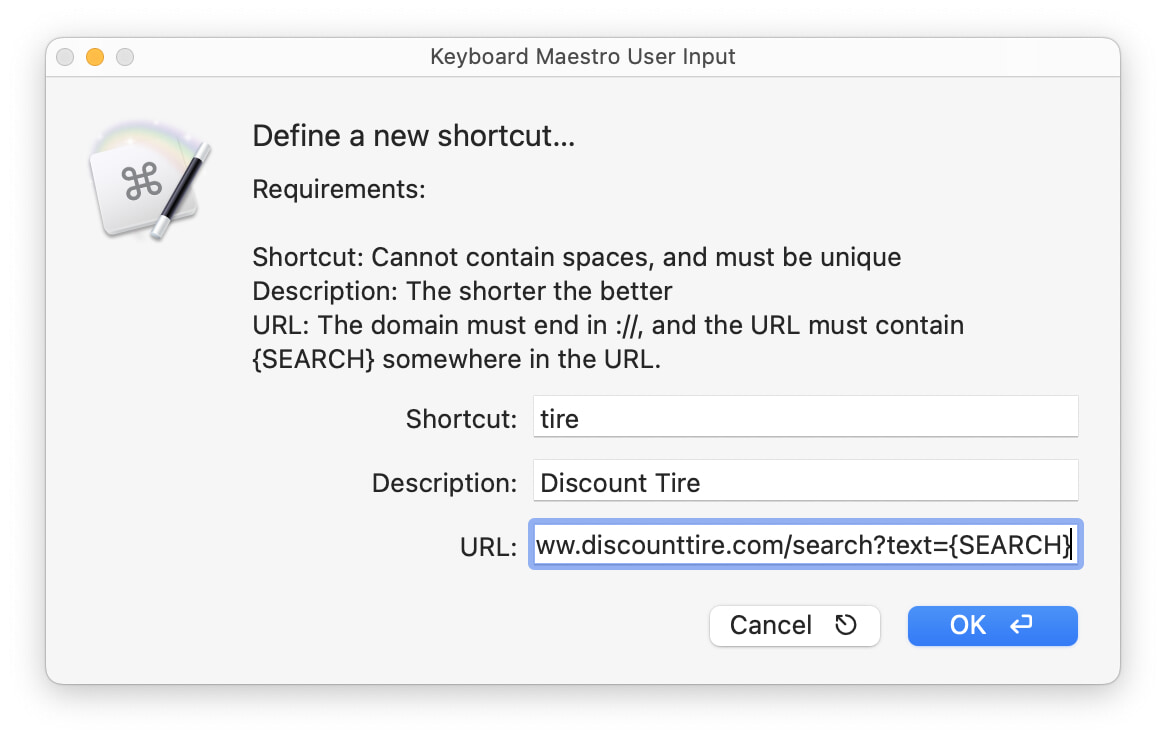
Pay close attention to the listed rules, as you won't be allowed out of the dialog box until your entries meet those restrictions: No spaces in the shortcut and it can't be a duplicate, and you must provide a valid URL that also contains the {SEARCH} placeholder. Click OK when done, and your new shortcut is added and active.
Add many custom shortcuts (batch)
The batch input method is used when you have a number of shortcuts to add, all at once. Most users won't ever need to use this screen, given the 100ish bundled shortcuts. If you do, however, here's what it looks like:
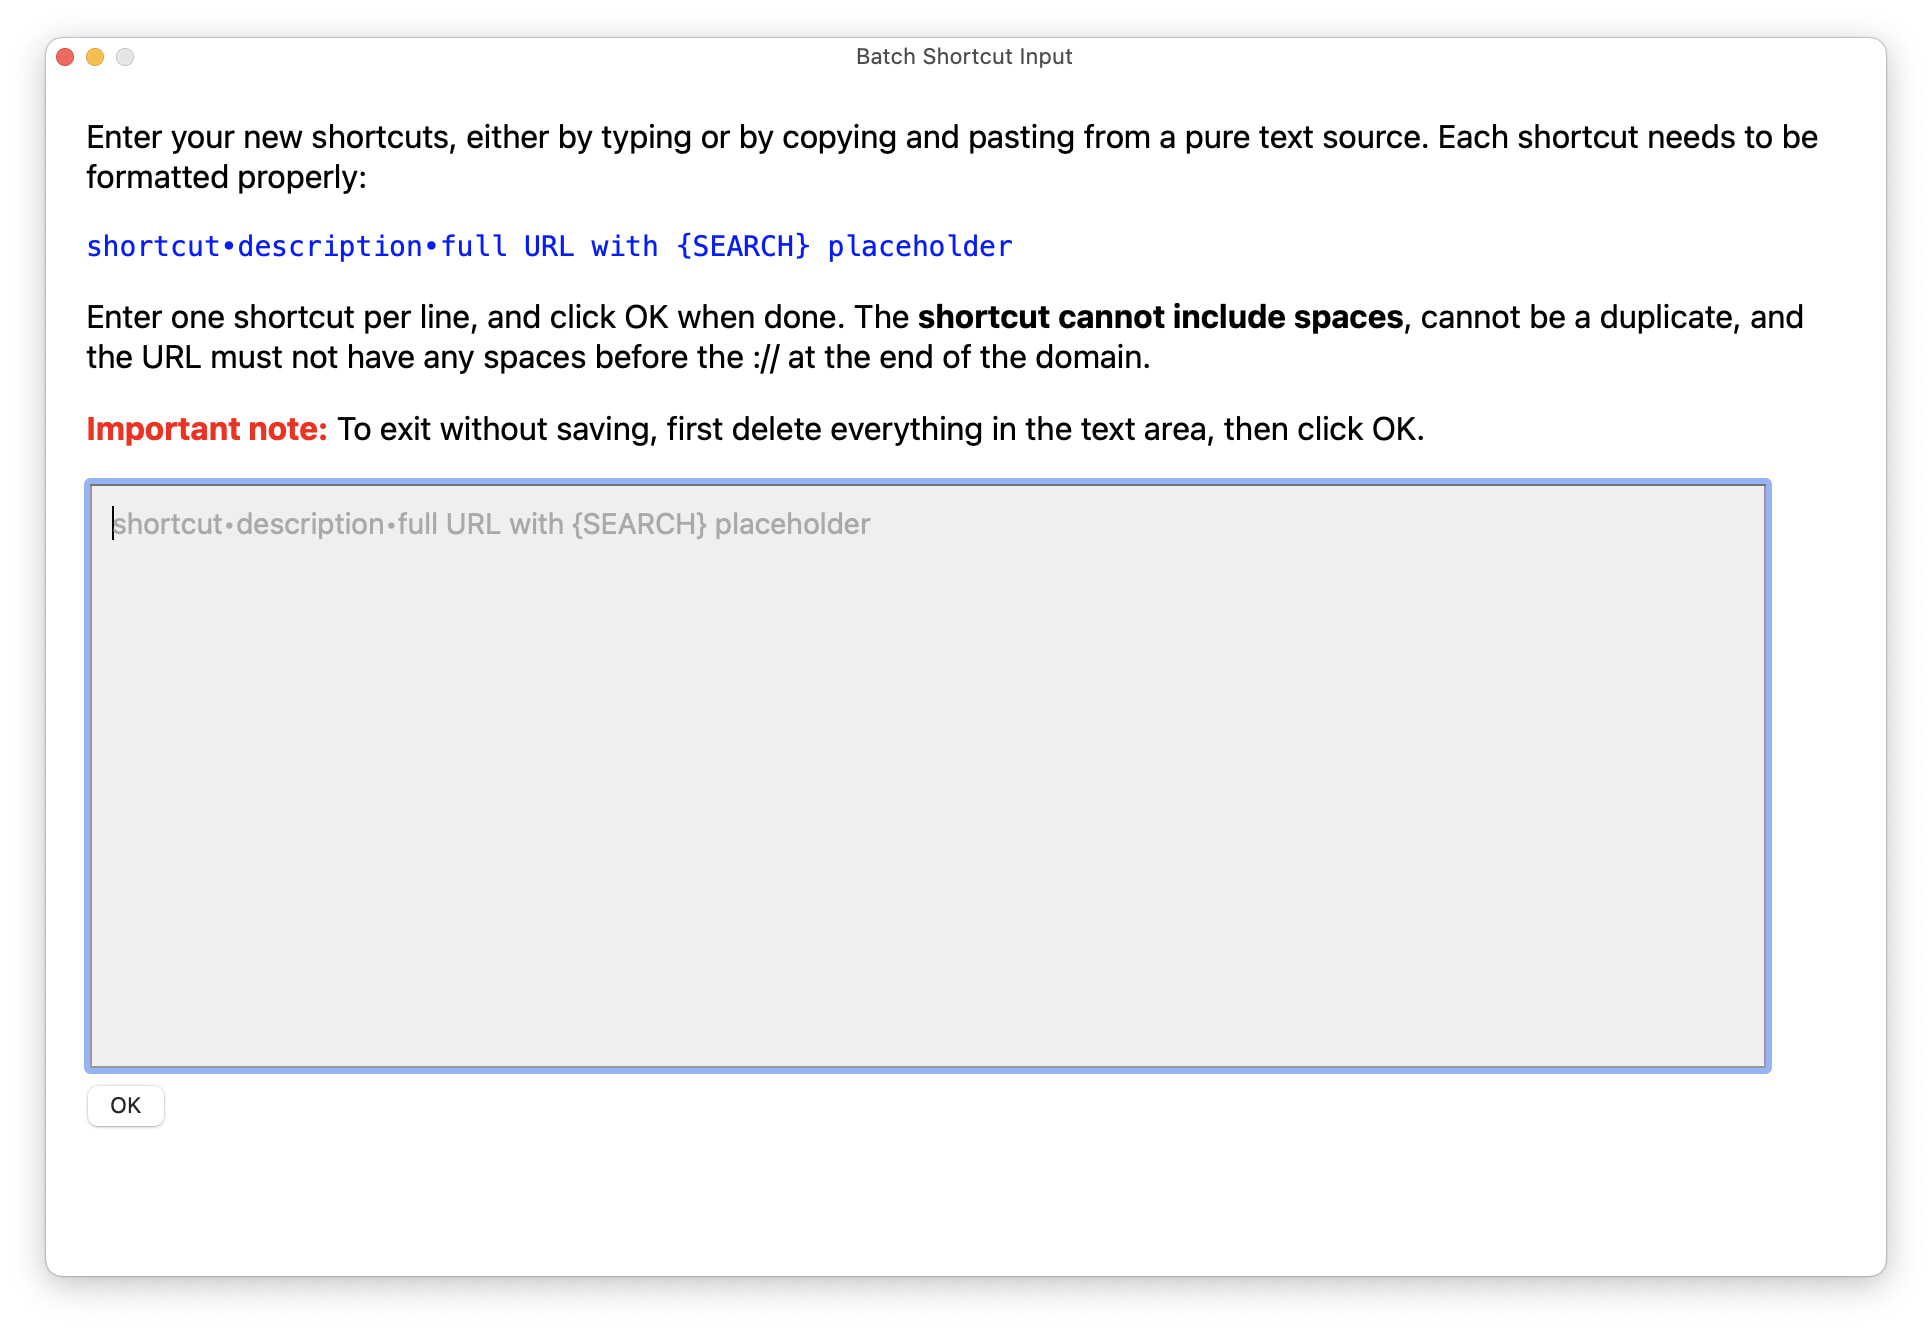
Each shortcut must be on its own line, formatted as shown in the blue text in the screenshot. All entries will be checked for spaces (not allowed), valid URLs, and unique shortcuts. Once you have everything entered, click OK to add them to the database.
Modify a shortcut's settings
This powerful feature lets you change anything about any of your active shortcuts—the activation keys, the description, and the URL. You'll first be shown a list of your active shortcuts; select one from the list, and it will appear in a dialog box, with its current values filled in:
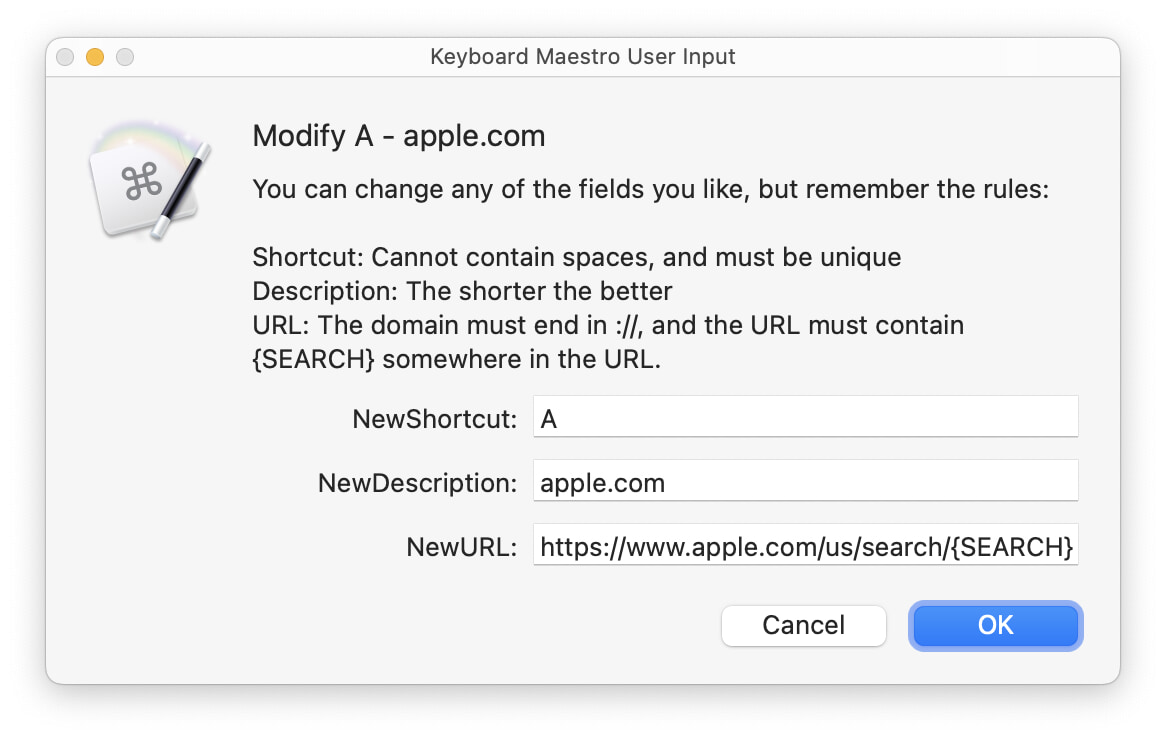
Change whatever values you wish, then click OK. (Unfortunately, I have no control over the text box width, so you won't be able to see the full URL; copy and paste into a text editor if you want to edit the URL, then paste it back in.) The macro will make sure it's not a dupe, and requires the URL to be valid and include the {SEARCH} placeholder.
Remove one or more shortcuts
Use this menu item to remove shortcuts—custom ones you added, ones you added from the optional list, or even the default built-in shortcuts. You can choose one or more from the pop-up list that appears:

Note: If you remove default or optional shortcuts, you can easily add them back, as they're stored in the database and just marked as inactive. If you remove a custom shortcut, though, it's gone for good (as it gets deleted from the database), and you'll have to re-add it from scratch.
Restore a removed default shortcut
If you remove some of the 18 default shortcuts, then decide you'd like to have them back, this is the menu to use. (This menu item only appears if there are removed default shortcuts.) Just pick one or more shortcuts to restore from the menu that appears:
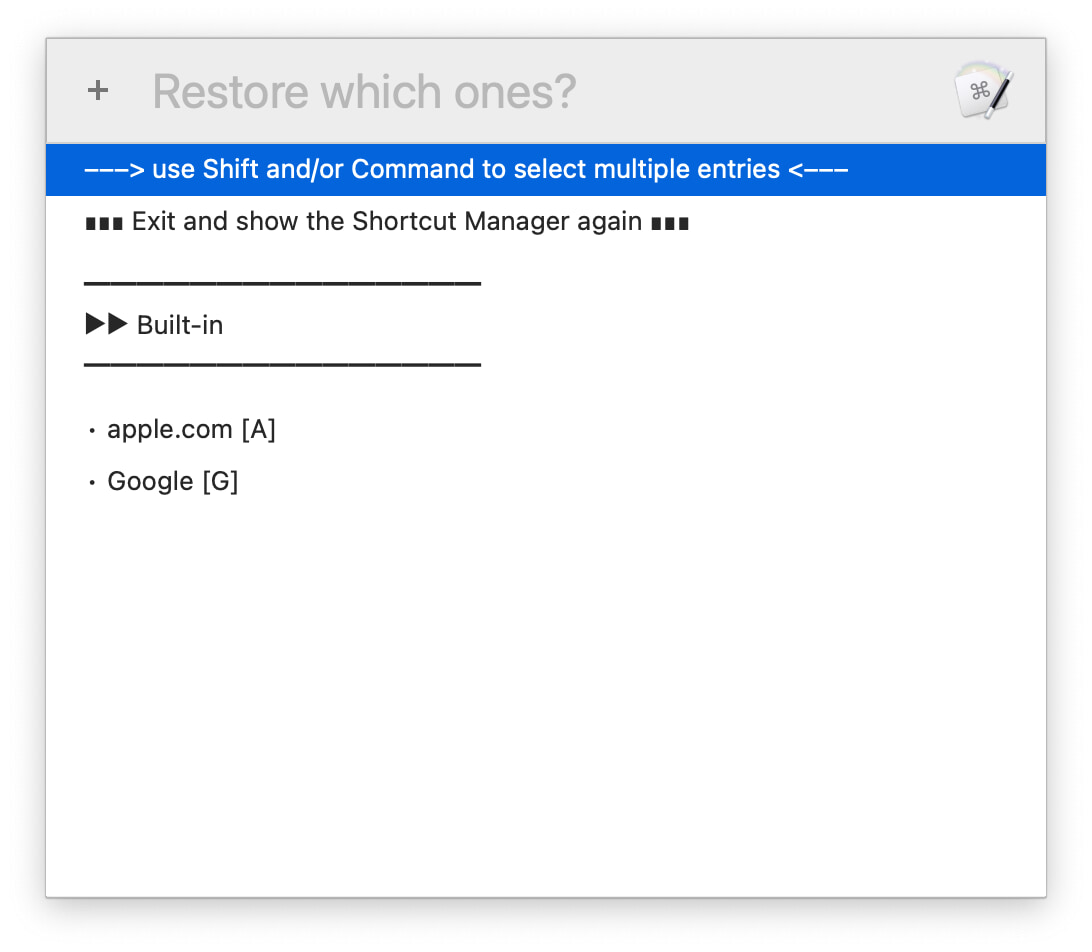
Note: To restore a removed optional (i.e. not active by default) shortcut, add it as you did originally: Use the Add shortcuts from bundled list entry in the Shortcut Manager.
Delete user=-added, or reset modified, shortcuts
Use this menu to delete shortcuts that you added (i.e. not a built-in shortcut), or to undo the modifications you made to a built-in shortcut:
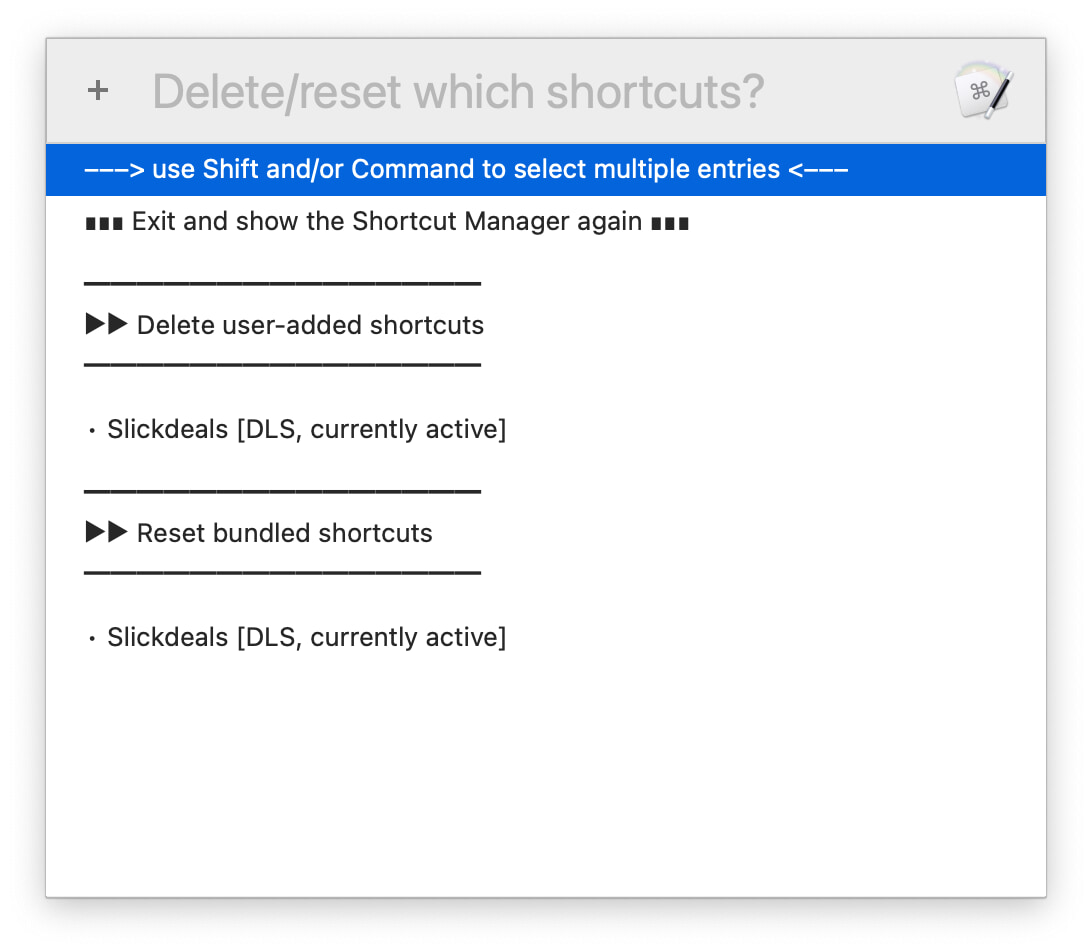
Remember that built-in shortcuts are never actually deleted, but ones you added are—once they're gone, they're gone.
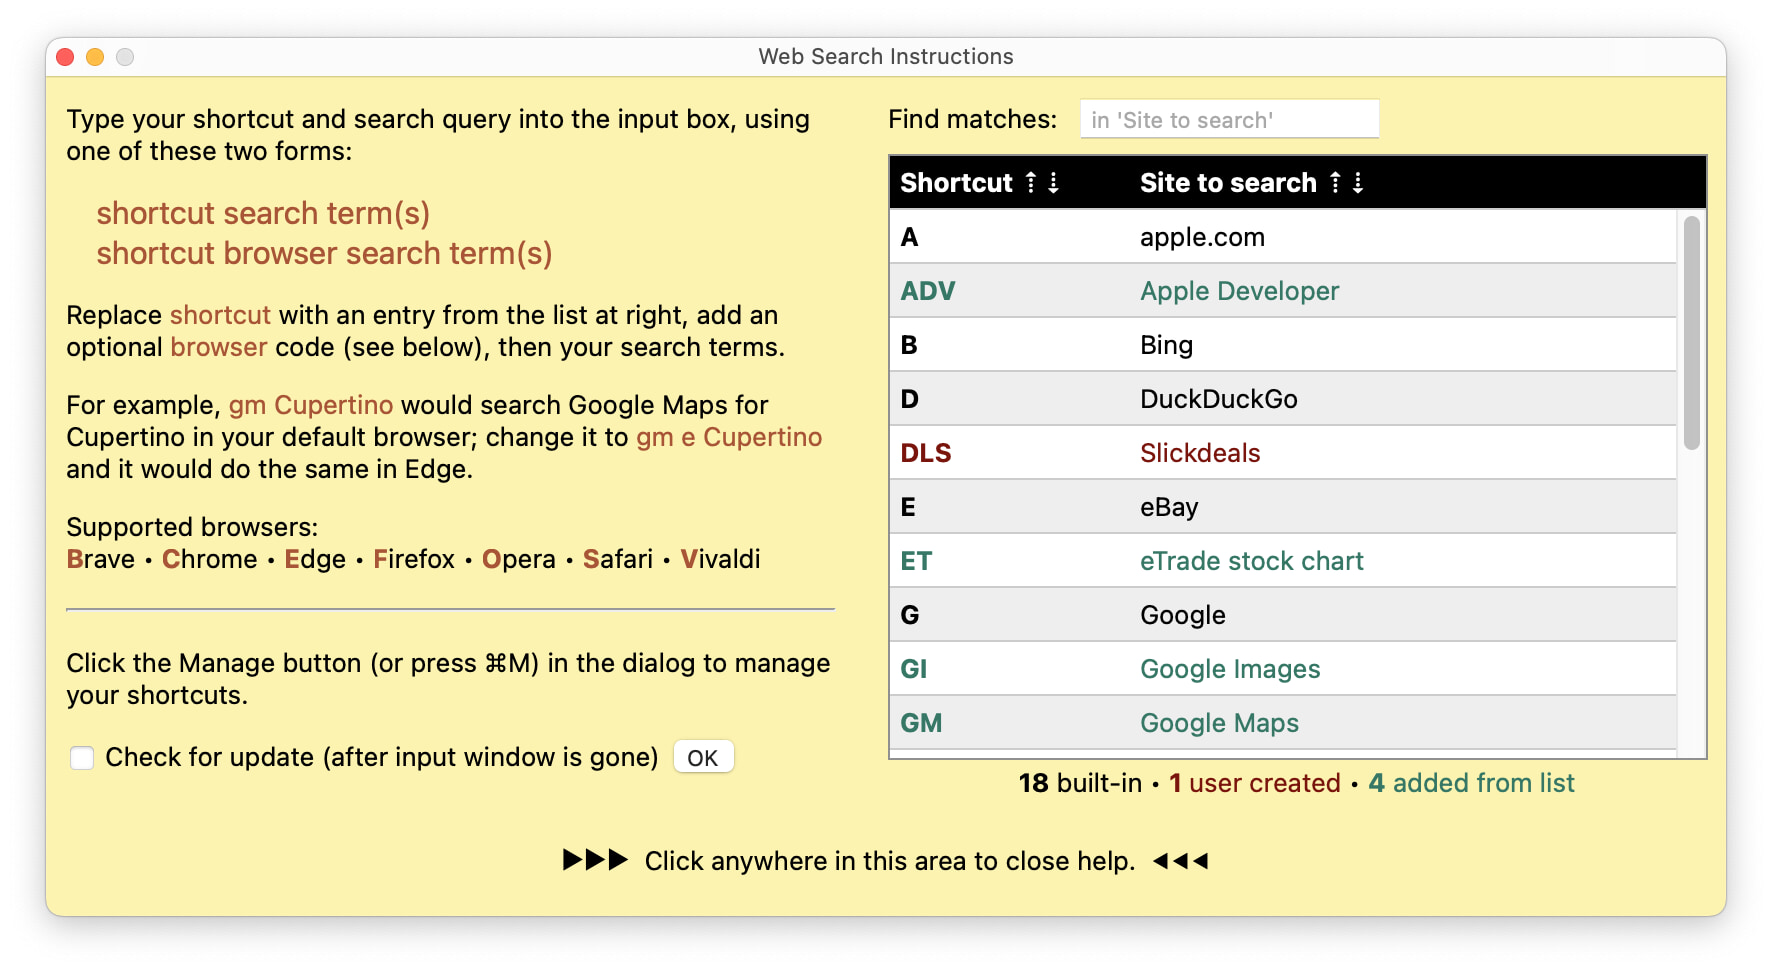
List shortcuts
This is more of a "future" feature than a "now" feature, but you can use it and see how it looks. It opens a window showing your active shortcuts, along with any available (hidden or inactive) built-in and optional shortcuts:

You can sort the tables using the arrows in the headers. Eventually, this will (hopefully) be a window from which you can easily add and remove shortcuts with a click. For now, it's a list that includes the ability to test each site in the list by clicking the "test" link—this will literally search for "test" on the selected site.
Check for update
What it says—this menu item runs the macro's update checker, and either displays a notification telling you you're up to date, or launches the update macro if there's an available update.
Preferences and tools
This menu item launches a new menu with a few additional options on it:
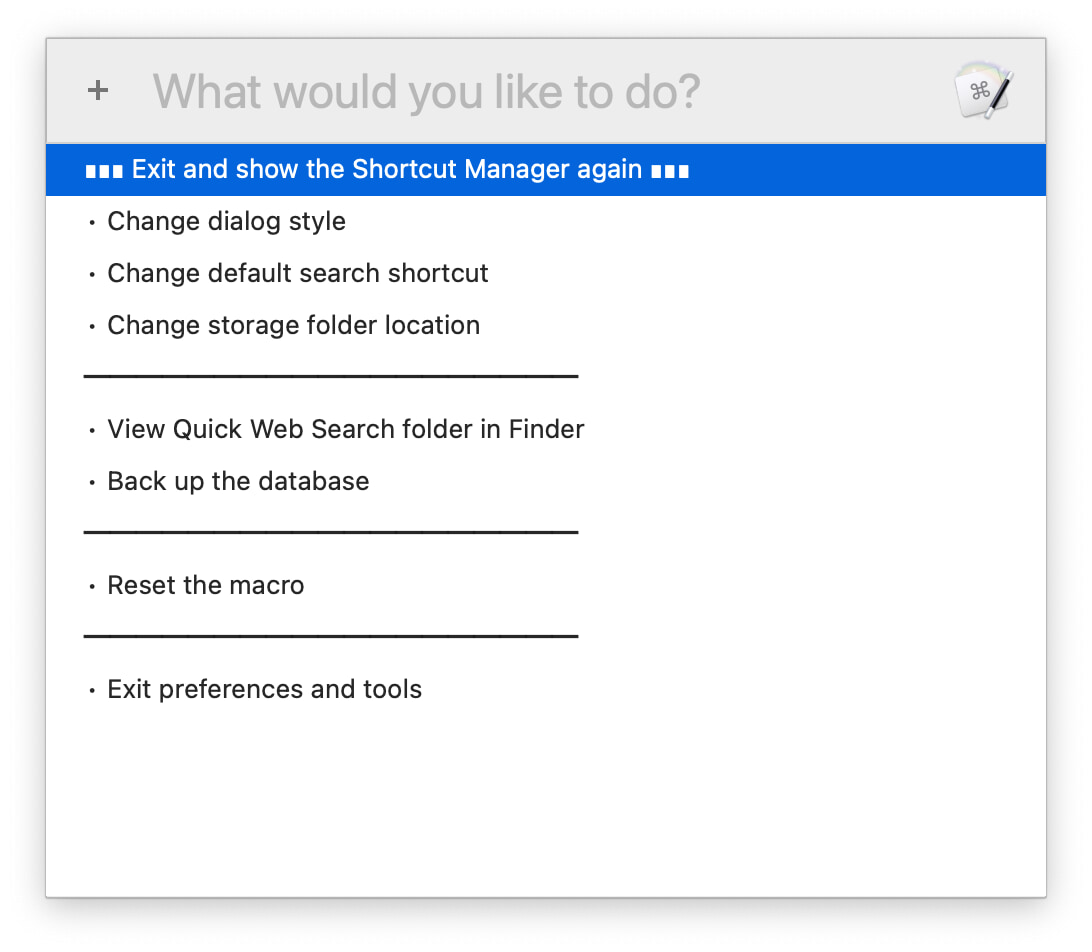
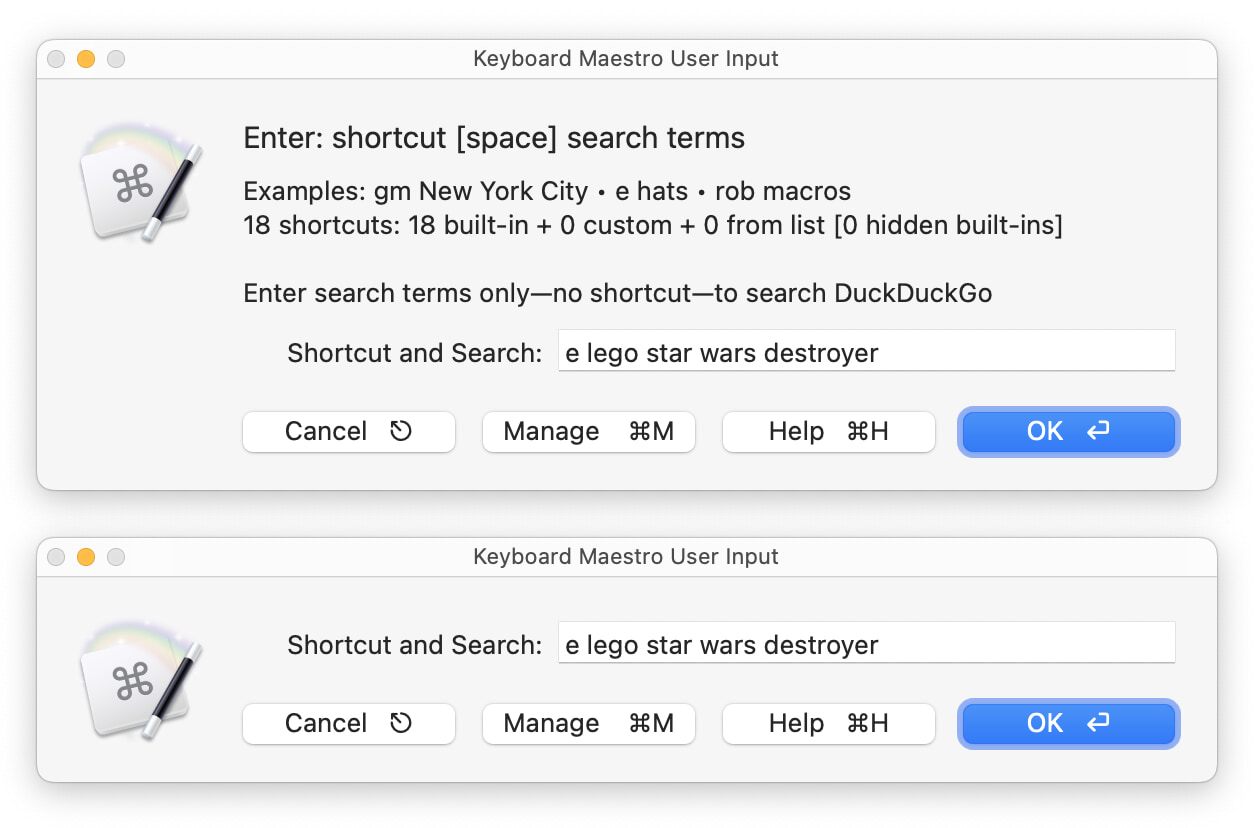
Change dialog style lets you toggle between the small and large dialogs, as seen at the top of this help.
Change default search shortcut lets you specify a new site to use as the default—that is, the site that will be searched if you don't enter a shortcut.
Change storage folder location lets you find a new home for the Quick Web Search folder. If you're going to move the folder, please move it using this menu—if you move it manually, the macro will break.
View Quick Web Search folder in Finder opens the Quick Web Search folder in Finder—in case you want o manually back up the database file, for example.
Back up the database creates a backup of the database file, on your user's desktop. I strongly recommend putting the Quick Web Search folder into one of your regular backup routines, so you don't have to worry about backing it up manually. This is true even if you use a cloud folder, as a corrupted database on a cloud folder will shortly be a corrupted database on all connected devices.
Reset the macro will do just that: It's a total reset of the macro, removing all your files, customizations, and global variables.
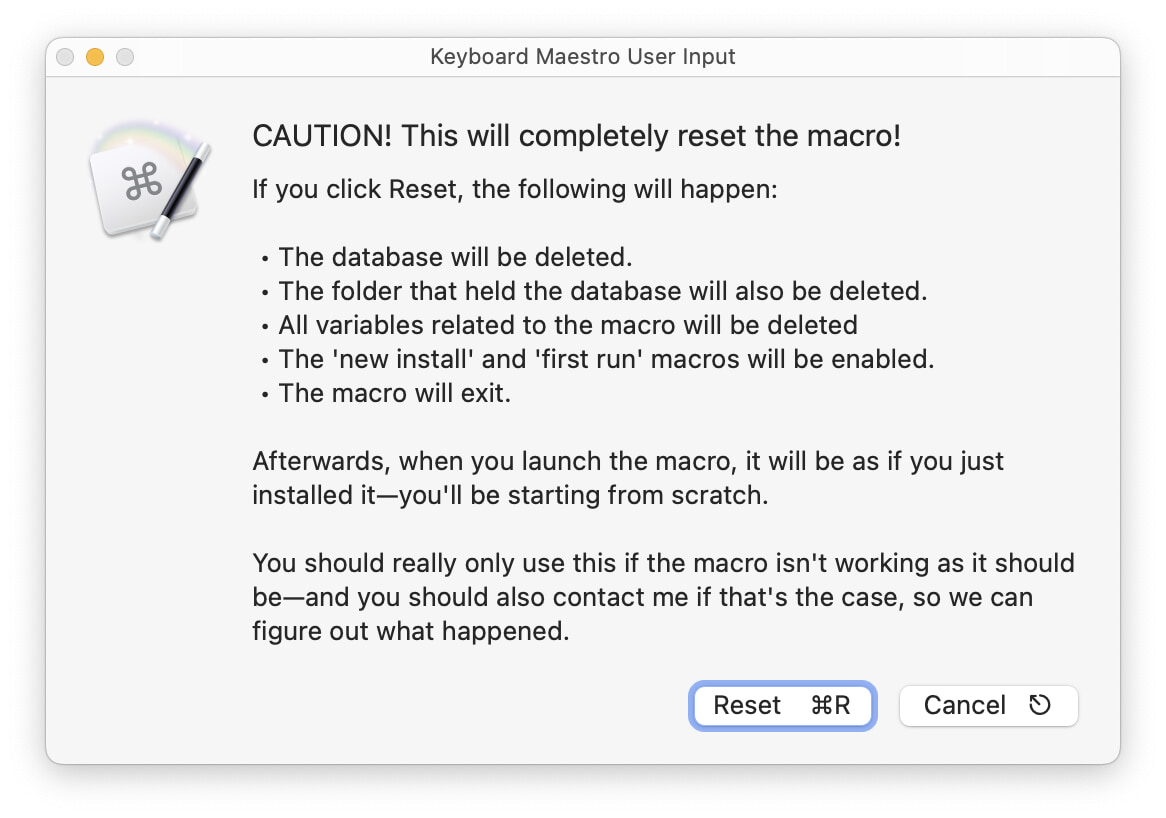 If you run the macro after using reset, it will act as though you'd never run it before. You really shouldn't have to use this menu item. If you do, I'd appreciate hearing from you, as it's there only as a measure of last resort and I'd like to figure out what happened to get you to that point.