This post was originally published in Decwember of 2016. I took it down to replace one section (using repeats) with another (using groups), and to expand some other areas.
I've been using Keyboard Maestro (or KM for short) a lot lately, i.e. Create an iTunes song info window or A much improved special character palette, or a slew of others.
As my collection of macros has grown, and some of those macros have gotten more complex, I've been using a few of KM's features to help keep my macros organized, and make it easier to debug them while I'm working on them. Some of these are obvious, some maybe not so obvious, so I thought I'd share what I'm doing.
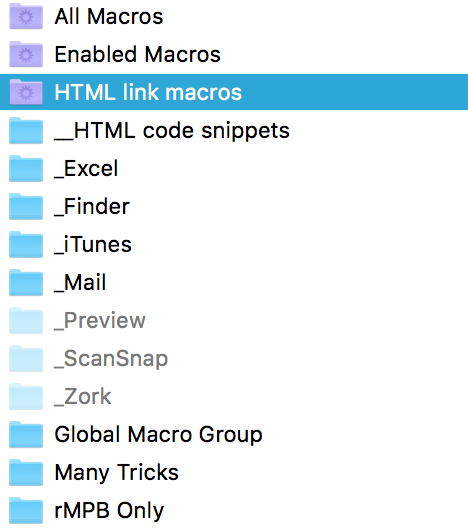 Macro groups let you organize your macros into separate groups, as seen at right. Group indicators are blue for normal groups, purple for smart groups, and dimmed for disabled groups.
Smart groups can be used to see macros across multiple groups. The highlighted example, for instance, searches for all macros that contain <a href=", the HTML code for inserting a link. Smart groups make it easier to find macros quickly, regardless of where they're saved.
Disabled groups are particularly useful if you sync your macros (as I do) between Macs. This screenshot, from my laptop, shows a few folders of macros—_Preview, _Scansnap, and _Zork—that I use only on my main iMac, so I've disabled them on the laptop.
Conversely, the rMBP Only group contains macros that only work on my laptop, so this group is disabled on my iMac.
Customize a group
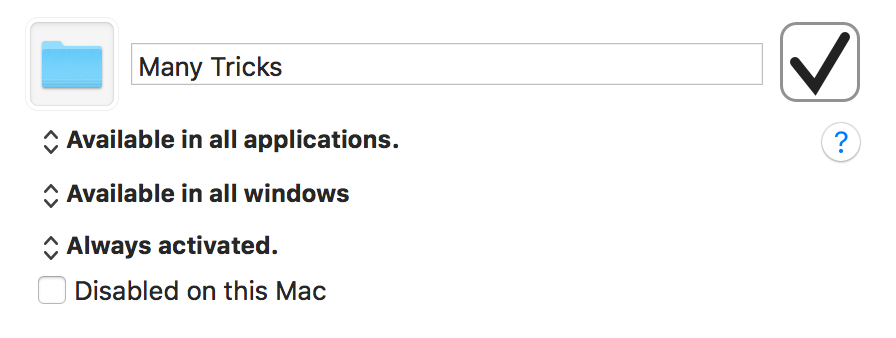
For each macro group, you can specify in which applications and/or windows that group's macros will function in, as well as their macro state and enabled/disabled status:
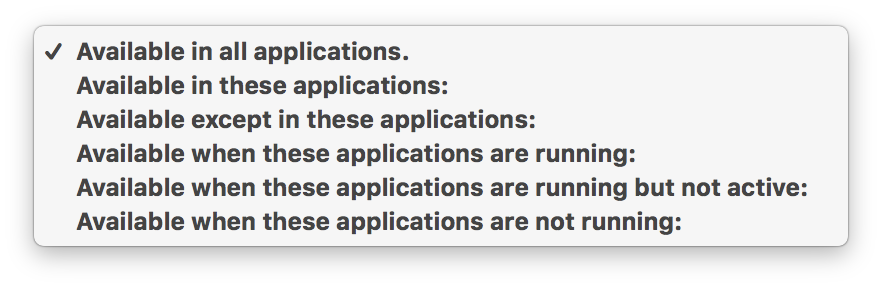
Within each of those control area, the options are numerous. The applications pop-up, for example
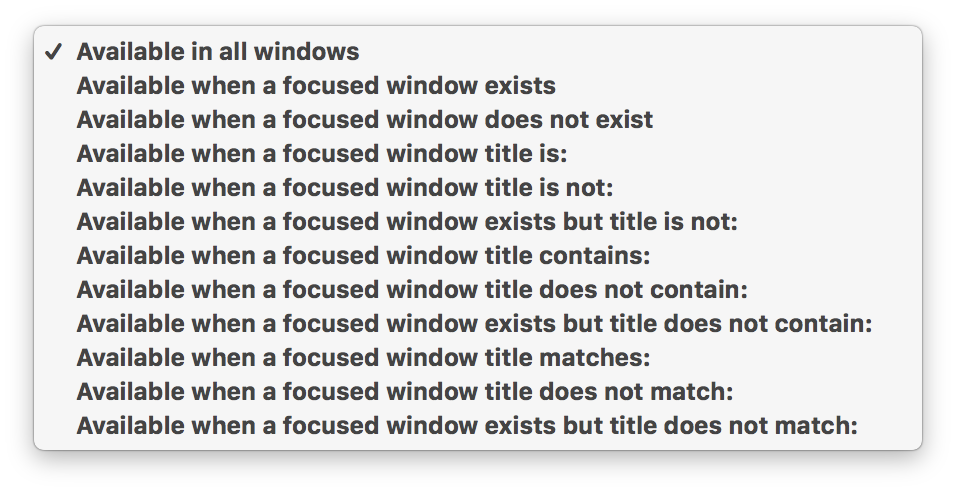
The windows pop-up offers an even more fine-grained level of control:
And finally, the "when active" pop-up offers control over when the macro group is active:

There's even more power hiding in the activation section, as you'll get a new set of options if you pick one of the "when" options. As an example, here I've set up my iTunes group to show a pop-up palette at the mouse location when I press the specified hot key:
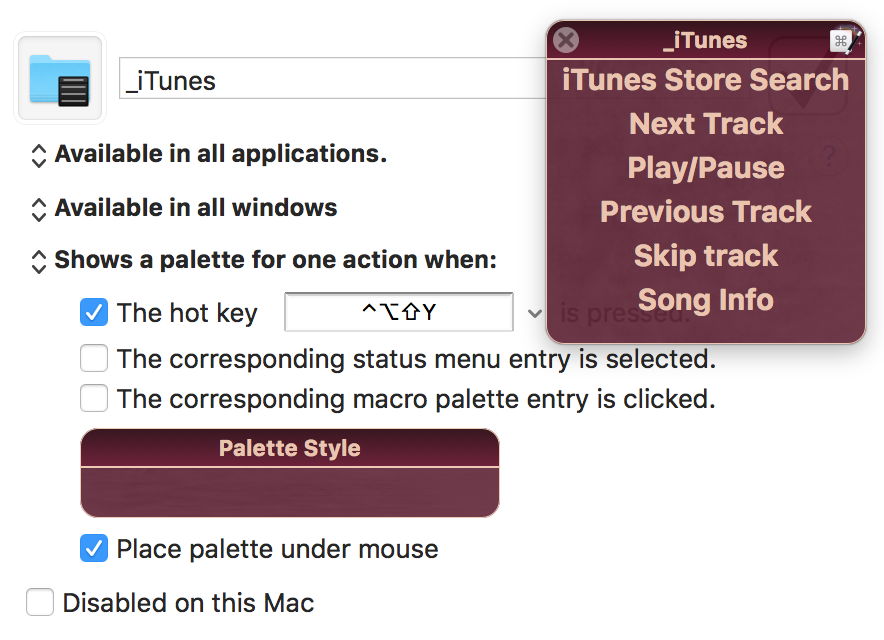
With these settings, when I press Shift-Control-Option-Y, I see a pop-up palette containing all of the macros in my iTunes group—you can see the palette itself at the top right of the image, as I invoked it prior to taking the screenshot.
Using macro groups—and the ability to fine-tune how and when the macros in a group launch—I've got an organized collection of macros that sync well across my Macs.
In a long macro, it can sometimes be difficult to remember what a certain section of the macro does—especially if you're using the macro to click the mouse at screen locations, or paste values from clipboards.
When programmers write code, they use comments to help explain what they've done—either for their own use, or for someone else's use in the future. Hopefully you won't have to worry about commenting your macros for others, but liberal commeting can help you remember why you did what you did in a given macro.
KM has a built-in comment action which you can insert as a step in any macro. It's quite basic, with just two fields:
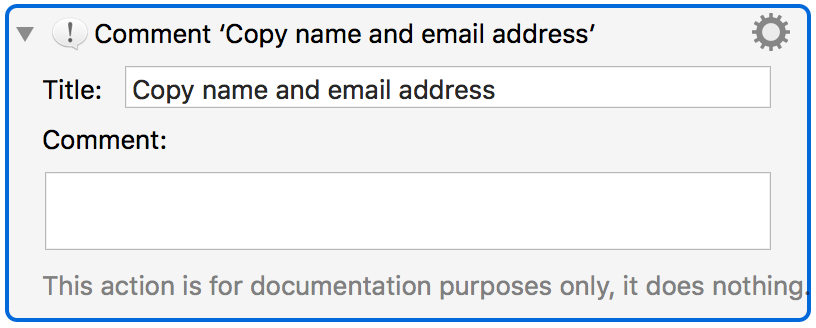
Fill in the text fields with whatever info you'll find useful to trigger your memory in the future. As seen in the screenshot above, I tend to only fill in the Title field, usually leaving the actual Comment field blank. Why is that?
Because of collapsing: You can click the disclosure triangle to the left of any KM action to collapse it into a one-line view. When you do this for a comment, you'll still be able to see the Title field, but not the Comment field:

I use collapsing all the time—once I've finished a section of a macro, I'll collapse it so I know it's complete. With a good entry in the Title of a comment, I know exactly what each section of the macro does, without having to expand the comment action.
That's not to say you shouldn't use the Comment field at all. I have several macros that execute somewhat-complex Terminal commands, and I use the Comment field to explain what each command line option does, so I don't have to look it up in Terminal in the future.
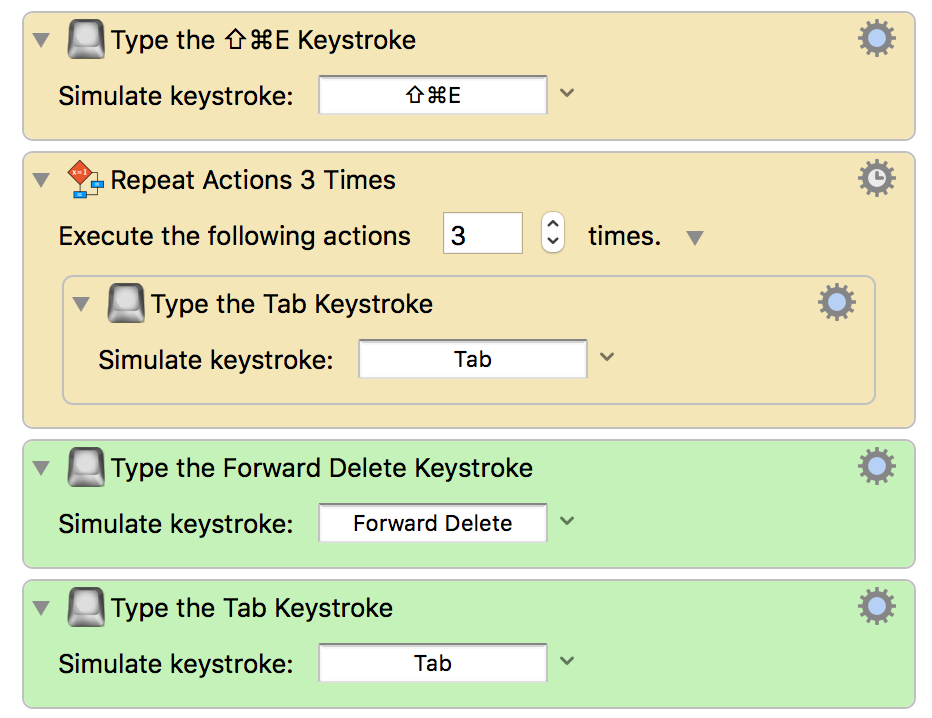
 To further visually group macro steps, I use KM's colors to apply the same color to related steps in the macro.
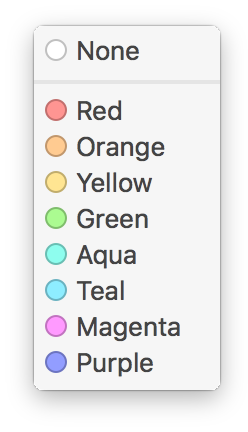
Click the gear icon next to any macro step, and you can choose from any of the nine colors as seen at right. (Unfortunately, you have to do this one macro step at a time; you can't select multiple actions, then click the gear icon, and choose a color to apply to all the selected actions.)
When related steps are identically colored, it becomes much easier to find a particular area of the macro that you're working on.
Using comments, collapsing sections, and coloring related steps really helps me work through issues in my macros. But the real trick is the next one, especially when combined with comments, collapsing, and colors…
One of my most-used macro actions isn't an action at all, but a container: The Group action. A group is just that, a collection of steps that can then be enabled, disabled, collapsed, and expanded as if they were one action step.

Take a bunch of related actions, and drag them into the "No Action" area of the Group action. Once grouped, the group behaves like an individual macro step; you can enable or disable the entire group, set its color, collapse it, and move it around as if it were a single step.
When you've got a massively-long macro, being able to condense great chunks of it makes it much easier to navigate and find the exact bit you want to work on.
 You may not be aware—I wasn't until someone pointed it out to me—but you can rename any action in Keyboard Maestro. Just add the action to your macro, click the gear icon for that action, and pick Rename from the menu.
This is especially useful for the Group action, as you can rename the group to be something meaningful—and the name will show when you collapse the group. But it's not just for the Group action. If you're erasing a variable, for instance, it will look like this by default:
Set Variable 'RGunix_man' to Text '%Delete%'
Using rename, you can make it more human-readable:
Clear variable: RGunix_man
Or consider an Insert Text by Pasting action…
Insert Text '<a href="%CurrentClipboard%">%|%</a>' by Pasting
That's one I use to convert the clipboard to an "a href" HTML link. So I renamed it:
Insert '<a href…' with clipboard contents
Renaming your actions will help you remember what each step does, and you don't lose any detail, because the macro step itself remains unchanged.
Using all these methods together, even my most-complex macro can be summarized in an easy-to-navigate manner:
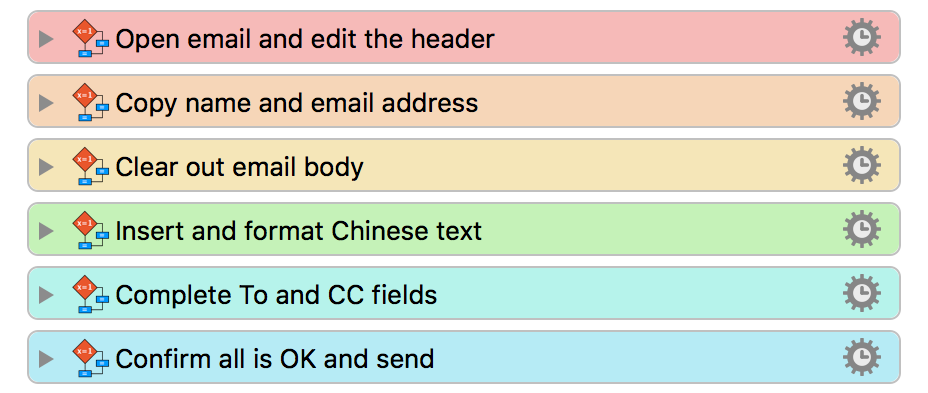
This particular macro is used to send out license emails for customers of a Many Tricks reseller in China. It has to modify every bit of an email message, and insert some Chinese language text, so there's a lot of tabbing, deleting, copying, and pasting going on.
In expanded form, this macro is 48 steps long, and it's a real pain to scroll through all those steps if I didn't have it organzied. But the groups let me expand only those sections I need to see, and the "three Cs" plus renaming mean that once expanded, it's really easy to find where I need to go.
If you build complex macros, it's well worth the time to make them easy to debug going forward. You may fully understand it today while writing it, but will you be able to say that 18 months from now when it stopas working and you need to figure out what broke? If it's well laid out, that task becomes much simpler.
Thanks very much for this, and your previous examples. I've been thinking about getting keyboard maestro, and this was more helpful than skimming through the documentation.
Comments are closed.